Frosted Window
by Holly McMillen
Add a frosty look to an image.
Supplies
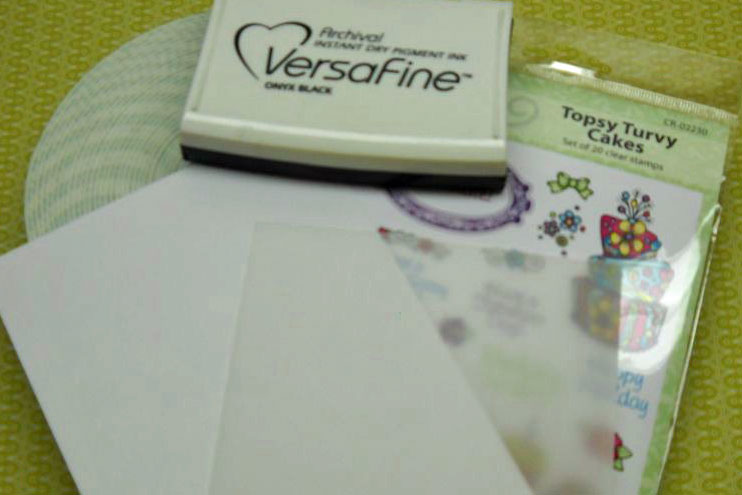
- Light Neutral Colored Cardstock
- Vellum Paper
- Dimensional Tape
- Fast Drying Ink
- Open Line Stamp
- Coloring medium of your choice
Step-by-Step
-
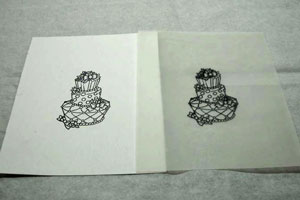
Step 1
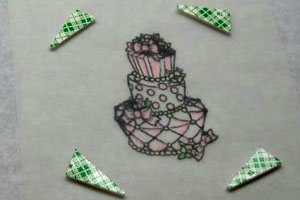
Stamp image on both cardstock and on vellum.
Note:
Even with quick drying ink, you will need to wait a few minutes for your ink to dry on the vellum.
If you are using a clear stamp/clear block, it's easiest if you lay the vellum piece over the cardstock after you've stamped the cardstock so that your vellum image will line up without question.
-
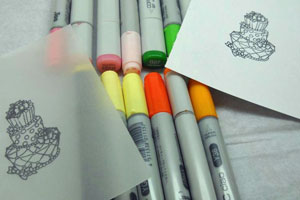
Step 2
Choose at least three shades of each color you intend to use. Color the cardstock image with the darker shades and the vellum image with the lighter shades.
-
Step 3
Color the image on cardstock. Set aside.
Flip the image stamped on vellum over and color the image with the lighter versions of what you used on the cardstock. Use the colored image as a reference. Remember, you are coloring in reverse, so if your image is detailed, you will want to keep that in mind. Let the vellum image dry.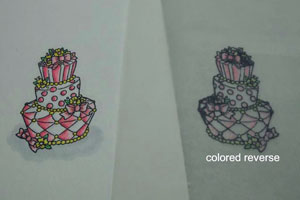
-
Step 4
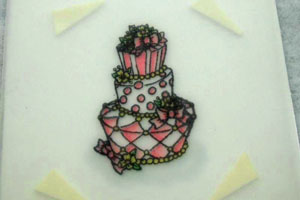
Apply dimensional tape to the backside of the vellum piece in areas that will be covered by other papers or embellishments.
-
Step 5
Line up your vellum over top of your colored image and affix.
-
Step 6
Use your completed frosted window on a card or other project! Enjoy!

Video!
Your Turn
You've seen the tutorial, now you try it! We've got a section of the gallery set aside for Frosted Window. Try this technique, then upload your artwork to the gallery. Show us your creations!
***Please note - Internet Explorer/Edge is not a supported browser, and will not allow you to see the videos. Please use Chrome, Firefox or Safari to view our tutorial videos.

Questions and Comments
We'd love to get your feedback or questions. Leave your comment below.
He IS Able!
Traci Starkweather
MARY
Page 2 of 2 pages < 1 2