Folded Paper Frame
by Beate Johns
Create a paper frame out of a square piece of patterned paper.
Supplies
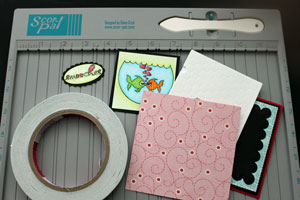
- 4 1/4" square of patterned paper
- Scor-Pal™, or other scoring tool, ruler and pencil
- Additional cardstock, to finish your project
- Dimensionals, or other adhesive
- Stamps, Taylored Expressions Animal Love Sentiments and Fish in Love used here
Step-by-Step
-
Step 1
Line two opposite corners of your 4 1/4" square of patterned paper up with 3" scoring line on your Scor-Pal.
Score at 1" and 1 1/2".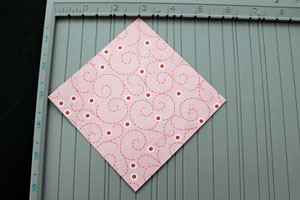
-
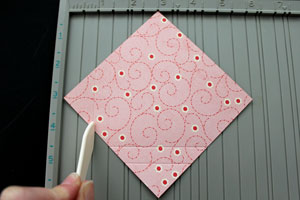
Step 2
Turn your paper 90 degrees, line the corners up again with the 3" score line and score the next corner at 1" and 1 1/2".
-
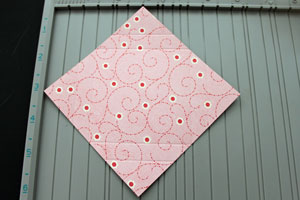
Repeat until each corner has score lines at 1" and 1 1/2".
-
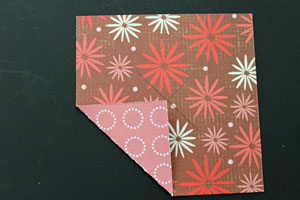
Step 3
Fold the corners in towards the center of your square on your inner score line.
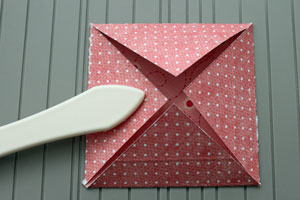
-
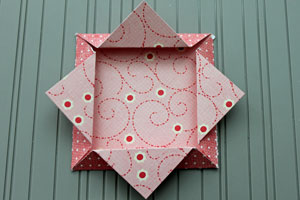
Step 4
Fold the corners out on the second score line.
-
Step 5
Unfold your corners and place your image in the center of the paper frame. Add adhesive to the inner sides of your frames.
Foam dots were used here to give it a more 3D look.
Hint:
The center will be a 3" square. The black layer here is a 2 7/8" square.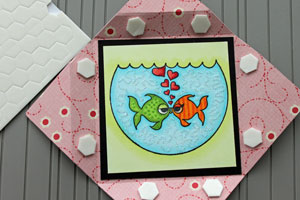
-
Remove the paper lining from the adhesive and adhere the sides of the frames to your image.
-
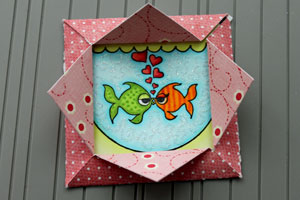
Step 6
Fold the tip of each corner back in.
Add a dimensional to each corner.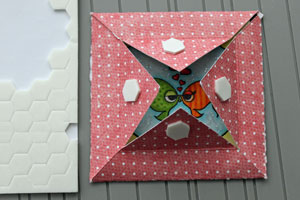
-
Fold back over to finish your paper frame.

-
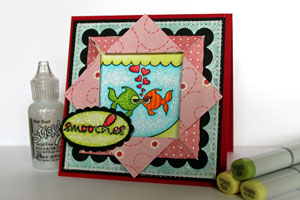
Step 7
Use your frame on a card, box or scrapbook page.
Video!
Variations
-
Don't own a Scor-pal™ or want a different size frame?
You can use any size patterned paper square. Mark the center of your paper.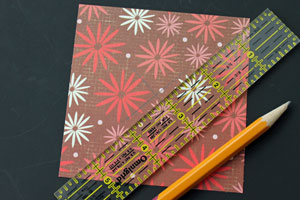
-
Fold the corners of the paper over so the corner tip hits the center of your paper. Then fold the corners back out.
Your Turn
You've seen the tutorial, now you try it! We've got a section of the gallery set aside for Folded Paper Frame. Try this technique, then upload your artwork to the gallery. Show us your creations!
***Please note - Internet Explorer/Edge is not a supported browser, and will not allow you to see the videos. Please use Chrome, Firefox or Safari to view our tutorial videos.
 *
*
Questions and Comments
We'd love to get your feedback or questions. Leave your comment below.
Thanks and many blessings
Janelle
I have the Crafter's Companion Ultimate and the Enveloper Score Board, is that the one you referenced?
I just made a center point as shown in the demo on Wed. I found that I need to use lightweight paper doing it that way. I used some scrap pieces to practice on and did it until I was happy with the results. Tomorrow I'll do the actual card. Thanks
You can see my card <ahref="http://zacksnanaat.blogspot.com/2010/02/happy-easter-scs-weekly-inkling-196.html"> HERE</a>
Thanks Beate for always being so inspiring.
Wow! This was a great project and SUPER tutorial! Thank you for showing me/us how to make this without a SCOR-PAL. Now, I can make these also!
Your videos make learning, so much easier for us visual learners!
He IS Able,
Traci S.
Hugs,
Beverly
Page 2 of 3 pages < 1 2 3 >