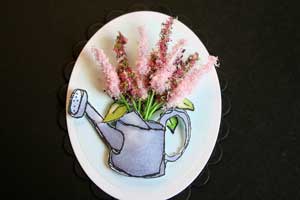
Flower Soft Bouquet

by Beate Johns

Create flowers out of wire and Flower Soft.

Supplies

  • Stamped Image, Our Craft Lounge Growing Gratitude used here
  • Flower Soft®, Baby Pink and Spring Mix used here
  • Flower Soft Wire
  • Flower Soft PVA Glue (Aleene's® Tacky Glue)
  • Styrofoam Block
  • Powder Tray
  • Wire Cutters, or strong scissors
  • Tape, or thin thread to tie your bouquet
  • Green Marker (optional)

Step-by-Step

  1. Step 1

    Use wire cutters to cut 2" pieces from Flower Soft Wires.

    Hint:
    You can also use strong scissors.
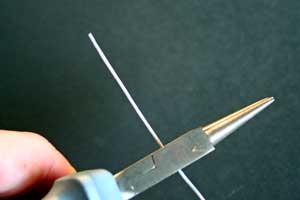
  2. Cut as many wire pieces as needed for the bouquet.
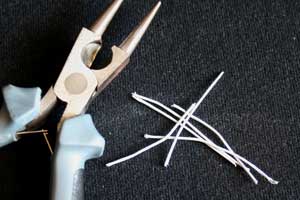
  3. Step 2

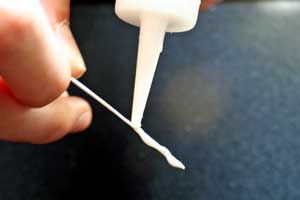
    Add Flower Soft Glue to the top part of the wire, turning the wire and coating the entire wire top with adhesive.

    Hint:
    Flower Soft Glue is the same as Aleene's Tacky Glue, but packaged in bottle with a tiny applicator tip. Any strong liquid adhesive will do, but this works best.
  4. Step 3

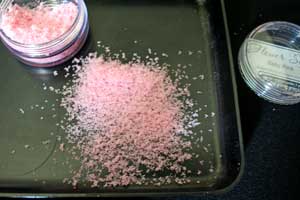
    Take some of the Flower Soft that you want to use out of the container. I used a Powder Tray, but you can also use a sheet of paper to catch the extra Flower Soft.

    Hint:
    Flower Soft is very compressed in the original container. For best results, take it all out, put it in a bigger container and fluff it up.

    It won't go back into the original container, so have some resealable containers handy.
  5. Step 4

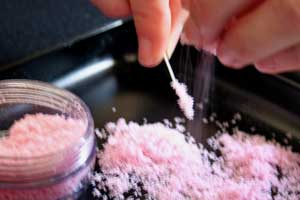
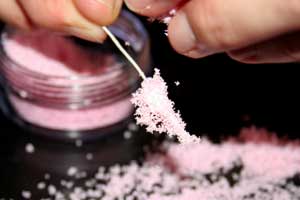
    Hold your wire over the pile of Flower Soft with one hand and then sprinkle Flower Soft over the wire with the other.

    Turn the wire and continue to sprinkle Flower Soft over it until all of the glue is covered.
  6. Step 5

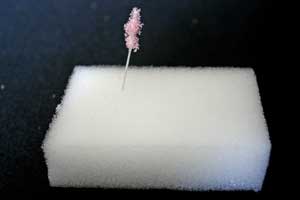
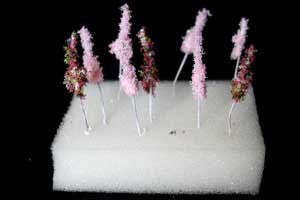
    Insert the end of the wire into a Styrofoam block to dry, Flower Soft side up.

    Allow to dry for 20 to 30 minutes.
  7. Step 6

    Once the glue has dried, you can add more glue to part or all of the wire to make a fuller flower.
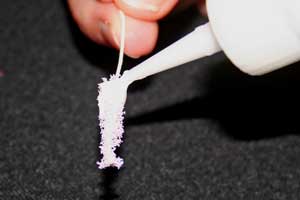
  8. Again, add Flower Soft over the glue as described in Step 4.
  9. Step 7

    Repeat the same process with all your cut wire pieces.
  10. Step 8

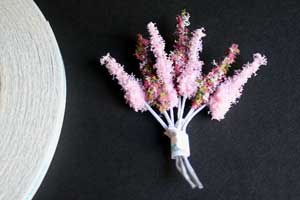
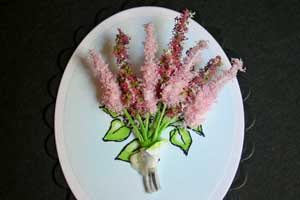
    Take the flower stems and tape them together to form a bouquet. A small piece of Scor-Tape was used here.

    Hint:
    You can also use some Flower Soft glue to glue the wire stems together; it will just take a little longer to dry.
  11. Step 9 (Optional)

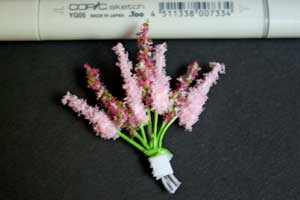
    Color stems with a marker.
    (Copic YG05 was used here.)
  12. Step 10

    Adhere bouquet on your cardstock with tape or Flower Soft glue.
  13. Step 11

    Add stamped image (or image from Card Toppers) over the bouquet with dimensional adhesive.
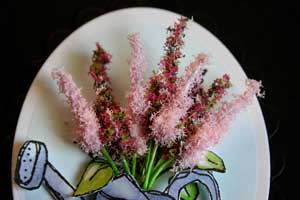
  14. It will hide the end of your stems.

  15. Step 12

    Finish your card.

Questions and Comments

We'd love to get your feedback or questions. Leave your comment below.

Beate, what a great idea! I only discovered Flower Soft at the Scrapbook Expo in Pleasanton Ca. a couple of weeks ago and have used it on a couple of cards as dimension for a flower or two but this is great... You are just soooo talented!!!Keep it up, I love your tutorials.
Corinne  |  Sat Apr 4, 2009 at 12:36 PM
Thank You So Much for showing how to make this beautiful & colorful card. I just found out about the product, Flower-Soft & I am amazed & like it very much.

What Great Ideas! Can you e-mail me with info. about "Fower-Soft"?

Thank You. Mary Ann
Mary Ann  |  Sat Apr 4, 2009 at 12:55 PM
This is so neat, do you have to use a special wire for this technique.If so where is it available.
thanks
Diane
Diane  |  Tue Apr 7, 2009 at 6:13 PM
This product looks awesome... Do's Micheals or Joanne's carry this product ????
Lorraine Seguin  |  Tue Apr 28, 2009 at 12:10 PM
Love your tutorial and card. Just purchased many individual colors after demo by the creators at Rubber Stamp Convention. Do you know where I can find "recipies" for mixing colors?
Ann Lancaster  |  Mon May 25, 2009 at 3:34 PM
Absolutely gorgeous! I just got my first container of flower soft and can't wait to try it! Thank you for such a great tutorial!
Nancy Jensen  |  Wed Jun 10, 2009 at 12:40 PM
OMgosh! How adorable is that?!? What a great idea. And the stamp you used goes just perfectly with it! Thanks for sharing!
Leeci  |  Thu Jun 11, 2009 at 5:30 AM
What a lovely card and the tutorial so good that I might even be able to tackle this myself. Bought some flowersoft from a card shop just a few weeks ago but now have the inspiration needed to use it. Many thanks, June
June Clapp  |  Mon Jun 15, 2009 at 7:26 AM
I made my own by rubbing two styrfoam balls together in a plastic bag. I put some in small jars and colered them with reinkers. It only took a drop.
Barb  |  Sat Mar 27, 2010 at 11:25 PM
what is the wire call so i can find it in the store
laura  |  Sat Mar 19, 2011 at 1:52 PM
Laura,
It's called Flower Soft Wire.
beate  |  Sat Mar 19, 2011 at 3:22 PM
Thanks so much! There are so many similar flower tutorials out there but this one is unique!
*smile*
Scrapcollectr57  |  Tue Mar 29, 2011 at 11:10 AM
Gives Thanks for this. I got the connect from a commentary you left at different site and found it to be a great compiling of the story thus far. Here�s imploring for the integrity of the swap.
Banner Prints
Simith  |  Wed Jul 6, 2011 at 8:59 AM
You make experience a place here. I have study a lot about this on early articles published by previous people, but I primary admit that you clear proved your point here! Will exist back to read more such of your greatest selective information!
Personalised Canvas Prints
Jhon Simith  |  Wed Jul 6, 2011 at 9:01 AM
I can not remember where I saw it, but someone mentioned that you could roll up your cardstock and grate it on a box grater to make your own Flower Soft. I am in the process of trying it now. The paper does grate, just need to make the bluebonnets now. smile
Crystal  |  Thu Mar 15, 2012 at 5:45 PM

Page 2 of 2 pages  <  1 2

You need to be logged in to comment

GET OUR NEWSLETTER


Splitcoaststampers's privacy policy