Flap Card
by Rose Ann Reynolds
Try this adorable trifold card.
Supplies
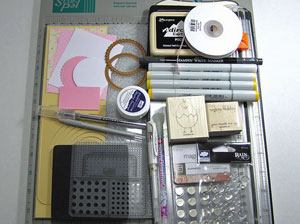
- Scoring tool
- 3 1/2" x 11" piece of cardstock
- 3 1/4" x 4" piece of coordinating patterned paper
- 3 1/4" x 4" piece of neutral cardstock for card inside
- Coluzzle™ or other circular cutting system
- Paper cutter
- BasicGrey magnetic snap closures or similar product
- Dimensionals
- Adhesive
- Stamps, ink, additional cardstock and embellishments
Step-by-Step
-
Step 1
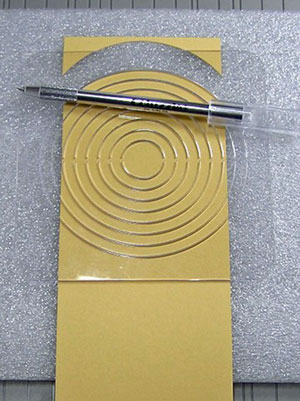
Take the 3½" x 11" piece of card stock, and trim one of the short ends using the most outer channel of the Coluzzle™ circle template.
-
Step 2
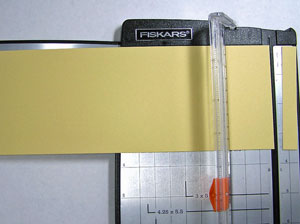
Trim card stock opposite the curved flap as shown to measure a total length of 10 3/8". (A ruler was used to aid in measuring).
-
Step 3
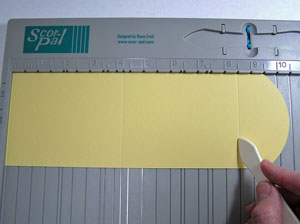
Score card stock at 41/4" and 8 1/2".
-
Step 4
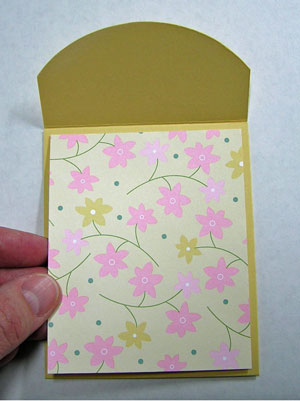
Fold at scores, and adhere patterned paper to lower flap. (Faux stitching on the upper flap was added at this point.)
-
Step 5
Stamp, color, and mat the main image, then adhere to the center of the top flap using dimensionals or similar product.

-
Step 6
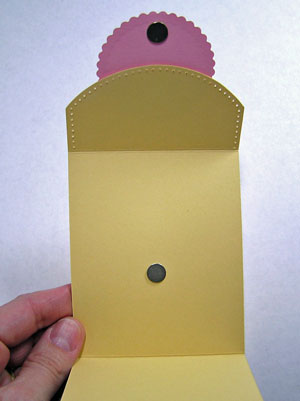
Adhere magnetic closures to the back of main image, and the inside base of the card.
-
Step 7
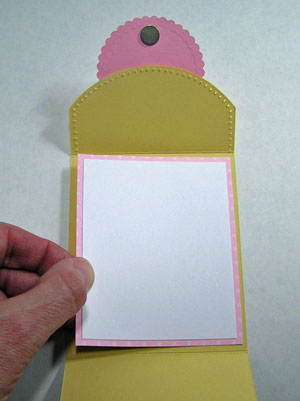
Adhere neutral card stock to the inside base to cover the exposed magnet. (One layer is ideal, but here, patterned paper and white card stock were used.)
-
Step 8
Finish project using coordinating ribbon and desired embellishments.

Your Turn
You've seen the tutorial, now you try it! We've got a section of the gallery set aside for Flap Card. Try this technique, then upload your artwork to the gallery. Show us your creations!
***Please note - Internet Explorer/Edge is not a supported browser, and will not allow you to see the videos. Please use Chrome, Firefox or Safari to view our tutorial videos.

 *
*
Questions and Comments
We'd love to get your feedback or questions. Leave your comment below.
I will try to follow your steps, then I will ask if I don�t understand , but I think I will have to buy a special paper for this card??'
Thank you for your help
I�m looking forward to hearing your advices
Page 4 of 4 pages « First < 2 3 4