Faux Tarnished Silver

by Shelly Hickox

Create a faux tarnished look with embossing powder.
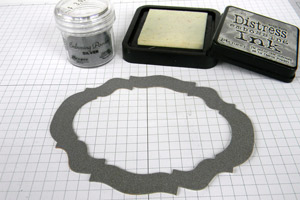
Supplies

  • Silver Embossing Powder

  • Clear Ultra Thick Embossing Enamel (UTEE)

  • Embossing Ink

  • Chipboard Die Cut Shape

  • Heat Gun

Step-by-Step

  1. Step 1

    Ink chipboard shape with embossing ink and cover with silver embossing powder.
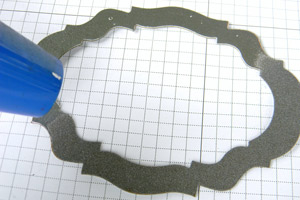
  2. Step 2

    Heat embossing powder until it melts. Let cool.

  3. Step 3

    Cover frame again with embossing ink, applying it lightly and randomly. Coat with UTEE, being sure to leave some areas uncovered.

  4. Step 4

    Heat UTEE until it melts. The larger chunks of UTEE will disperse the silver embossing, creating a mottled effect that looks like tarnished silver. If not enough silver is showing, you can repeat steps 1-3 until desired effect is achieved.

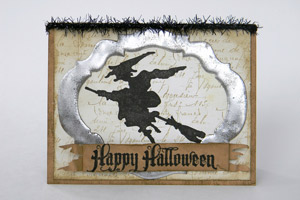
  5. Close up look of the Faux Tarnished Silver frame.

  6. Step 5

    Finish your card.

Video!

Your Turn

You've seen the tutorial, now you try it! We've got a section of the gallery set aside for Faux Tarnished Silver. Try this technique, then upload your artwork to the gallery. Show us your creations!

***Please note - Internet Explorer/Edge is not a supported browser, and will not allow you to see the videos. Please use Chrome, Firefox or Safari to view our tutorial videos.

Questions and Comments

We'd love to get your feedback or questions. Leave your comment below.

Hi Shelly,
great tutorial!
Love the old look of the faux tharnished silver.
Thank you for showing.
Elisabeth  |  Wed Oct 24, 2012 at 3:55 AM
WOW, thats very impressive, def gonna have a go, perfect for so many vintage and steampunk looks, thank you.
Christine Duffy  |  Wed Oct 24, 2012 at 5:35 AM
Oh Shelly, what a cool technique, great finish, and looks easy. On my list of things to try! TFS, great video!
Kris  |  Wed Oct 24, 2012 at 6:09 AM
I am an embossing freak--will do this today! Thanks for sharing this simple tutorial and my ideas are popping outta my head with this! smile Thanks for the inspiration! smile
Susanne  |  Wed Oct 24, 2012 at 6:12 AM
Awesome look you achieved. I can't wait to try it. I have never used both powders layered like that. Thank you for sharing!
Winnie  |  Wed Oct 24, 2012 at 6:25 AM
Wow! I love, love, love this technique. I will use it on the vintage scrapbook I am making!
Karen Keltner  |  Wed Oct 24, 2012 at 7:01 AM
What do you use under the heat gur.. I can see something like a plastic? or cooking paper?
Nydia  |  Wed Oct 24, 2012 at 7:38 AM
Nydia, it's Ranger's Non-Stick Craft Sheet. Any heatproof surface is fine.
Shelly Hickox  |  Wed Oct 24, 2012 at 7:50 AM
Thanks so much everyone! I apologize for the video being a little funky at the beginning - I think YouTube 'fixed' it for me and that made it a little weird. Please feel free to ask if you have any questions! smile
Shelly Hickox  |  Wed Oct 24, 2012 at 7:51 AM
I wonder how it would look if you sprinkled black UTEE? I wish I had some black UTEE to try, but I don't.
Vicki Mitchell  |  Wed Oct 24, 2012 at 7:59 AM
I don't have any either, but I bet it would look really cool! Maybe kind of smoky. Hmmm...now I want to try it!!
Shelly Hickox  |  Wed Oct 24, 2012 at 8:01 AM
I love that technique, I am definitely trying it out tonight on my project. Thanks for sharing. I love this site!
Jackie  |  Wed Oct 24, 2012 at 9:50 AM
Needed something to do today - this is it!
Thanks for sharing, Shelly!
Pam  |  Wed Oct 24, 2012 at 9:56 AM
Thank you Shelly for the brilliant tutorial, what a fabulous result, will definitely have a go at this one!
Redanne  |  Wed Oct 24, 2012 at 10:18 AM
What is UTEE and where do I get it?
Marilyn  |  Wed Oct 24, 2012 at 11:57 AM
Marilyn, it's a product made by Ranger:
http://rangerink.com/?product=melt-art®-ultra-thick-embossing-enamel™
It should be available at most craft stores, with the other embossing powders. The particles are much larger than normal ep so you get a very different look using it.
Shelly Hickox  |  Wed Oct 24, 2012 at 12:02 PM
I guess it doesn't like my link, lol! If you go to rangerink.com, you can find it on the right hand sidebar. Hope that helps! smile
Shelly Hickox  |  Wed Oct 24, 2012 at 12:04 PM
What is the brown sheet you are working on? I've seen it before when people stamp. I didn't know you could use a heat gun on it too.
Ellelizzymay  |  Wed Oct 24, 2012 at 5:42 PM
Elle, it's Ranger's Non-Stick Craft Sheet. It's perfect for working with anything hot - embossing, wax, etc. And melted embossing powder just wipes right off.
Shelly Hickox  |  Wed Oct 24, 2012 at 5:51 PM
I got married last year and wanted to do mini books for my husband's groomsmen. We are older and the cute, sweet things I typically see just don't work for us. I had been looking for a cover idea for the books. THIS IS PERFECT!! Oh my gosh! I am so excited. I handmade our invitations and everyone raved. Some even framed them as decor. This is just what I needed. Thank you, thank you, thank you!
Anna O.  |  Wed Oct 24, 2012 at 6:42 PM

Page 1 of 2 pages  1 2 >

You need to be logged in to comment

GET OUR NEWSLETTER


Splitcoaststampers's privacy policy