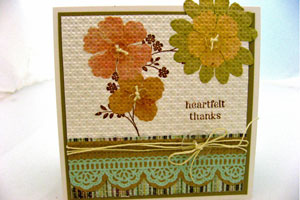
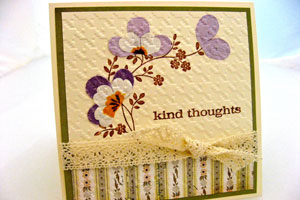
Faux Pressed Flowers
by Anne Harada
Create a card with the look of vintage pressed flowers.
Supplies
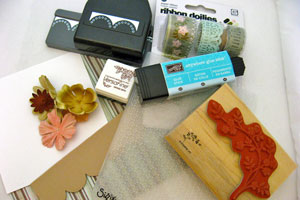
- Embossing folder, with atight grid/design
- Stamped image of branch, flowers, or tree (Stampin' Up! Thoughts and Prayers used here)
- Ink
- Glue Stick
- Cardstock
- Paper flowers
- Embellishments
Step-by-Step
-
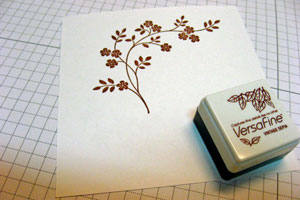
Step 1
Stamp image onto cardstock.
-
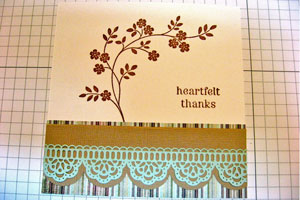
Step 2
Adhere additional cardstock or patterned paper layers.
-
Step 3
Select the Paper flowers you want to add to your image and determine arrangement.
Note:
It is okay to layer them, however, it gets harder to roll through your machine with each added layer.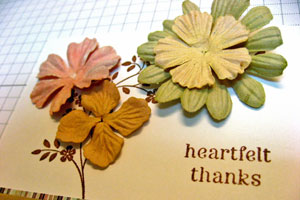
-
Step 4
Add glue to the back of each flower.
-
Adhere flowers to stamped cardstock.
Hint:
Liquid adhesives will also work, but use sparingly so the glue doesn’t soak through when the flowers get pressed.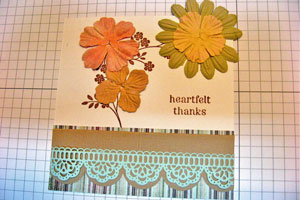
-
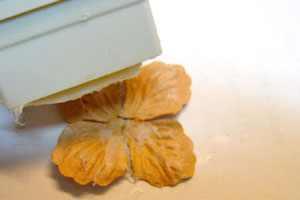
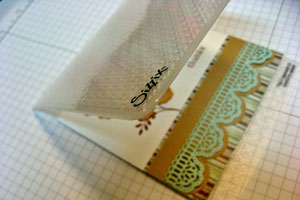
Step 5
Insert the panel into the embossing folder and run through a die cut machine to emboss.
-
-
Step 6
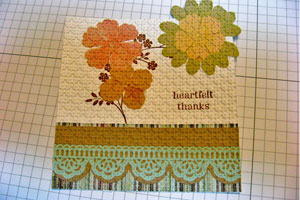
Add embellishments and finish the card.
Video!
Variations
-
Trim your Prima flowers and add color to create more realistic botanical types.
Your Turn
You've seen the tutorial, now you try it! We've got a section of the gallery set aside for Faux Pressed Flowers. Try this technique, then upload your artwork to the gallery. Show us your creations!
***Please note - Internet Explorer/Edge is not a supported browser, and will not allow you to see the videos. Please use Chrome, Firefox or Safari to view our tutorial videos.

Questions and Comments
We'd love to get your feedback or questions. Leave your comment below.
Thank you! There is a tutorial in the Resources section on how to use your Watercolor Pencils:
http://www.splitcoaststampers.com/resources/tutorials/watercoloring_with_watercolor_pencils_and_aqua_painter/
Maybe that will help?
Hugs,
Anne
Page 2 of 4 pages < 1 2 3 4 >