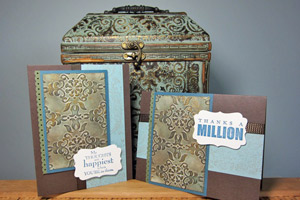
Faux Patina

by Angie Leach

Create a faux patina look with an embossing folder and ink.

Supplies
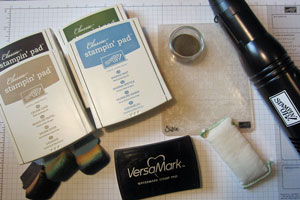
  • White cardstock
  • Big Shot, or other die cutting machine
  • Embossing folder
  • One light, neutral color ink (Stampin' Up! Crumb Cake used here)
  • Two medium colors of ink (Stampin' Up! Marina Mist & Always Artichoke used here)
  • One dark color of ink (Stampin' Up! Early Espresso used here)
  • Sponges
  • VersaMark™ Ink, or other embossing ink
  • Embossing Buddy™
  • Heat tool
  • Gold or silver embossing powder

Step-by-Step

  1. Step 1

    Lightly ink one side of the embossing folder with a light, neutral color ink.
    (Stampin' Up! Vintage Wallpaper Embossing Folder and Crumb Cake ink used here)
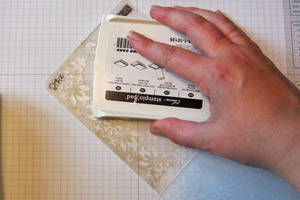
  2. Place white card stock inside the inked folder and run it through the Big Shot.
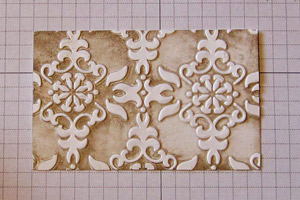
  3. Step 2

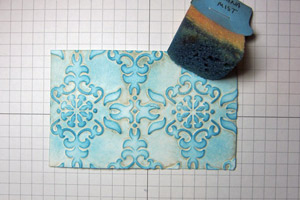
    Sponge a medium shade of ink over the piece to bring out the embossed details.
    (Stampin' Up! Marina Mist used here)
  4. Step 3

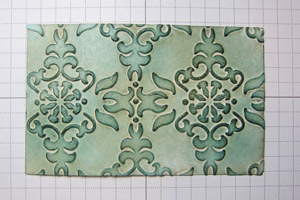
    Sponge on a darker ink to accentuate the embossing even more. Leave some of the in-between areas a little lighter to vary the depth of the colors.
    (Stampin' Up! Always Artichoke used here.)
  5. Step 4

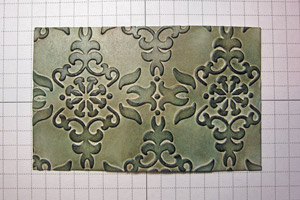
    Sponge on the darkest color ink to bring out the rich, deep tones and textures.
    (Stampin' Up! Early Espresso used here,)
  6. Step 5

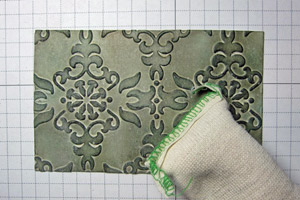
    Soak up any remaining ink moisture by rubbing an Embossing Buddy over the card stock, or let dry naturally
  7. Step 6

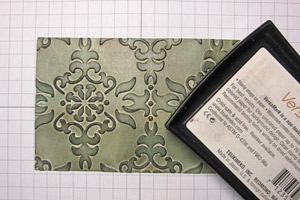
    Lightly and randomly rub the VersaMark™ Ink Pad over the top of the embossed design.
  8. Step 7

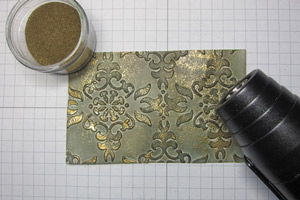
    Sprinkle on gold embossing powder, then heat set with the heat tool.
  9. Step 8

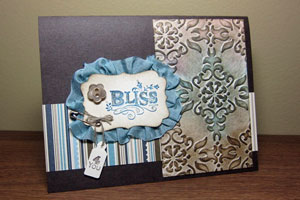
    Finish Your Card.

Video!

Variations

  1. Add some shimmer
    For a shimmery variation, try sponging on Shimmer Paint over the whole piece instead of gold embossing.
Your Turn

You've seen the tutorial, now you try it! We've got a section of the gallery set aside for Faux Patina. Try this technique, then upload your artwork to the gallery. Show us your creations!

***Please note - Internet Explorer/Edge is not a supported browser, and will not allow you to see the videos. Please use Chrome, Firefox or Safari to view our tutorial videos.

Questions and Comments

We'd love to get your feedback or questions. Leave your comment below.

This tutorial was so interesting! I love the finished look. I especially appreciate the video b/c I would have used far too little pressure on the inks to get that richly-colored effect. Your demo shows how heavily each layer should be applied & what kind of coverage. Thank you for providing the how-to!
BellbrookMama  |  Wed Apr 18, 2012 at 7:38 PM
This is a beautiful technique! Depending on the colors used, it can look like verdigris (sp?), rusted metal, etc. I love this technique. Thanks for posting the excellent tutorial and video.
Sandra  |  Wed Apr 18, 2012 at 9:08 PM
Oh, Wow !!! Love love love this technique..A bird house, Im working on will be so cool in this ..Thank you .Angie your ink Anne
Anne M Sweeney  |  Thu Apr 19, 2012 at 1:03 AM
Thank you so much. What a great job explaining each layer and showing additional patina looks. This is one example I am anxious to try.
Pat  |  Thu Apr 19, 2012 at 8:43 AM
What a great idea, and the finished result is stunning. Can't wait to try it out.
Paper Crazy Lady  |  Thu Apr 19, 2012 at 9:13 AM
What a great "look". I can think of many applications where this technique will be perfect - like the "man card" I'm in the process of making. I think he'll really appreciate this. Thx for sharing the technique with us.
Francie  |  Thu Apr 19, 2012 at 10:27 AM
Gorgeous creations and I love the beautiful look its creates. I will be giving this a try for one of my up coming cards. So excited...Thank YOU!!
Calypso  |  Thu Apr 19, 2012 at 12:04 PM
I love this, I am a stampin up demonstrator I am pretty new at the demonstrator part and this is just what one of my groups has been looking for. Your tutorial was great and so easy to follow, I do have a question. Where do you get the little sponge holders, my fingers stay stained and I would love to find those little holders. Thanks again for sharing. I can hardly wait to try it myself.
K Quinton  |  Thu Apr 19, 2012 at 12:55 PM
This one, even I can do and did! It is easy and unique. Thanks for sharing.
Penny Hill  |  Thu Apr 19, 2012 at 1:32 PM
WOW is all I can say. Simple, easy, and yet so elegant! Very stunning. Thanks for the tutorial!
Hazel  |  Thu Apr 19, 2012 at 1:40 PM
I can't wait to try this - thanks for sharing!!!!
Nancy Williams  |  Thu Apr 19, 2012 at 5:01 PM
What they said! smile Also, thanks for showing an antiquing technique that does not use Distress inks as I only have one of those and I have lots of dye inks. And I really like the way you have the tag on your sponges as a handle. How clever!
Shala  |  Thu Apr 19, 2012 at 6:31 PM
Hi Angie love the video very interesting technique
Thanks for sharing
Flo  |  Thu Apr 19, 2012 at 7:37 PM
Love the patina look and especially love the SU Products used. I have them all and am also a SU Demo so if anyone needs any of the products, let me know.
ronnie  |  Fri Apr 20, 2012 at 9:34 AM
Thanks for the GREAT tutorial!! Loved it and can't wait to try it!! Since I noticed that no one has answered K. Quinton yet I thought I'd go ahead and help ?her? out. The "sponge holder" is made by punching a piece of cardstock out with the Stampin' Up Round Tab Punch Item #119864 and then you staple it to a piece of Stampin' Up! stampin sponge (sold in pkgs. of 3) item #101610...I usually cut my sponges up into 6-8 wedges...GREAT way to add selling points to the punches and sponges..hope this helps!!....jill
Jill  |  Fri Apr 20, 2012 at 2:09 PM
@Mary Smith - Mary, the sponge holders are simply made using the round tab punch, coordinating card stock and a staple. Not only do you get a handle and keep your fingers clean, but you know exactly what color is on that sponge. Hope that helps.
Ann Birchard  |  Fri Apr 20, 2012 at 4:59 PM
Thanks for this fabulous tutorial. The results are stunning!
Susan  |  Fri Apr 20, 2012 at 7:06 PM
Great effect & clear explanation, thanks for sharing smile
Kim A  |  Sat Apr 21, 2012 at 3:00 AM
I dug out some gold embossing powder that had darkened over the years and become "useless" and that was perfect for this technique! Also tried distress inks which worked better for me and were easier to apply. And finally I mixed a pinch of "green patina" Perfect Pearls with the embossing powder and the whole card started shimmering - quite cool. (I did mist it with water later just to set the powder.)
Thanks for the inspiration!
Susi  |  Sun Apr 22, 2012 at 11:41 AM
This is beautiful!! I must remember to give this a try. Thanks for a great tutorial!

~Bev
TexasGrammy  |  Sun Apr 22, 2012 at 12:37 PM

Page 3 of 5 pages  <  1 2 3 4 5 >

You need to be logged in to comment

GET OUR NEWSLETTER


Splitcoaststampers's privacy policy