Faux Silk

by Beate Johns

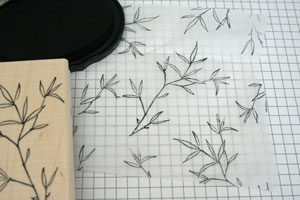
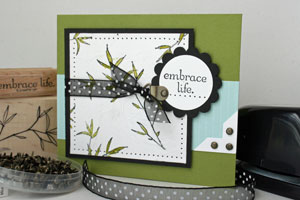
Stamp on tissue, crinkle it up and adhere it to cardstock for a soft silky look.

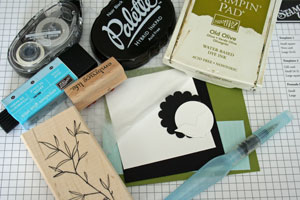
Supplies
  • Tissue paper

  • Glue stick, Xyron, spray adhesive, Mod Podge™ or other adhesive

  • Neutral cardstock

  • Stamps

  • Ink

Step-by-Step

  1. Step 1

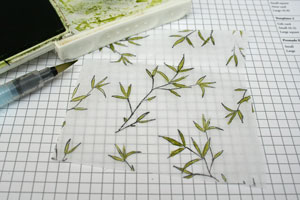
    Stamp images on tissue paper.

  2. Step 2

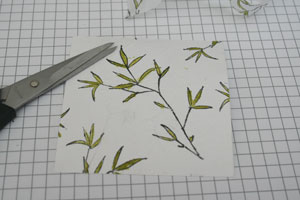
    Color images if neccessary.

    Hint:
    Color carefully. The ink will bleed through the tissue paper.
  3. Step 3

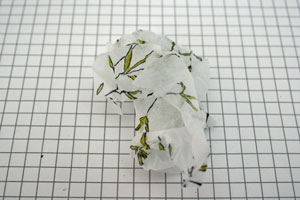
    Crinkle tissue paper. Smooth out and set aside.
  4. Step 4

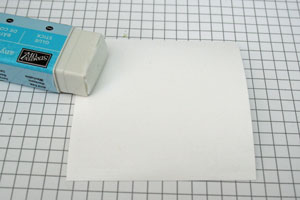
    Apply adhesive of your choice over the entire piece of neutral cardstock.
  5. Step 5

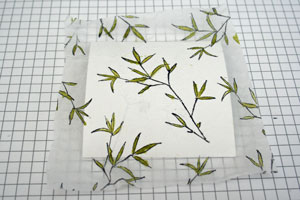
    Spread tissue paper over adhesive. Smooth out most wrinkles.
  6. Step 6

    Trim excess tissue paper.

  7. Step 7

    Finish your card.

Video!

Variations

    Add a little sparkle
    Apply Mod Podge™, Elmer's glue, or another wet adhesive to neutral cardstock with a foam brush. Smooth tissue paper over the cardstock and sprinkle Dazzling Diamonds Glitter™ over the tissue paper while still wet.

    Make it bold
    Use a bold image stamp instead and stamp in colored ink. The ink will run a bit if you use glue stick or liquid glue. It just adds to the card.

Your Turn

You've seen the tutorial, now you try it! We've got a section of the gallery set aside for Faux Silk. Try this technique, then upload your artwork to the gallery. Show us your creations!

***Please note - Internet Explorer/Edge is not a supported browser, and will not allow you to see the videos. Please use Chrome, Firefox or Safari to view our tutorial videos.

Questions and Comments

We'd love to get your feedback or questions. Leave your comment below.

O-o-o--o-! I'm going to try this...RIGHT NOW! Really nice!
--Rosetta
Rosetta  |  Sun Jan 13, 2008 at 6:12 PM
Just wondered... when you apply the tissue paper, do you try to smooth out all the wrinkles or leave the wrinkles?

Just wondered... I love it!
Thanks
colleen
Colleen  |  Wed Jan 16, 2008 at 6:39 PM
HELP! What am I doing wrong? I am using a regular glue stick that is fairly new. After stamping and then crumpling the tissue paper and mounting it, the project looks like crumpled mounted tissue paper and not anything like silk. Do I flatten out the wrinkles? Make more wrinkles? Should I try another glue stick? ANy hints would be appreciated.
LinB  |  Thu Jan 17, 2008 at 7:42 AM
Thank you so much for the info. I will definitely try this. You made things very simple to understand.
Little Windy  |  Tue Jan 22, 2008 at 6:21 AM
Thank you for sharing your awesome techniques. On the tissue paper, which works better. . . tissue paper as in Kleenex tissues or tissue paper you wrap a present with?
Phyllis  |  Wed Jan 23, 2008 at 11:22 AM
I love the technique and the look.
What am I doing wrong.... after a few days my faux silk piece starts to come off the card.

I am using a glue stick, and I put lots (I mean lots) of glue on the white CS, then adhear the tissue. The CS does tend to curl just a bit on the edge, but easy to flatten back out. Adheard to card front it looks great. But in a couple days, the piece of CS that has the tissue adhearded to it begins to come away from the card base. It is like the edge is starting to curl again. I am using snail to adhear the tissued CS to the card base.
Any tips?
Kathy  |  Wed Jan 23, 2008 at 12:35 PM
I've loved this look....reminds me of a picture painted on leather... just fantastic... I've found that if I run the base card stock thru my Xyron, I've had no problems at all with curling or adhearing... Thanks so much for sharing this fantastic idea
Cookie  |  Sun Jan 27, 2008 at 8:15 PM
Love it!
Carolyn Mcavoy  |  Mon Feb 11, 2008 at 6:11 AM
I love this technique. It really looks like silk! I did add some color to mine and liked it better when I put the side on which I had colored, face down on the glue. I'm definately going to try it with my stamp clubs.
Kit Walleen  |  Thu Jan 8, 2009 at 7:25 PM
Wish the "texture" of the finished card was more visible in the photo. Might have to try the technique to see it better! Thanks.
Nance  |  Wed Oct 20, 2010 at 1:03 PM
Great technique
Ann-Marie Allard  |  Thu Oct 21, 2010 at 9:02 AM
Love this...would really love to see a tutorial on the markers...how to use them, where to get them etc. I love the results that others get with them but before I make that investment I would really love to know how to use them!! Thanks for all the inspiration!
flowerfreak  |  Tue Oct 26, 2010 at 11:11 AM
Tip top stuff. I'll eexcpt more now.
Tessa  |  Tue Jan 3, 2012 at 1:15 PM
Thank you for sharing this technique - love the background that you created.
Jana Z  |  Tue Feb 11, 2020 at 5:50 AM

Page 3 of 3 pages  <  1 2 3

You need to be logged in to comment

GET OUR NEWSLETTER


Splitcoaststampers's privacy policy