Facial Tissue Flower
by Joanne Allison
Fold and tie paper tissues together to create a gorgeous flower.
Supplies
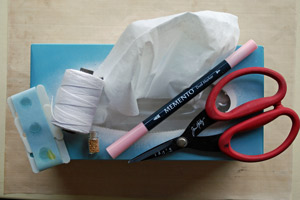
- Facial tissue
- Thread or florist wire
- Strong, sharp scissors
- Marker (Memento Angel Pink used here)
- Flower center (glue dot coated in microbeads used here)
Step-by-Step
-
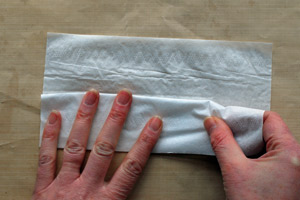
Step 1
Cut tissue into strips 2" wide. As a regular tissue is about 8", an easy way to do this is to fold it in half, fold each half back on itself and cut along the fold lines.
-
Step 2
Stack three of the strips together, discard the last strip.
-
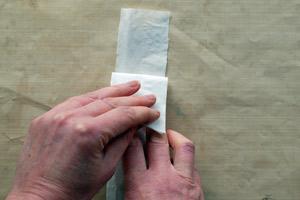
Step 3
Concertina fold along the length of the stack – aim for somewhere between 1/4" and 1/2" for your fold.
-
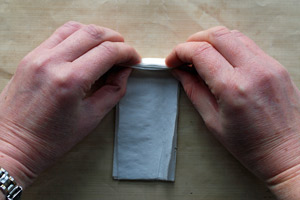
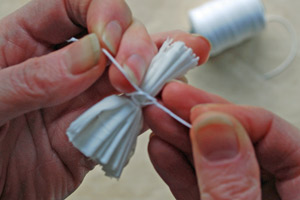
Step 4
Wrap thread around the center of the folded piece and tie off (or use florist wire if you find that less fiddly). Trim the thread ends.
-
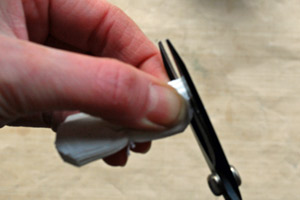
Step 5
Using strong, sharp scissors as there are multiple layers, round off each end of the strip.
-
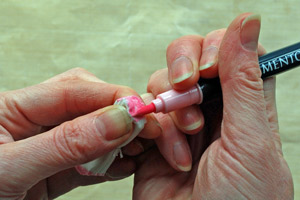
Step 6
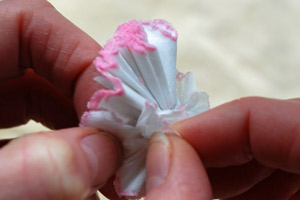
Run a marker around the cut ends (any kind of marker will do) and allow a few minutes to dry as the moisture will make the tissue more delicate.
-
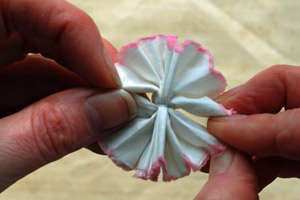
Step 7
Fan the piece out around the tied center to make a circle.
-
Step 8
Gently pull apart the tissue layers (there will be six layers in all).
-
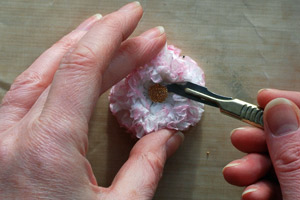
Step 9
Add a pretty center to finish the flower. Add a dab of liquid adhesive if you use a glue dot as the base for your center to make sure it stays stuck to the tissue surface.
-
Step 10
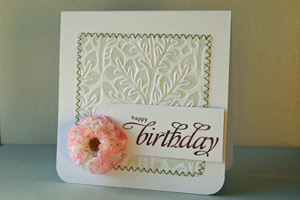
Use liquid adhesive to add the flower as an embellishment on a card, gift package or other papercrafted project!
Video!
Variations
- Use florist wire to make long-stemmed flowers and arrange a few in a pretty container – a perfect gift when real flowers are not appropriate (in some hospital situations or where the recipient has allergies, for example).
- Try glitter or flock on a glue dot for a different finish to the center or use a button for a more whimsical look.
Your Turn
You've seen the tutorial, now you try it! We've got a section of the gallery set aside for Facial Tissue Flower. Try this technique, then upload your artwork to the gallery. Show us your creations!
***Please note - Internet Explorer/Edge is not a supported browser, and will not allow you to see the videos. Please use Chrome, Firefox or Safari to view our tutorial videos.

Questions and Comments
We'd love to get your feedback or questions. Leave your comment below.
Thanks for this!
Joni
For those asking about the background - it's the Flora folder from the Spellbinder M-Bossabilities range. I brayered some Bundled Sage Distress ink onto the folder before embossing my cardstock to give the subtle two tone effect.
All the items I used are listed in the Comments area of the YouTube video if there's anything else you want to check and I miss your question for some reason.
Page 2 of 2 pages < 1 2