Facial Tissue Flower

by Joanne Allison

Fold and tie paper tissues together to create a gorgeous flower.

Supplies
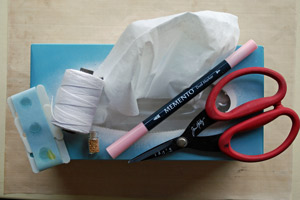
  • Facial tissue

  • Thread or florist wire

  • Strong, sharp scissors

  • Marker (Memento Angel Pink used here)

  • Flower center (glue dot coated in microbeads used here)

Step-by-Step

  1. Step 1

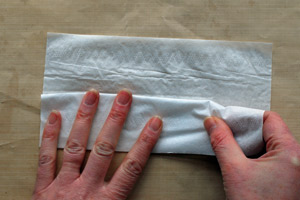
    Cut tissue into strips 2" wide. As a regular tissue is about 8", an easy way to do this is to fold it in half, fold each half back on itself and cut along the fold lines.
  2. Step 2

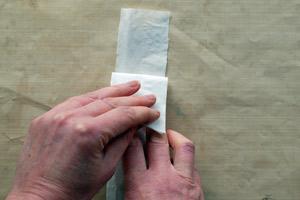
    Stack three of the strips together, discard the last strip.
  3. Step 3

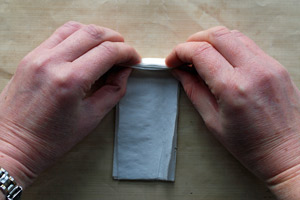
    Concertina fold along the length of the stack – aim for somewhere between 1/4" and 1/2" for your fold.
  4. Step 4

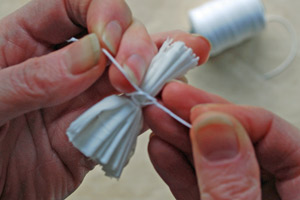
    Wrap thread around the center of the folded piece and tie off (or use florist wire if you find that less fiddly). Trim the thread ends.
  5. Step 5

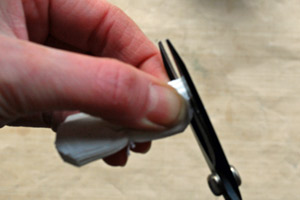
    Using strong, sharp scissors as there are multiple layers, round off each end of the strip.
  6. Step 6

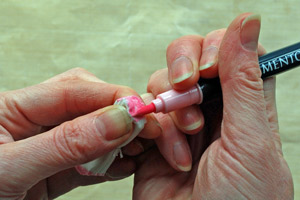
    Run a marker around the cut ends (any kind of marker will do) and allow a few minutes to dry as the moisture will make the tissue more delicate.
  7. Step 7

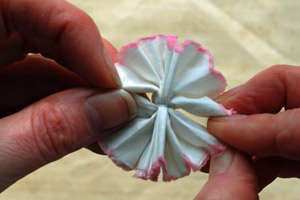
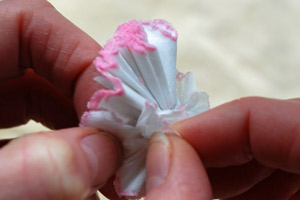
    Fan the piece out around the tied center to make a circle.
  8. Step 8

    Gently pull apart the tissue layers (there will be six layers in all).
  9. Step 9

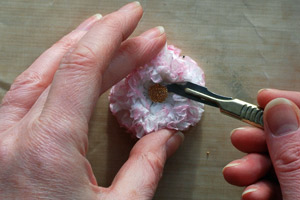
    Add a pretty center to finish the flower. Add a dab of liquid adhesive if you use a glue dot as the base for your center to make sure it stays stuck to the tissue surface.
  10. Step 10

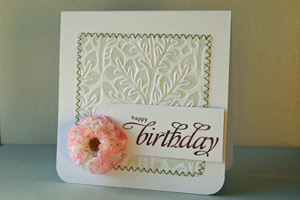
    Use liquid adhesive to add the flower as an embellishment on a card, gift package or other papercrafted project!
Video!

Variations

    - Use florist wire to make long-stemmed flowers and arrange a few in a pretty container – a perfect gift when real flowers are not appropriate (in some hospital situations or where the recipient has allergies, for example).

    - Try glitter or flock on a glue dot for a different finish to the center or use a button for a more whimsical look.

Your Turn

You've seen the tutorial, now you try it! We've got a section of the gallery set aside for Facial Tissue Flower. Try this technique, then upload your artwork to the gallery. Show us your creations!

***Please note - Internet Explorer/Edge is not a supported browser, and will not allow you to see the videos. Please use Chrome, Firefox or Safari to view our tutorial videos.

Questions and Comments

We'd love to get your feedback or questions. Leave your comment below.

Very, very beautifull flower ! Thanks for this tuto, I 'll soon try to make one ! Nice card !
Catherine
Catherine BONNEL  |  Wed Jan 30, 2013 at 5:32 AM
Thank you! It's beautiful and I think even I, as a newbie, can do this!
Laurie Blair  |  Wed Jan 30, 2013 at 5:54 AM
OK, I love making paper flowers, I made hundreds of kleenex flowers when I was much younger (that was after all the big thing to decorate wedding cars with in the 60's and 70's ) ... yet it never occurred to me that they too were paper flowers and just cut the tissue smaller, add some colour and voila, easy pretty flowers ... thanks for the inspiration
Candy Hazzard  |  Wed Jan 30, 2013 at 6:30 AM
What a nice idea! A little bit fiddly, with the layers, so a good job for a rainy day, as it is here!
Wilma de Swart  |  Wed Jan 30, 2013 at 6:35 AM
Joanne, this is so very pretty, love the soft delicate look. You made it look so easy, made with simple supplies we all have. It's a must try today smile TFS!
Kris  |  Wed Jan 30, 2013 at 6:59 AM
Such a great, simple, yet effective idea! I can't wait to give this a go! The possibilities are endless!
Karen Lea  |  Wed Jan 30, 2013 at 7:13 AM
Beautiful! I too remember making tissue paper flowers in the 70's. It never occurred to me to make them small enough to use as an embellishment. Thanks for the idea!
Lucy
Lucy Evans  |  Wed Jan 30, 2013 at 7:15 AM
Those are beautiful. I'll have to give them a try.
Regina Hamilton  |  Wed Jan 30, 2013 at 8:13 AM
This is lovely and a great idea for hand presented cards. I learned how to make the large Mexican paper flowers from my Spanish teacher, and like others who wrote here, I never gave it a thought to make a smaller version. Thank you. It's beautiful.
Vira Cogswell  |  Wed Jan 30, 2013 at 8:32 AM
Beautiful card, great technique, and charming video presentation! From now on I'm calling that a "concertina fold." Love it!
Cyndi Watkins  |  Wed Jan 30, 2013 at 8:38 AM
I think the flower is very pretty....but I love the embossed background. Can you tell me where I can get that.

P.S. I love your website!
Julie Meraz  |  Wed Jan 30, 2013 at 9:25 AM
In the early 70's, I held a baby shower for a friend and made many tissue flowers to decorate the chair of honour for the first time mom to be. In those days we could get pastel coloured tissues. What once was old is new again!
Pam B  |  Wed Jan 30, 2013 at 9:39 AM
Loved this tutorial and the card I did playing with it turned out exactly like I wanted it to. Thank you so much Joanne.
Priss  |  Wed Jan 30, 2013 at 10:29 AM
very pretty card, love the flower
colleen howell  |  Wed Jan 30, 2013 at 10:33 AM
Thanks for the great tutorial! I think you got everybody to buy that great sentiment set from Waltzingmouse Stamps - it's out of stock now.
Mary Ann (mastamper)  |  Wed Jan 30, 2013 at 10:58 AM
Wow, brings back memories of when I was a kid. Can't tell you how many hundreds of these I made over the years. Thanks for the tip on how to make them "card size."
Jeanne Johannes  |  Wed Jan 30, 2013 at 11:00 AM
Love your card! Can you tell me what that backround image is?
Emily  |  Wed Jan 30, 2013 at 11:20 AM
Such a pretty result and so simple.

Haven't heard the phrase "Granny Knot" since I left England in 1966! Love your accent.

PC49
Cleminson  |  Wed Jan 30, 2013 at 11:29 AM
Great tutorial! and the card you made is also lovely. How did you make it?
Paperlover / Nancy S  |  Wed Jan 30, 2013 at 11:52 AM
That is very pretty. My grandma used to make a similar flower using tissue paper.
Donna DaBillo  |  Wed Jan 30, 2013 at 12:01 PM

Page 1 of 2 pages  1 2 >

You need to be logged in to comment

GET OUR NEWSLETTER


Splitcoaststampers's privacy policy