Encaustic
by Birgit Edblom
Use wax blocks and a hot iron to create beautiful backgrounds.
Supplies
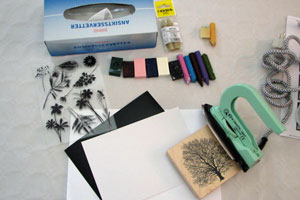
- Glossy paper or special paper for Encaustic
- Wax Blocks
- Stamps
- Scissors
- Tissues
- Iron - craft or encaustic iron, or any iron without steam holes
Step-by-Step
-
Step 1
Set the iron on low temperature.
Optional:
Stamp image with Stazon™.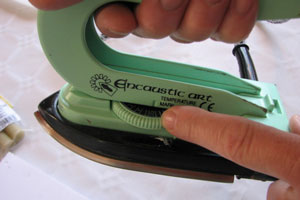
-
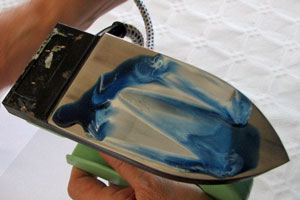
Step 2
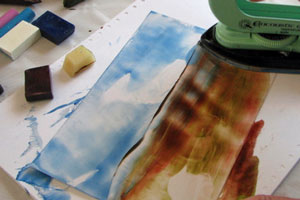
When the iron is warm, turn it over and coat the surface with wax in the colors you want to use.
-
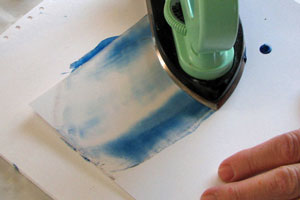
Step 3
Place the iron on the paper and move it around lightly. Explore different movements and lifts. Don´t worry about the result, you can go over it as many times as you want. When you are satisfied with the result, clean the iron on some scrap paper.
-
Step 4
Choose some other colors and move the iron over the paper in both directions without lifting it till you´re satisfied with the result.
-
Step 5
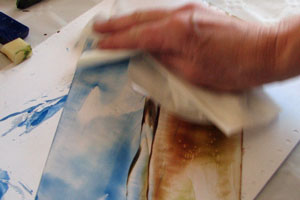
Wipe the painting with a tissue to make it shiny.
-
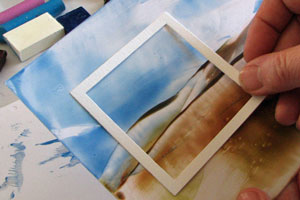
Step 6
Select the part of the painting you like and cut it out. The rest can be used for another project.
-
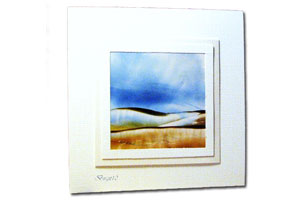
Step 7
Finish your card.
Video!
Variations
-
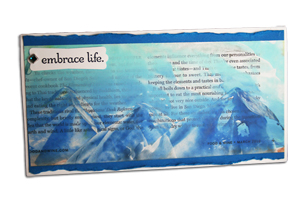
Printed background
Try the technique on glossy magazine pages for a different look.
-
Stamp it!
Stamp images with Stazon or Jet Black Archival ink on your finished background.
Or for more advanced Encaustic painting...create your background, stamp your image and then cover it with clear wax. Next color your image with wax and stylus tool.
Don't have any Encaustic Wax yet?
Try our Melted Crayon Background tutorial.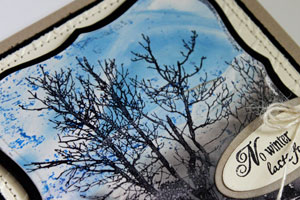
Your Turn
You've seen the tutorial, now you try it! We've got a section of the gallery set aside for Encaustic. Try this technique, then upload your artwork to the gallery. Show us your creations!
***Please note - Internet Explorer/Edge is not a supported browser, and will not allow you to see the videos. Please use Chrome, Firefox or Safari to view our tutorial videos.

Questions and Comments
We'd love to get your feedback or questions. Leave your comment below.
Thanks for sharing this with us!
Note to Constance - it won't take too long to wonder how you ever had time to work! LOL!
I have such a problem in making mountains.
Can U help with a hint?
Barbara Jardine
What did you use for the wax? I have beeswax at home but nothing to color the wax with. Any ideas?
Thanks.
I enjoy the tutorials very much.
Page 2 of 2 pages < 1 2