Embossing Resist
by Beate Johns
Emboss images on light colored cardstock, then apply darker ink to make them "pop".
Supplies
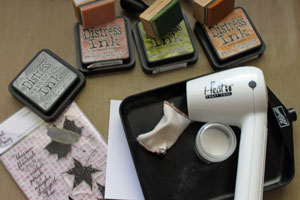
- Embossing ink
- Clear embossing powder
- Embossing Buddy™
- Heat Tool
- Powder Tray, or paper to catch embossing powder
- Stamps (Sweet 'n Sassy Stamps Season of Change used here)
- Light colored cardstock
- Waterbased Dye Ink darker then your cardstock color ( Wild Honey, Tattered Rose and Peeled Paint Distress Inks used here)
- Blending Tool,Sponge, Stipple brush or sponge brayer
- Paper towel
Step-by-Step
-
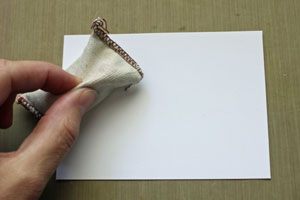
Step 1
Rub Embossing Buddy over entire piece of cardstock.
-
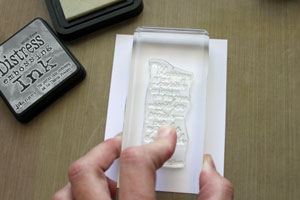
Step 2
Ink stamp with Embossing Ink and stamp on cardstock.
-
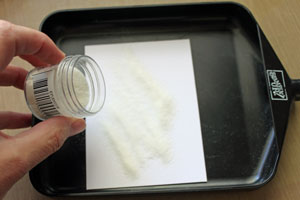
Step 3
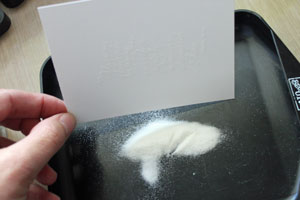
Pour embossing powder over stamped image, making sure everything's completely covered.
-
Step 4
Tap excess powder off. Collect remaining powder in either the Powder tray or on a piece of scrap paper and pour it back into the container.
-
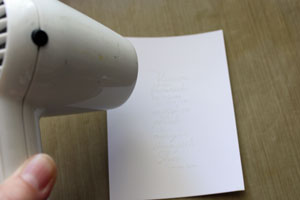
Step 5
Heat powder with heat tool until it melts into a shiny cover. Let cool.
-
Step 6
Sponge ink over your cardstock. You can also use a stipple brush or the sponge brayer for this step.
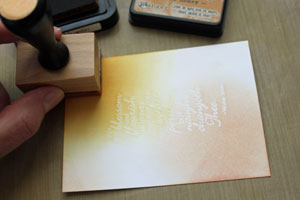
-
Cover your entire piece of cardstock.
-
Step 7 (Optional)
To add more depth to the stamped images, try adding more in the same color used for sponging.
-
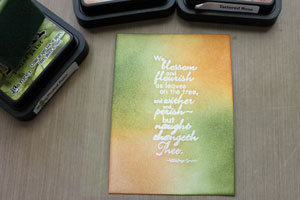
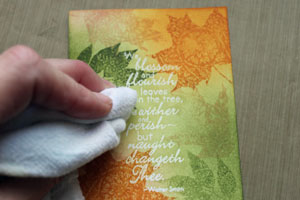
Step 8
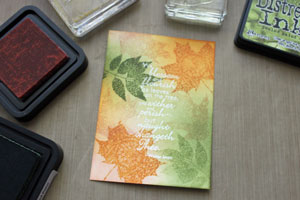
Use a paper towel or rag to buff ink off embossed images. The embossed images will resist the sponged ink.
-
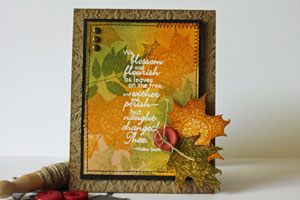
Step 9
Finish your card.
Video!
Your Turn
You've seen the tutorial, now you try it! We've got a section of the gallery set aside for Embossing Resist. Try this technique, then upload your artwork to the gallery. Show us your creations!
***Please note - Internet Explorer/Edge is not a supported browser, and will not allow you to see the videos. Please use Chrome, Firefox or Safari to view our tutorial videos.
Questions and Comments
We'd love to get your feedback or questions. Leave your comment below.
Has anyone tried the dryer sheet and does it really keep the stray embossing powder at baby?
Tam
Page 2 of 2 pages < 1 2