Embossed Embossing
by Beverly Gerard
Learn how to heat emboss dry embossed layers for a unique background.
Supplies
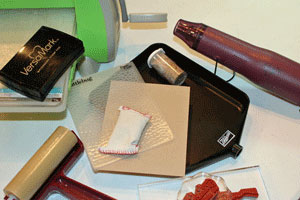
- Cardstock
- Die cutting machine
- Embossing folder
- Versamark™, or other embossing ink
- Embossing powder
- Anti-static puff
- Powder tray, or paper to retrieve embossing powder
- Brayer
- Heat gun
- Stamps, cardstock, embellishments to complete your project
Step-by-Step
-
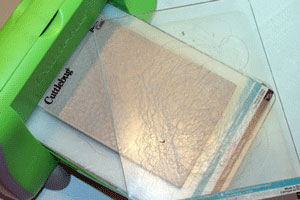
Step 1
Place cardstock inside the embossing folder and emboss with a die cutting machine per manufacturer instructions.
-
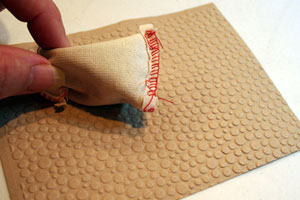
Step 2
Apply the anti-static powder over the entire dry embossed cardstock. This step makes a significant difference in the finished product.
-
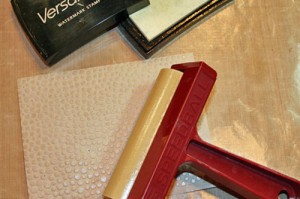
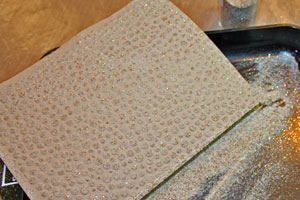
Step 3
Ink up the brayer with clear embossing ink. Using gentle pressure, carefully roll the ink onto the raised surfaces of the cardstock. Your goal is to apply ink only to these raised areas. Reink the brayer as necessary during ink application.
-
Step 4
Sprinkle embossing powder onto the entire inked surface - clear embossing powder used here. Tap off all excess powder before applying heat.
-
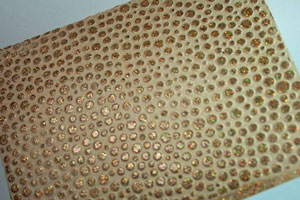
Step 5
Gently heat the embossing powder, being sure to keep the heat tool moving during this process. Do not overheat the powder.

-
Step 6
Trim or die cut the embossed piece to the size needed for your creation.
-
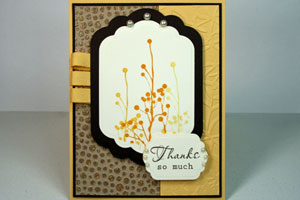
Complete your project.
Video!
Your Turn
You've seen the tutorial, now you try it! We've got a section of the gallery set aside for Embossed Embossing. Try this technique, then upload your artwork to the gallery. Show us your creations!
***Please note - Internet Explorer/Edge is not a supported browser, and will not allow you to see the videos. Please use Chrome, Firefox or Safari to view our tutorial videos.

Questions and Comments
We'd love to get your feedback or questions. Leave your comment below.
I have not tried this without a brayer, but how about trying to gently tap your versamark pad atop the dry embossed raised areas, being careful not to press the ink into the deeper recessed areas? Best wishes!
I have tried to use a VersaMark pen only once, with poor success personally. The only projects that I have shared have been created by using the brayer. Best wishes in your efforts!
~Bev
Perhaps you can try to gently tap your VersaMark pad atop the raised elements of the dry embossed piece. I've never tried this, but wish you well in your efforts!
~Bev
Yes! We can print the tutorials! I'm glad you like it. Check for the print button just below my picture up at the top of the tutorial front page. This is available for all or most SCS tutorials. ;o)
~Bev
The anti-static puff reduces the static electricity that so often holds bits of embossing powder to the cardstock in areas that are not meant to be heat embossed. They also help to minimize glitter clinging where you don't want it. Mine is from SU, but I know they are sold unbranded by other companies, including Clear Dollar Stamps. I see them often at scrappy / stampy vendor conventions too.
Thank you! The nesties used on the yellow card are Spellbinders Labels Eleven. Glad you liked it!
~Bev
The birthday stamp is "Happy Birthday Circle" sku:565-20 at Rubbernecker.com . It is excellent rubber with a cling mount, so it works on your acrylic blocks of any brand. Glad you like it! Thanks,
~Bev
Thanks a bunch for letting me know about the gallery link! I've reported it to the staff ... so hopefully it will be corrected soon. Just use "embossed embossing" in your keywords ... and I'll hope to see your work in the galleries!
~Bev
My anti-static puff happens to be from Stampin' Up! However, if you google "anti-static puff embossing", you'll find lots of alternative brands. Also, scrappy/stampy vendor conventions have several non-branded puffs. Hope this helps! ~Bev
For anyone that needs an embossing buddy, you can use some material, make a little pillow, sew up leaving one end open, put baby powder in it and sew it up. Also try a dryer sheet. Works just as well since they are anti static right?
Page 3 of 4 pages < 1 2 3 4 >