Embedded Image

by Holly McMillen

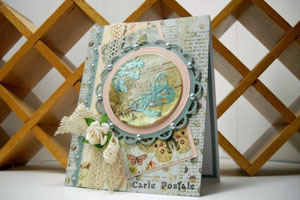
Create a unique look by stamping an embossed image on embossed background.

Supplies
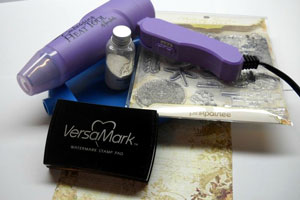
  • Cardstock or patterned paper
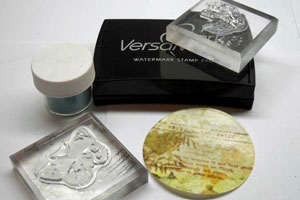
  • Versamark™ , or other embossing ink
  • Ink (color of your choice)
  • Clear Embossing Powder
  • Colored Embossing Powder (color of your choice)
  • Heat gun
  • Stamps (silhouettes tend to work best)

Step-by-Step

  1. Step 1

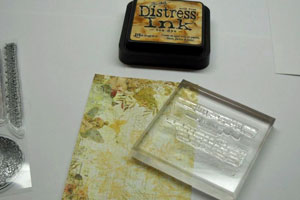
    Stamp cardstock or patterned paper with a script or tight patterned background in ink color of your choice.

    Hint:
    You can skip this step if you are using a patterned paper.
  2. Step 2

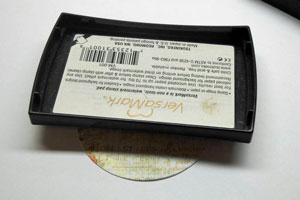
    If you are going to die cut your image, do that now. With Versamark™ , use the direct to paper technique to apply a layer of ink.
  3. Step 3

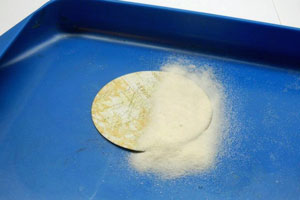
    Cover the image with clear embossing powder and heat set. Wait 2-3 minutes and then repeat steps 2 and3. Allow image to cool.
  4. Step 4

    Stamp your main image onto the embossed piece using Versamark™.Cover the area with a contrasting color embossing powder (seafoam green used here). Heat set.
  5. Step 5

    Create your project using your embedded image!
Video!

Your Turn

You've seen the tutorial, now you try it! We've got a section of the gallery set aside for Embedded Image. Try this technique, then upload your artwork to the gallery. Show us your creations!

***Please note - Internet Explorer/Edge is not a supported browser, and will not allow you to see the videos. Please use Chrome, Firefox or Safari to view our tutorial videos.

Questions and Comments

We'd love to get your feedback or questions. Leave your comment below.

Would never have thought to use two different colours of embossing powder, one over the other. Great tutorial; will have to try this. So many wonderful ideas....not enough time!
cdnoption  |  Wed Aug 3, 2011 at 4:50 AM
Thanks so much, this sounds like fun!!
Karen Wallace  |  Wed Aug 3, 2011 at 4:59 AM
Hi Beate,

I'm confused. What is different about the look this technique provides, compared to simply using black ink to stamp the image prior to applying the clear embossing powder?
Gia Siana  |  Wed Aug 3, 2011 at 6:53 AM
Hi Gia!

I think I can answer that for you. If you simply stamp in black and then cover in clear embossing powder, you'll have your image underneath the embossing (which is closer to cracked glass). With this technique, embossing with the colored ink on top of the clear created the illusion that the image is contained within the clear layer (embedded). I encourage you to try both side by side so you can see the difference.

Thanks for asking the question, too. I am sure others would be wondering the same.

Have fun!
Holly McMillen  |  Wed Aug 3, 2011 at 7:10 AM
Great tutorials Holly and Beate! Can't wait to try this technique. Love the look of the finished product.
Brenda  |  Wed Aug 3, 2011 at 8:02 AM
Absolutely fun and wonderful technique. Thank you.
Dani  |  Wed Aug 3, 2011 at 8:25 AM
What a great technique. I haven't heat embossed for a while, but I think it's time to pull out those supplies. Thanks!
Pam Crusberg  |  Wed Aug 3, 2011 at 8:55 AM
Lovely! We forget the stuff we have , but this looks like fun and so pretty,tfs.
evie  |  Wed Aug 3, 2011 at 9:44 AM
I was just wondering the other day if I could do this, and didn't have a chance to try it. Thanks for sharing this! Great video, and sample!
Toni Kwaiser  |  Wed Aug 3, 2011 at 9:48 AM
I have done something similar to this when making brads the color I need them to be . I was wondering if you could use that technique on papper. Really nice I like that.
linda  |  Wed Aug 3, 2011 at 9:58 AM
Thank you so much for sharing this technique in directions and video. I really understand so much more clearly with the video! I know others relate better to the written directions...especially helpful with measurements are given!

It would be great to have a "how to" video for SCS. Show how to sign up for groups, post cards, etc...

Thank you so much again! I will be trying this today!

He IS Able!
Traci S.
Traci S.  |  Wed Aug 3, 2011 at 10:38 AM
Pretty cool technique, and I love playing with the embossing tools!

I do have a quick question though. WHERE didyou get the wooden wine bottle rack that is in the background? I have been looking for one just like it for awhile!!

Thanks!

Jann
Jannarama  |  Wed Aug 3, 2011 at 10:58 AM
Beate: This looks fabulous. Have two gf coming to make cards next week. Think we'll try this one out for sure! I so enjoy these SCS weekly inklings. Have tried some and they ALWAYS turn out. Thanks:)
Sandy C.  |  Wed Aug 3, 2011 at 11:06 AM
In the past when I have embossed over embossing, the clear layer on the bottom starts to re-melt and bleed into the top layer of colored powder while it's heating. This leaves the stamped image misshapen and not crisp at all. Any suggestions? Thanks!
Mary Beth  |  Wed Aug 3, 2011 at 11:55 AM
Mary Beth,
Only heat the top image until it's melted. Don't wait until the entire clear embossed layer is melted.
beate  |  Wed Aug 3, 2011 at 12:02 PM
This its so awesome... I have all the stuff to try this can't wait!
Nickey  |  Wed Aug 3, 2011 at 12:59 PM
I am looking forward to having a go at this again. Have had the same problem as Mary beth in the pasts but I will do as Beate suggests and see how it goes, TFS.
Margaret J  |  Wed Aug 3, 2011 at 1:55 PM
Great tutorial and video! Beate, what is the brand of your heating gun and where can it be bought? (I assume a regular hair dryer is too hot???) Also, do you emboss with heat on a stamping mat? Thank you!
Mona  |  Wed Aug 3, 2011 at 2:41 PM
I love this, I'm going to have to try this one out!
I love the video's they are so informative. I'm a visual learner so for me this is awesome! Beate you're the best, thanks for sharing all of these with us smile
Briana  |  Wed Aug 3, 2011 at 2:42 PM
Great technique! What is that wonderful 'dust pan" you are using to catch the excess embossing powder?
Rebecca Ruediger  |  Wed Aug 3, 2011 at 3:16 PM

Page 1 of 3 pages  1 2 3 >

You need to be logged in to comment

GET OUR NEWSLETTER


Splitcoaststampers's privacy policy