Elf Shoe Treat
by Sarah Wills
Use this elf shoe template for a sweet holiday gift.
Supplies
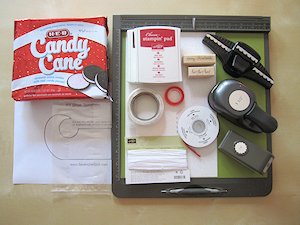
- Printable Elf Shoe Template
- 5" x 12" Cardstock (green here)
- 1" x 12" Cardstock (white here) for border decoration and tags
- Score board
- Punches (1 1/2" circle, border, small scalloped circle)
- Adhesive
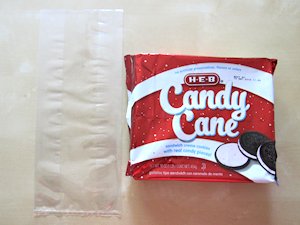
- Sandwich cookies
- Other supplies as needed to complete the project (stamps, twine, ribbon, tape)
Step-by-Step
-
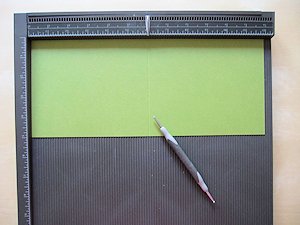
Step 1
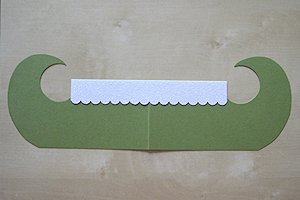
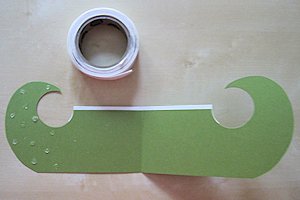
Cut a piece of cardstock to measure 12" x 5". Score halfway along at 6" and fold along the score line.
-
Step 2
Print the Elf Shoe Template and cut it out. Trace the template onto the folded cardstock with the straight side along the fold. Cut around the pencil lines, being sure to hold the two layers firmly together as you go.
TIP:
Use a 1 1/2" circle punch or die to cut the circular shape.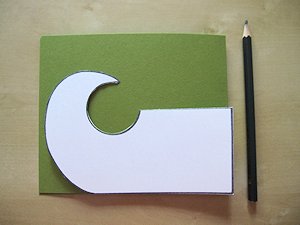
-
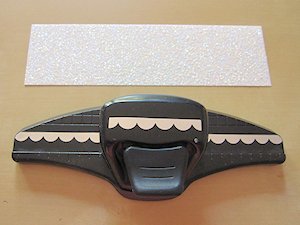
Step 3
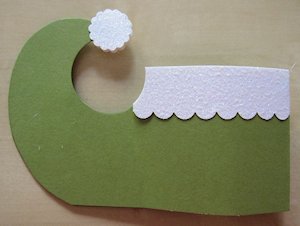
To make the trim around the top of the shoe, cut a piece of white or glittered cardstock to 6" x 1 1/4" and shape one edge using a border die or punch.
-
Step 4
Attach the trim to the top edge of the shoe using strong adhesive tape.
-
Turn over and use 1 1/2" circle punch to trim edges of the border to match the shape of the shoe.

-
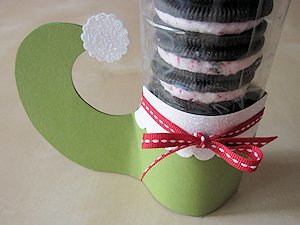
Step 5
Use Glue Dots or strong adhesive tape to adhere the ‘toe’ sections together.
-
NOTE:
Remember to leave the ‘foot’ section free of adhesive for the cookie tube to slip into.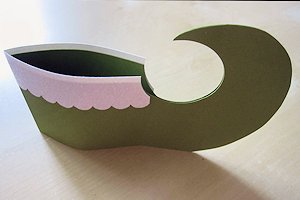
-
Step 6
Cut two circles to make the pom pom at the end of the shoe, and adhere in place.
-
Step 7
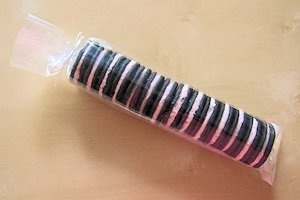
Take a food safe cello bag and pop a stack of sandwich cookies inside – seasonal colors such as red or green work really well.
-
Roll the cello bag into a tube shape and secure at the back with tape. Tie top to close.
-
Step 8
Embellish or label the top of the bag as desired.

-
Tie a piece of ribbon tightly around the trim of the shoe and finish with a bow – pulling tight will ensure that your shoe sits nice & flat on a surface.
-
Step 9
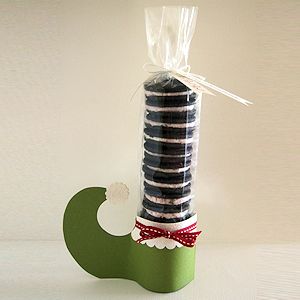
Complete the project.
Video!
Your Turn
You've seen the tutorial, now you try it! We've got a section of the gallery set aside for Elf Shoe Treat. Try this technique, then upload your artwork to the gallery. Show us your creations!
***Please note - Internet Explorer/Edge is not a supported browser, and will not allow you to see the videos. Please use Chrome, Firefox or Safari to view our tutorial videos.

Questions and Comments
We'd love to get your feedback or questions. Leave your comment below.
Page 2 of 2 pages < 1 2