Easel Card
by Beate Johns
Create a card with a built-in easel.
Supplies
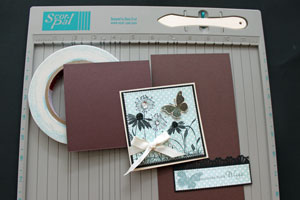
- One 4 1/4" x 8 1/2" piece of cardstock (look for alternate measurements under variation)
- One 4 1/4" square piece of cardstock
- Scor-Pal™, or other scoring tool
- Scor-Tape™, or other strong adhesive
- Additional cardstock for card inside and card front
- Stamps, Taylored Expressions Discover your Wings used here
- Ink and Embellishments
Step-by-Step
-
Step 1
Score the 4 1/4" x 8 1/2" piece of cardstock at 4 1/4" and 6 3/8".
Hint:
On a Scor-Pal, the 6 3/8" measurement is marked with a dot on the upper guide.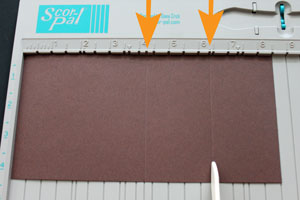
-
Step 2
Prefold all score lines.
First fold the card in half, then fold the second score line (6 3/8") opposite from the 4 1/4" score line.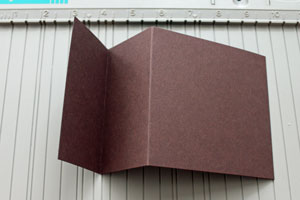
-
Step 3
Place cardstock on table with the 4 1/4" side down.
Add Scor-Tape to the 2 1/8" x 4 1/4" section cardstock that is facing up.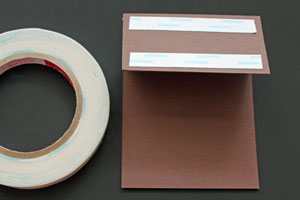
-
Step 4
Remove the Scor-Tape liner and adhere the 4 1/4" cardstock square to the card base.
Line up the top of the square with the top of the 2 1/8" x 4 1/4" section.
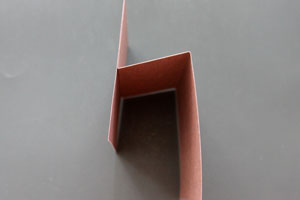
This creates the easel card base.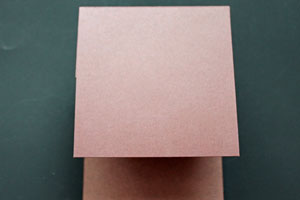
-
Side view
-
Step 5
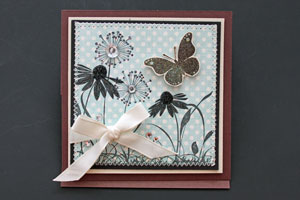
Decorate the card front.
-
Step 6
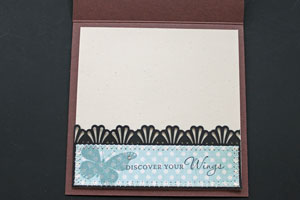
Decorate the card inside.
-
To make the easel card stand up by itself, add an embellishment or an extra layer (for this sample, it's the punched layer) the inside of your card. This that will keep the card front from closing.
It is best to have that embellishment or layer at least 1/3" into the card from the bottom up.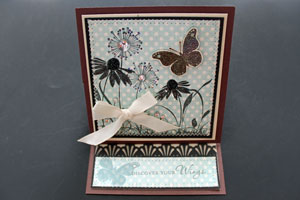
Video!
Variations
-
Regular card size (4 1/4" x 5 1/2")
Vertical card
Start out with a 4 1/4" x 11" piece of cardstock and score at 5 1/2" and 8 1/4". Your card front piece will measure 4 1/4" x 5 1/2.
Horizontal card
Start out with a 5 1/2" x 8 1/2" piece of cardstock and score at 4 1/4" and 6 3/8". Your card front piece will measure 4 1/4" x 5 1/2".
Other card sizes
You can make any card size into an Easel card.
Your Easel base will measure two times the height of the card front.
Example:
For a 3" x 6" card start out with a 6" square for the easel base. Score at 3" (height of finished card) and 1 1/2" ( 1/2 of height of card).
-
Circular Easel Card
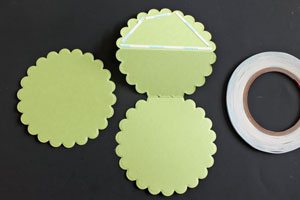
- Cut a circular card base out with die templates. To do that, fold your cardstock in half, and line up the side with the fold so that part of that fold won't be cut.
- Score one of the circle card sides in half and fold the other half up.
- Add adhesive to the folded up 1/2 circle.
- Adhere another circle shape, cut with the same die you used to cut the card base, to the 1/2 circle.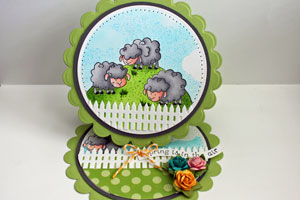
Your Turn
You've seen the tutorial, now you try it! We've got a section of the gallery set aside for Easel Card. Try this technique, then upload your artwork to the gallery. Show us your creations!
***Please note - Internet Explorer/Edge is not a supported browser, and will not allow you to see the videos. Please use Chrome, Firefox or Safari to view our tutorial videos.
 *
*
Questions and Comments
We'd love to get your feedback or questions. Leave your comment below.
I plan on doing one right away.
Thank You so much
Patti
Lisa
Thank you,
God bless you.
Cibi.
Page 1 of 6 pages 1 2 3 > Last »