Dryer Sheet Flower
by Emily Keaton
Learn how to transform used fabric-softening dryer sheets into a gorgeous layered flower embellishment.
Supplies
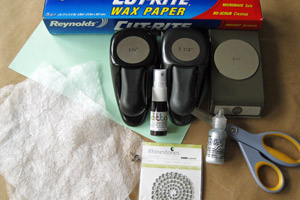
- Used Dryer Sheets, Bounce used here
- Circle Punches or circle dies of increasing diameter, 1 1/2", 1 3/4", 2", 21/4", 21/2", and 2 3/4" circle punches were used here
- Cardstock
- Scissors
- Spray Ink or shimmer mist, Ditto Glimmer Spray by Hampton Art was used here
- Glitter glue, silver Stickles were used here
- Wax Paper
- Decorative Brad
- Rhinestones or Pearls
Step-by-Step
-
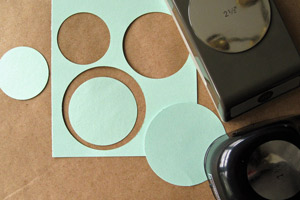
Step 1
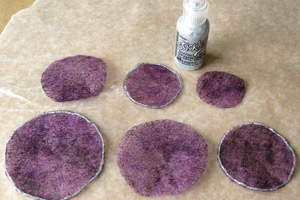
Punch six circles of increasing diameter from cardstock.
-
Step 2
Use the cardstock punches as guides for cutting out circles from used dryer sheets, one circle of each size. The dryer sheet circles need not be perfect; in fact, imperfections will add to the charm of the finished flower.
Note:
Alternatively, nested circle dies and a die cutting machine may be used to cut circles from the dryer sheets.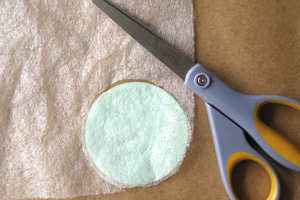
-
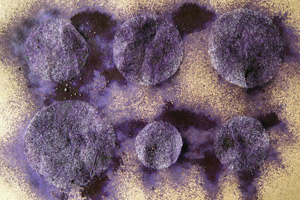
Step 3
Line up the dryer sheet circles on a protected surface. Shake spray ink as directed on packaging, and spray the circles with ink until desired coverage is achieved. Blot any undesired droplets with a paper towel. Remove the circles from wet ink to dry completely.
-
Step 4
Cover work surface with wax paper. Starting with the largest circle, outline every other circle with glitter glue. Allow to dry completely.
-
Step 5
Stack the circles, with the largest on the bottom. Insert a decorative brad through the center of the stack.
Note:
Stacking the layers slightly off-center will add to the charm of the finished flower.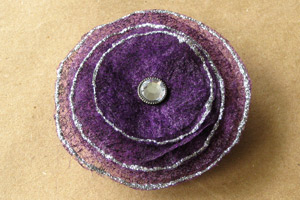
-
Step 6
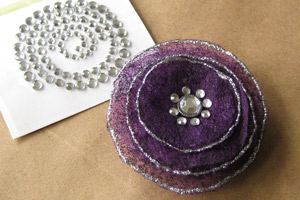
Adhere rhinestones or pearls around the brad in the center of the flower.
-
Step 7
Attach completed dryer sheet flower to a card, layout, or other project.

Video!
Your Turn
You've seen the tutorial, now you try it! We've got a section of the gallery set aside for Dryer Sheet Flower. Try this technique, then upload your artwork to the gallery. Show us your creations!
***Please note - Internet Explorer/Edge is not a supported browser, and will not allow you to see the videos. Please use Chrome, Firefox or Safari to view our tutorial videos.

Questions and Comments
We'd love to get your feedback or questions. Leave your comment below.
You are both amazing - thanks so much for sharing!!!
Page 3 of 3 pages < 1 2 3