Drawer Box

by Holly McMillen

Create an adorable box with a drawer to hold cards or other goodies.

Supplies
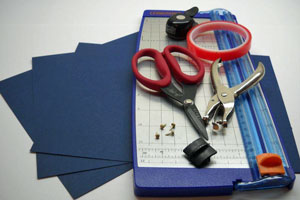
  • One 8 1/2" x 7" piece of heavy cardstock or lightweight chipboard (drawer)
  • One 9 1/16" x 6 1/16" piece of heavy card stock or lightweight chipboard (Part A)
  • One 9 1/8" x 6 1/8" piece of heavy card stock or lightweight chipboard (Part B)
  • Paper cutter with scoring blade
  • Sticky tape or other strong adhesive
  • 1/2" circle punch
  • Hole punch
  • Scissors
  • Stamps, paper and embellishments to decorate the box

Step-by-Step

  1. Step 1

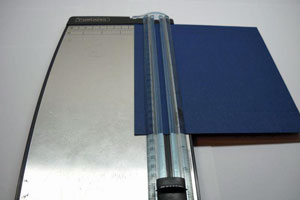
    Score the 8 1/2" x 7" piece of cardstock on each side at 1 1/4".
  2. Step 2

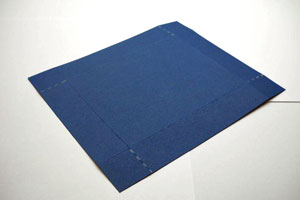
    Cut up to the score lines on all four sides as shown.
  3. Step 3

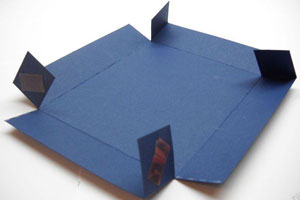
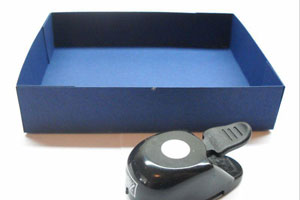
    Fold tabs and apply sticky tape to the back of them. Form into a box bottom.
  4. Step 4

    Using the 1/2" circle punch, punch a 1/2"circle in the front of the drawer and set aside.
  5. Step 5

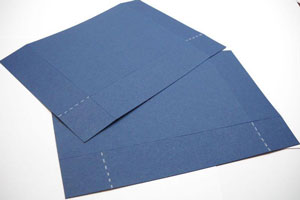
    Score at 1 1/2" on both short sides and at 1 1/2" on one of the long sides of both Part A and Part B.
  6. Step 6

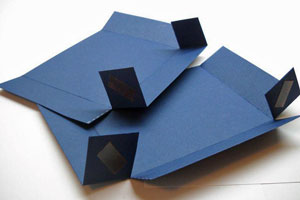
    On Part A (which will nest inside), cut in on each side at the score line to the interior score line.

    On Part B (which will nest outside), cut up on the two bottom score lines to the interior score line.

    Apply sticky tape to the tabs and fold both pieces in to form an open ended box.
  7. Step 7

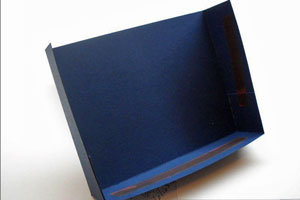
    Apply sticky tape to the interior walls of the Part B (slightly larger piece).
  8. Step 8

    Slide the smaller piece (Part A) into the larger (Part B) and press together.

  9. Step 9

    Slide the drawer into the box and it is ready to decorate.

    Note:
    Lightweight chipboard works well - you can use the backing to the 12 x 12 designer paper packs.

    If you use regular weight chipboard, adjust Part B to measure 9 3/16” x 6 3/16”, but keep the score lines the same. This will allow for the slightly thicker paper.

    Fun tip:
    When made with the lightweight chipboard, you can stack the boxes for storage of Nestabilities™ or other supplies.
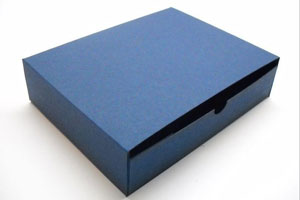
  10. Step 10

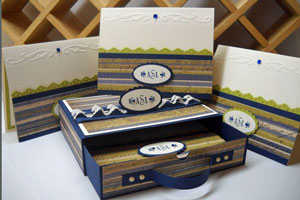
    Decorate the box and create matching cards.

    This box holds up to 10 cards (4 1/4" x 5 1/2") and envelopes.
Video!

Your Turn

You've seen the tutorial, now you try it! We've got a section of the gallery set aside for Drawer Box. Try this technique, then upload your artwork to the gallery. Show us your creations!

***Please note - Internet Explorer/Edge is not a supported browser, and will not allow you to see the videos. Please use Chrome, Firefox or Safari to view our tutorial videos.

Questions and Comments

We'd love to get your feedback or questions. Leave your comment below.

To Upallnite: Yes, Purple and Red are the colors. IF you are under 50 y/o, your colors are Pink and Lavendar. You'll have to post pics of your Red Hat project - would love to see them.
Marie Anderbery  |  Tue Jul 13, 2010 at 10:42 AM
ooohh...thank you ladies...now Im going to have to make 2 of them. One for each group. I've already made 2 boxes. Took pics and getting ready to post them. These are so much fun to make!
Upallnite  |  Tue Jul 13, 2010 at 11:08 AM
I was wondering if you have dimensions for a 6 x 6 box..so we can put a 6 x 6 easel card on top?

I would love that...I know, I should be able to figure it out with your dimensions. I'm not that talented.

Thanks so much,
Sheila
Sheila  |  Wed Jul 14, 2010 at 12:37 PM
Can u please share the video again?
Connie  |  Thu Jul 22, 2010 at 4:48 PM
Wanted to let you know that I posted a link to this tutorial/video today on my blog.

Nancy Ward
http://www.nancywardcrafts.com
Nancy Ward  |  Sat Jul 24, 2010 at 9:06 AM
Hello, i just think that is a great box.. but i have a question about your box. can u give the measurement's for the card stock used to decorate the box?
Ronnie  |  Sun Jul 25, 2010 at 11:00 AM
I got my red tape from HL. Gonna need more !! I had a really hard time with my first try, used three sheets of good Bazzill paper too :-( So I tried again using the chipboard sheet off the back of a SU DP pad. Worked like a charm when I labeled each piece and measured with my Tim Holtz ruler. I tried both my MS and ScorePal boards first, and they seemed to be just a hair off. I believe the front of the box is supposed to be lower, but I might just make the drawer cover a little higher, and using a chunky jeweled brad for a drawer pull instead of the handle. Then going to fill it with generic cards and it will be a gift for my mom's best friend's birthday. Fun to make even tho frustrating at first, but that was me, not the video or the directions ! LOL !
elizabeth parham  |  Mon Aug 9, 2010 at 8:37 AM
Love it. What's an SAHM?
debbie wicklund  |  Mon Aug 16, 2010 at 1:59 PM
A SAHM is a stay at home mom. My kids are grown and gone now, and I stay at home...LOL, but typically a sahm does not work outside of the home.
elizabeth parham  |  Mon Aug 16, 2010 at 2:09 PM
WOW this is fantastic! Will have to give it a try on the weekend. TFS
Helen -- Firenze Cards
Helen  |  Tue Aug 31, 2010 at 3:19 PM
What kind tape are you using, and where do you get it. It seems a lot better then sticky strip
Jenny  |  Sun Sep 12, 2010 at 4:51 PM
The tape is called Terrificcally Tacky Tape and is made by Provo Craft. I got mine at Hobby Lobby, $2.99 for 5 yards of 1/4" and $4.99 for 5 yards of 1/2".
Liz  |  Sun Sep 12, 2010 at 6:20 PM
I love making this drawer box. but my question is there a tutorial on making the cards that were made for this set? thanks in advance for any help...
Rjt  |  Thu Sep 16, 2010 at 9:53 PM
it looks like one of the CB ironworks edger thingies on the top, maybe rickrack or a diecut, a scalloped oval layered onto striped paper, probably on a standard sized card. I'm guessing though, it's probably best to contact the author of the tut - up in the top right corner of the tut. Good luck!
Liz  |  Thu Sep 16, 2010 at 9:59 PM
This is super awesome. I'd love to try to make it, but will want to be more durable so I'll probably buy lightweight chipboard first. Thanks!!!
Bai  |  Thu Sep 23, 2010 at 9:28 PM
check the back of any SU DSP packs...those sheets seem to be just the right thickness for the box...worked for me anyway....a good sized cereal box might work just as well too.
Liz  |  Fri Sep 24, 2010 at 9:37 AM
That is too cute. And the best part is all of the supplies are so common. I can't stand when a tutorial requires some fancy gadget that only die hard paper crafters have. Kudos for the great tutorial!
Vinyl Wall Lettering  |  Fri Nov 12, 2010 at 12:05 PM
Nice box wrong size looking for something more like 4.25 x 6.25
Rj  |  Fri Nov 12, 2010 at 8:43 PM
I love this box but I was wondering if you could help me figure out the measurements for a 3 1/2 inch drawer box. I saw an easel drawer box on line but no measurements were given. Hope to hear from you soon.

Thanks , Maria

Love your tutorials
Maria J Sanchez  |  Mon May 9, 2011 at 6:47 PM
Holly's bio might need updating! Just whose husband and four sons is she living with??? Great project, btw!
Rebekah Kaberry  |  Fri Sep 2, 2011 at 2:47 AM

Page 3 of 4 pages  <  1 2 3 4 >

You need to be logged in to comment

GET OUR NEWSLETTER


Splitcoaststampers's privacy policy