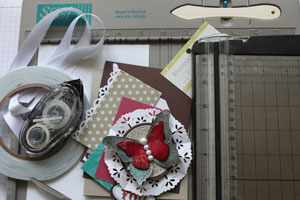
Double Pocket Card
by Beate Johns
Two score lines turn a cardstock strip into a double pocket card.
Supplies
- One 5" x 11 1/4" piece of cardstock for pocket base
- One 4" x 5 1/4" piece of cardstock
- One 4 1/4" x 11" piece of cardstock, folded in half for your card base
- Three 3 1/2" wide pieces of patterned paper (optional)
- Scor-Pal™, or other scoring tool
- Scor-Tape™, or other strong adhesive
- Paper Cutter
- Ribbon and other Embellishments
- Additional Cardstock, patterned paper and stamped images to decorate your card
Step-by-Step
-
Step 1
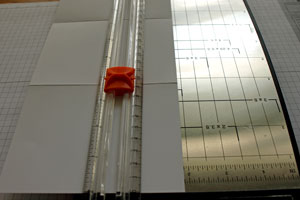
Line your cardstock edge up with the 1/2" score groove and score at 4 1/4".
Hint:
If you are not using the Scor-Pal™, score at 3 3/4".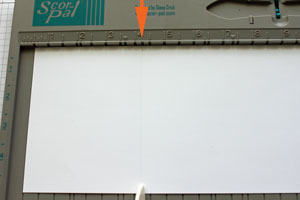
-
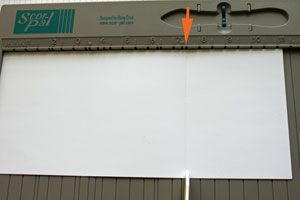
Step 2
Line the cardstock up with the edge of your Scor-Pal™ and score at 7 1/2".
-
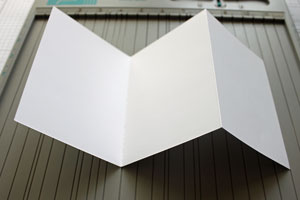
Step 3
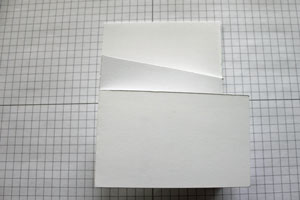
Prefold your score lines mountain valley style.
-
Step 4
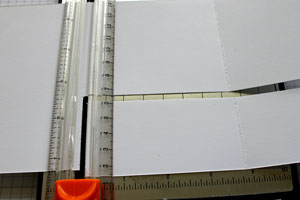
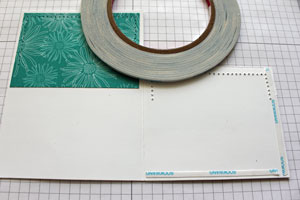
Unfold your cardstock and line it up with at 1 7/8" on your paper cutter. Cut from the top of your cardstock down to your first score line.
-
Line your first score line up with your cutting groove and cut the first score line down to your cut.
-
Step 5
Line up the bottom of your card edge with 2 3/4" (or the top edge with 7/8") and cut from the top to the first score line.
-
Line up the left score line with the cutter groove and cut from the top to where your paper is cut.

-
Step 6
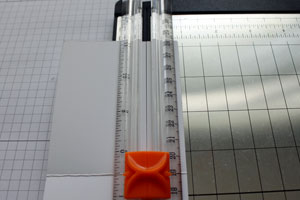
Fold your pocket base back up. It should look like this now.
-
Step 7
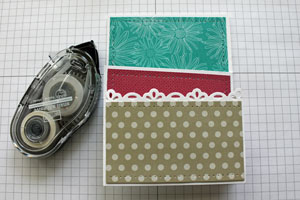
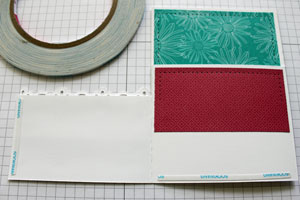
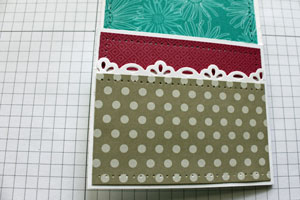
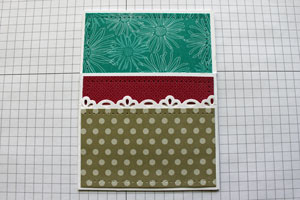
Adhere your 3 1/2" wide strips of patterned paper to each fold.
-
Step 8
Unfold your first pocket and add Scor-Tape™ or other strong adhesive to the side and bottom of the pocket top.
-
Take the tape liner off, fold pocket top back and adhere to pocket base.
-
Step 9
Unfold the middle and add Scor-Tape™ on the bottom and side.
-
Take tape liner off and fold pocket top over.
-
Step 10
Adhere your pocket base to your 4" x 5 1/4" piece of cardstock.
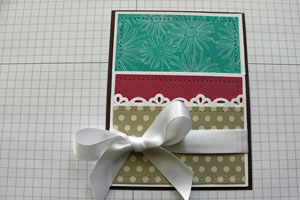
-
Tape everything to your card base.
-
Step 11
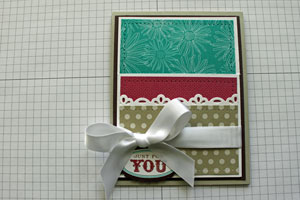
Create a tag to fit your top pocket.
Mine measures 2 7/8" x 4".
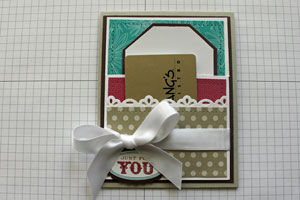
You can use the second pocket for a gift card.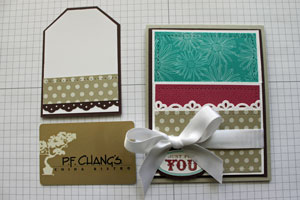
-
-
Step 12
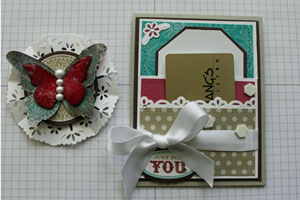
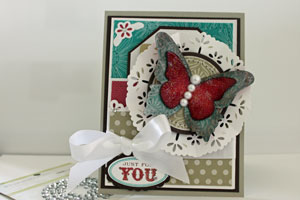
If you want to add additional images, leave your gift card and tag in the card. Then add dimensionals to hold your image.
-
Place your image over the dimensionals and tape down.
Video!
Your Turn
You've seen the tutorial, now you try it! We've got a section of the gallery set aside for Double Pocket Card. Try this technique, then upload your artwork to the gallery. Show us your creations!
***Please note - Internet Explorer/Edge is not a supported browser, and will not allow you to see the videos. Please use Chrome, Firefox or Safari to view our tutorial videos.
 *
*
Questions and Comments
We'd love to get your feedback or questions. Leave your comment below.
Page 2 of 2 pages < 1 2