Double Embossing
by Beate Johns
Emboss only the outer edges of your cardstock, leaving the inner part smooth to stamp on.
Supplies
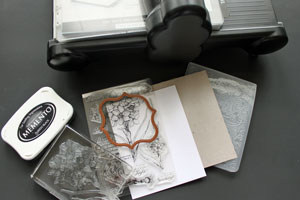
- Big Shot™, or other die cutting machine
- Embossing folder
- Tan Embossing Mat
- Nestabilities™ die template, Label 13 used here
- One 4 1/4" x 5 1/2" piece of cardboard, for embossing frame (thin cardboard from postage stamp package used here)
- One 4 1/4" x 5 1/2" piece of cardstock
- Ink
- Stamps, Flourishes Paperwhites used here
- Additional cardstock and embellishments to finish the project
Step-by-Step
-
Step 1
To cut a mat from the cardboard, create the Big Shot sandwich as follows.
Cutting mat
Multipurpose platform on tab 2
Cardboard
Nestabilities die template (cutting ridges facing down)
Cutting mat
Hint:
Center the die template on the cardboard.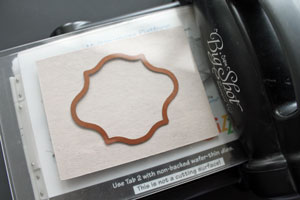
-
Step 2
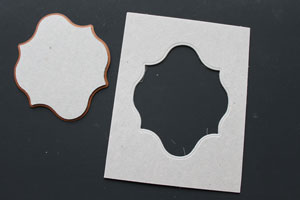
Run sandwich through the die cut machine and pop the center out.
-
Step 3
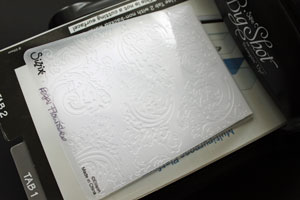
Insert cardstock into the embossing folder. Place on closed Multi-purpose platform.
-
Step 4
Place cardboard frame on top of embossing folder.
Hint:
Add removable adhesive on the frame to make sure it doesn't move.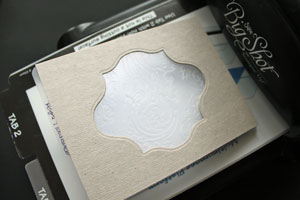
-
Top sandwich with cutting mat.
Trouble Shooting Hint:
If it doesn't work, your cardboard might be too thin. Try creating two of the same masks and taping them together for one thicker mask.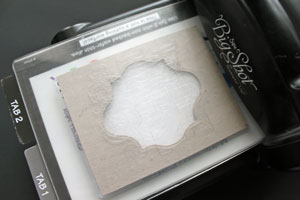
-
Step 5
Run sandwich through the Big Shot. Remove cardstock from the embossing folder.
The center of the cardstock will stay smooth.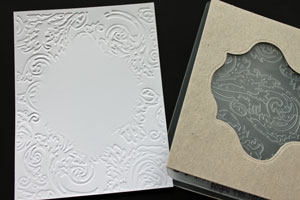
-
Step 6
Now create the following sandwich:
Multi-purpose platform open at Tab 1
Cutting Plate
Tan embossing mat
Cardstock
Die, cutting side down, lined up with the smooth center of the cardstock
Cutting plate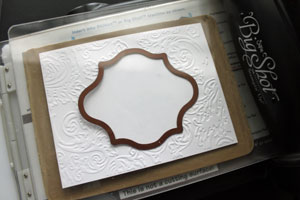
-
Run stack through the machine, and a frame will be embossed around the smooth cardstock center.
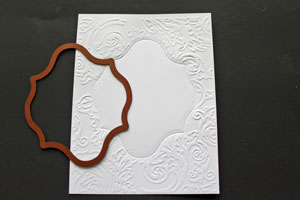
-
Step 7
Stamp the image in the smooth center portion of the cardstock.
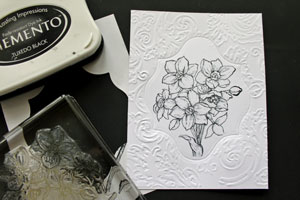
-
Step 8
Color and embellish the image if desired.
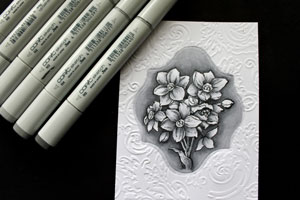
-
Step 9
Finish your card.
Check this tutorial to find out how to create a frame with Nestabilities™ dies.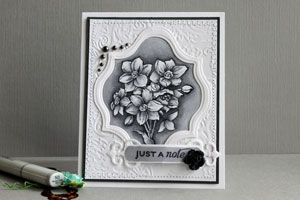
Video!
Variations
Double Embossing with Cuttlebug™
To cut your frame out of cardboard use the following sandwich:
- A Plate
- B Plate
- Cardboard or Chipboard
- Nestabilities die (cutting lines face down)
- C Plate
To emboss your cardstock use this sandwich:
- A Plate
- Embossing Folder with cardstock inside
- Cardboard frame
- C Plate
To Emboss your cardstock with Nestabilities die use this sandwich:
- A Plate
- B Plate
- Tan Embossing Mat
- Cardstock
- Nestabilities die (cutting lines facing down)
- B Plate
Your Turn
You've seen the tutorial, now you try it! We've got a section of the gallery set aside for Double Embossing. Try this technique, then upload your artwork to the gallery. Show us your creations!
***Please note - Internet Explorer/Edge is not a supported browser, and will not allow you to see the videos. Please use Chrome, Firefox or Safari to view our tutorial videos.
Questions and Comments
We'd love to get your feedback or questions. Leave your comment below.
The tag used for the sentiment is from Spellbinders Fancy Tag die set. They just came out with more Fancy Tags. I will need them all!!!
Ree,
I am working on a quick tutorial on how to create the frame. I will post it as soon as it is done and link to it from this tutorial. But it's really easy.
For the frame, cut and emboss a piece of cardstock with two nested dies at the same time. I used the die that I used to create the mask plus the one the next size up. Nest them into each other over the cardstock and then first cut, then emboss.
Kirby,
We have several Copic Tutorials on this site:
Basic Blending Techniques
Texture with Copics
Misting with Alcohol Markers
Copics with Pencils
Hugs and smiles
Hugs and smiles
Thanks for the info on the fancy tags..I hope it is one I have. I would love to have ALL the NB dies, but, alas, my purse strings are short (and tight), but wouldn't it be fun!! For the colored image I am hoping I can achieve a similar look with colored pencils and gamsol for the black/gray. So awesome, Beate!! You're the best!! Thanks once again
However when i tried it, it didn't work.
The first time i figured my cardboard frame wasn't think enough, so i got a thinker piece...
On the one, it did make the pattern deeper on the outside area, but inside there is still a pattern embossed (just lighter)
ANy tips or ideas??
I think you both have to play with your cardboard thickness. Mine is about 1/24" (three of these together would make 1/8"). If it's too thin the pattern will show through. Not sure what happens if it's too thick...
I have been trying a to work out how I could do this.
And this morning here is the answer.
I am having difficulty here,( Aus. )purchasing the tanning mat, backing sheets ,and sticky strips.
I will check with Spellbinders, On line.
I am waiting for the Metal sheets and paste to arrive. but theycan not sell me these things.
Have only recently joined Spellbinders Margaret
Sorry, I don't have a video for that. I colored the Flowers with Copic Markers N0, N1, N2 and N3 and colored the background I think with N3, N4, N5.
I am really slow in coloring. That would make for one boring video.
I appreciate the time you took to prepare this tutorial! I love Nestabilities and creating new pretty stuff! Your card by the way is gorgeous!!!
this is a great technique i have a cuttlebug so i will have to play around with the plates. but what i really want to know can you cut chipboard, strawboard call it what you want with nesties. I thought we could only cut heavy cardstock?
Page 3 of 7 pages < 1 2 3 4 5 > Last »