Double Diamond Fold
by Joann Jamieson
Make this special fold card with two diamond faces. For a single diamond fold, click HERE.
Supplies
- Cardstock
- Scoring board
- Bone folder
- Decorative paper (Heartfelt Creations Enchanted Mum Paper Collection used here)
- Paper trimmer
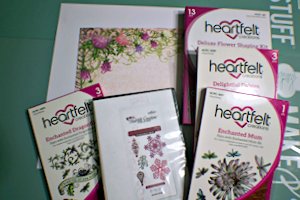
- Other supplies as needed to complete the card (Heartfelt Creations products used here: Delightful Daisies Cling Stamp Set and Die, Enchanted Mum Cling Stamp Set and Die, Enchanted Dragonflies Cling Stamp Set and Die, Arianna Lace Die, Deluxe Flower Shaping Kit; Art Institute Glue - Dries Clear Glue, Spellbinders Tool N' One, Worn Lipstick and Peeled Paint Distress Inks)
Step-by-Step
-
Step 1
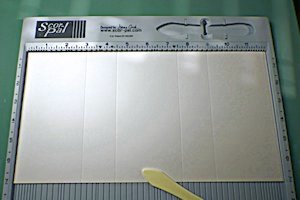
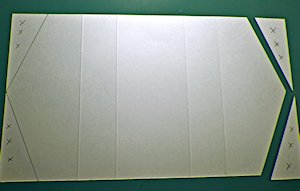
Trim cardstock to 12" x 7". Score at 3", 4 1/2", 7 1/2", and 9" along the long side.
-
Step 2
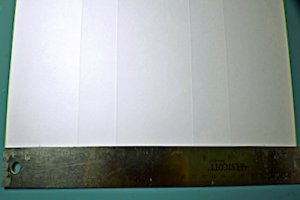
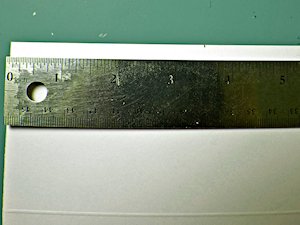
Flip the cardstock over and make pencil marks at 1 1/2" and 10 1/2" on both long sides.
-
Make a mark at 3 1/2" on both short sides.
-
Step 3
Lightly trace from the 1 1/2" and 10 1/2" marks to the center marks on the end to create the diamond shapes. Cut the corner areas away to create the diamond shapes.
-
Step 4
Place the cardstock back into your scoring tool approximately at the angle pictured. Use a ruler to line up the 10 1/2" point at the top of the card and the bottom of the 7 1/2" score line. Score down to connect the two points.
Rotate the cardstock to align the other angled cut to the right side of your scoring tool. Score again to connect the 7 1/2" score mark at the top of the card with the 10 1/2" mark at the bottom, creating an X that centers on the 9" score line.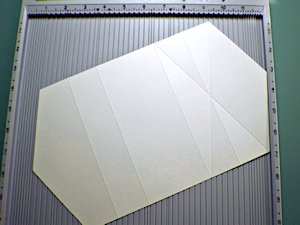
-
Repeat the process on the left side, scoring to connect the 1 1/2" point with the bottom of the 4 1/2" score line, and then the top of the 4 1/2" line with the 1 1/2" point at the bottom. This creates a scored X that centers on the 3" score line.
-
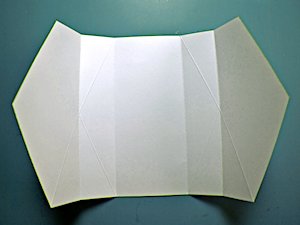
Step 5
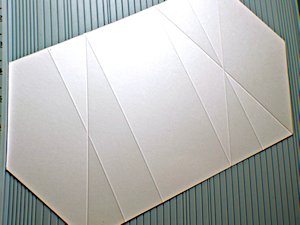
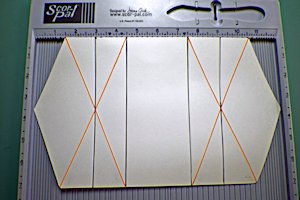
Since the score lines do not show up well in the pictures, this is what your finished card will look like after your scoring. The black lines will be valley folds and the red lines will be mountain folds.
-
Step 6
Fold on each horizontal score line and crease using a bone folder to ensure a nice sharp line.
-
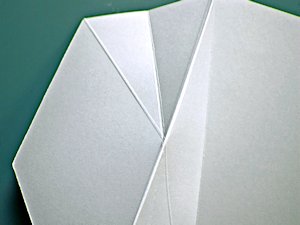
Step 7
Fold and crease the first angled scored line in the opposite direction of the horizontal fold.
-
Repeat with the other angled score line.
-
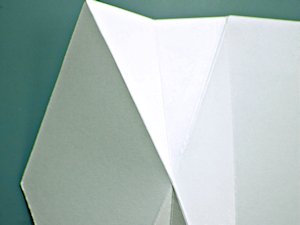
Step 8
Repeat for the right side. When you are done, your card should look like this.
-
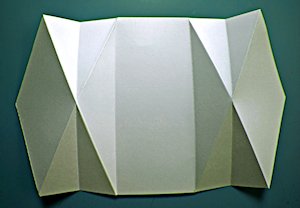
Step 9
Fold the card closed, and once again use your bone folder to get a nice sharp line.
TIP:
Place the folded card under a heavy book so it will hold its shape easier.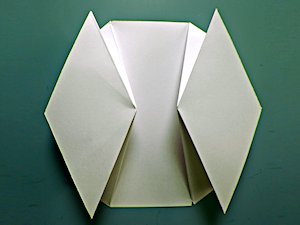
-
Step 10
Using the same template, recreate the card sections on your designer paper, cutting each piece a little smaller for a layered effect.
Once you have all your pieces cut, arrange them on the card to ensure that all the pieces are in the proper locations.
HINT:
Try doing this step several times using different papers and then mix the papers for a more mosaic look.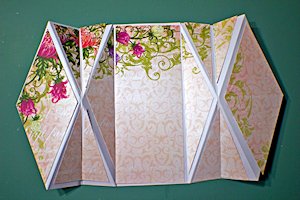
-
Step 11
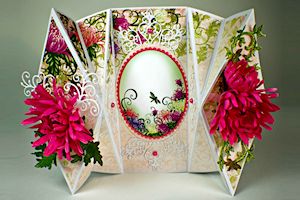
Decorate the card as desired and complete the project. The finished card is 7" x 6".
Video!
Your Turn
You've seen the tutorial, now you try it! We've got a section of the gallery set aside for Double Diamond Fold. Try this technique, then upload your artwork to the gallery. Show us your creations!
***Please note - Internet Explorer/Edge is not a supported browser, and will not allow you to see the videos. Please use Chrome, Firefox or Safari to view our tutorial videos.

Questions and Comments
We'd love to get your feedback or questions. Leave your comment below.
Thank you
wfaith, those wings can be trimmed off - I did that on my sample. You don't see them in the tutorial because of the camera angle.
I love the ribbon closure - I punched holes through the inner corner of the diamonds for mine.
https://castleparkdesigns.files.wordpress.com/2014/12/double-diamond-fold-template.png
Page 1 of 2 pages 1 2 >