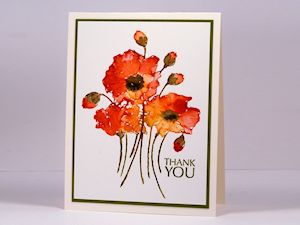
Distress Stain Watercolor
by Heather Telford
Stamp and blend with Ranger Distress Stains for a watercolored look.
Supplies
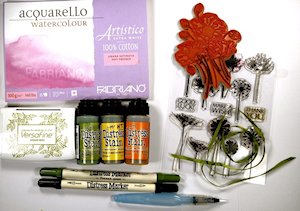
- Outline stamp (‘Fresh’ cling stamp and ‘Sprigs’ clear stamp set from Penny Black used here)
- Watercolor paper (Fabriano Artistico Hot Press used here)
- Tim Holtz® Distress Stains or other water-soluble medium (Peeled Paint, Scattered Straw, Spiced Marmalade used here)
- Tim Holtz® Distress Markers (Forest Moss and Black Soot used here)
- Mister bottle
- Water brush
- Other supplies as needed to complete the card (Versafine Spanish Moss ink used here)
Step-by-Step
-
Step 1
Ink an outline stamp directly with the dauber on the end of the Distress Stain bottle, using a light dabbing motion. Start with the lightest color – in the sample, Scattered Straw was used to ink the flowers. Add a darker shade to the edges of the image (Spiced Marmalade was used here on the edges of flowers and buds; stems were inked with Peeled Paint Distress Stain and short bud stems with Forest Moss marker).
NOTE:
You should not need to squeeze the bottle as you ink the stamp. If you do, you are likely to make your stamp too wet. There should be enough stain in the sponge dauber already.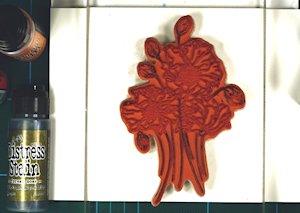
-
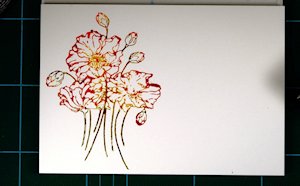
Step 2
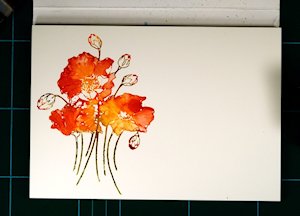
Mist stamp with water from 6-12 inches away, then stamp on hot press watercolor paper (hot press paper has a smooth finish that is ideal for stamping). Stain will stay wet long enough that you can paint the image.
-
Step 3
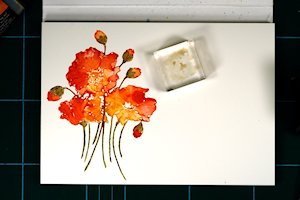
Using a waterbrush, pull color from the stamped outline to fill the petals.
Work on one petal or area at a time so all the stain does not run together. When one petal is done, move to another one that is not touching it.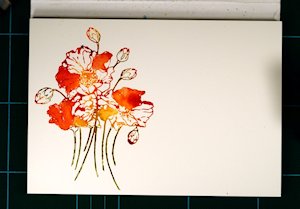
-
Step 4
Gradually work through all areas of the image, pulling in the stain and blending with the waterbrush.
-
Step 5
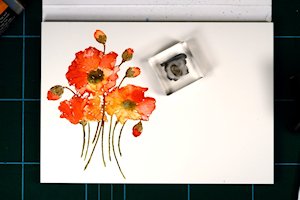
If deeper color or shading is needed, or to add color to any areas that have dried, press Distress Stain or Distress Marker onto an acrylic block and pick up color with a waterbrush.
-
Step 6
Distress Markers can also be used directly on the image as needed. Here, a Black Soot Distress Marker was used to color flower centers then blend with a waterbrush. Add extra black from an acrylic block as needed.
-
Step 7
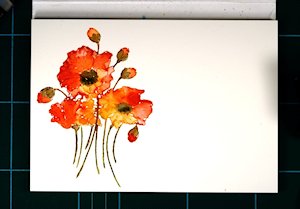
Make sure all coloring is completely dry before trimming the panel to desired size.
-
Step 8
Stamp a sentiment and mat the panel with coordinating cardstock, then attach to card base to complete the project.
Video!
Your Turn
You've seen the tutorial, now you try it! We've got a section of the gallery set aside for Distress Stain Watercolor. Try this technique, then upload your artwork to the gallery. Show us your creations!
***Please note - Internet Explorer/Edge is not a supported browser, and will not allow you to see the videos. Please use Chrome, Firefox or Safari to view our tutorial videos.

Questions and Comments
We'd love to get your feedback or questions. Leave your comment below.
If you stamp the image with a waterbased ink pad you will get a good outline but you will need to pick up ink from a palette or bottle to paint inside the petals. The painting part should work with any water based ink you will just need to see how fast your ink dries as you paint it on. Distress stain takes a while to dry which gives time to blend and move it around. The hot pressed watercolour paper works in your favour because the ink sits on top for longer before soaking in. You could try painting ink onto the stamp - I have not tried that myself.
Page 1 of 2 pages 1 2 >