Distressed Alcohol Markers
by Joan Bardee
Combine alcohol markers and distress inks for a unique look.
Supplies
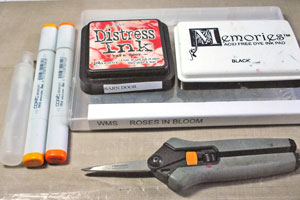
- Outline Stamp, (Waltzingmouse Roses in Bloom used here)
- Waterproof black ink
- Alcohol markers
- Distress inks
- Water mister
- Paper towel
Step-by-Step
-
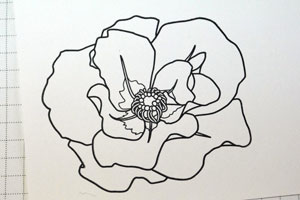
Step 1
Stamp line image (large open spaces work best) with a waterproof ink on white or cream cardstock.
-
Step 2
Being careful to avoid touching the stamped image (alcohol marker may smear waterproof ink), scribble a dark alcohol marker near the center of each part of your image.
HINT:
Practice on scrap paper to select a marker that coordinates with a shade of distress ink.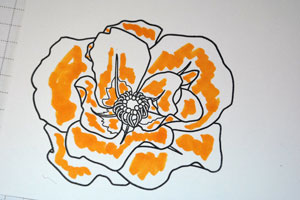
-
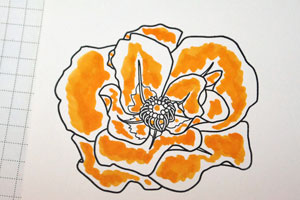
Step 3 (Optional)
Add a bit more coloring with a lighter alcohol marker.
-
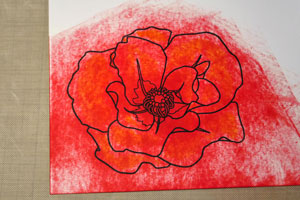
Step 4
Take a Ranger Distress Ink pad and apply it face down directly over your image, twisting in a circular motion.
-
Step 5
Mist with water.
HINT:
The more water you use, the more the Ink will dissolve and reveal more of the alcohol marker underneath.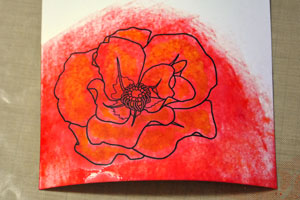
-
Step 6
Blot with a paper towel and set aside (or use a heat gun) to dry.

-
Step 7
When almost dry, cut out with scissors.
HINT:
It is easier to cut out your image when the cardstock is a bit damp. Too wet and the cardstock will be too fragile to cut.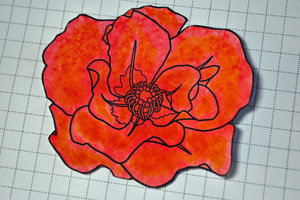
-
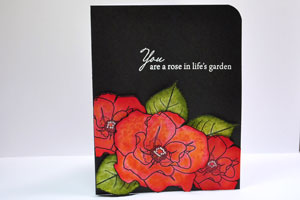
Step 8
Finish your project.
Video!
Your Turn
You've seen the tutorial, now you try it! We've got a section of the gallery set aside for Distressed Alcohol Markers. Try this technique, then upload your artwork to the gallery. Show us your creations!
***Please note - Internet Explorer/Edge is not a supported browser, and will not allow you to see the videos. Please use Chrome, Firefox or Safari to view our tutorial videos.

Questions and Comments
We'd love to get your feedback or questions. Leave your comment below.
Page 2 of 2 pages < 1 2