Dimensional Flowers

by Beate Johns

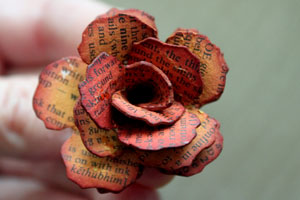
Create dimensional flowers out of three six petal die cut flowers.

Supplies
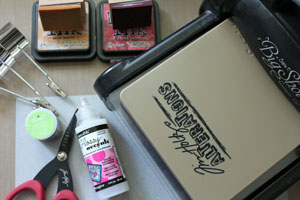
  • Six Petal Flower die cut or punch, (Tattered Floral Alteration die used here)
  • Grunge paper or cardstock
  • Alligator clips
  • Adhesive
  • Dictionary pages or text stamps
  • Ink
  • Wire
  • Scissors

Step-by-Step

  1. Step 1

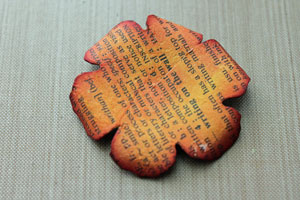
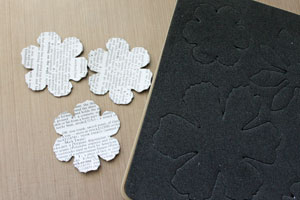
    Cut three six petal flowers out of grunge paper with either a punch or a die.

    Hint:
    Dictionary pages were adhered to the Grunge Paper for this sample before the flowers were cut.
  2. Step 2

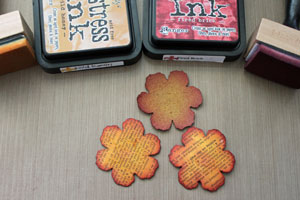
    Sponge ink on the front and back of the flowers.
  3. Step 3

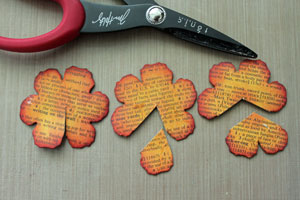
    Cut one of the flowers between two petals to the flower's center. Cut one petal off the second flower and two petals off the third flower.
  4. Step 4

    Take a petal between your fingers and roll it back and forth. It will shape the petal.
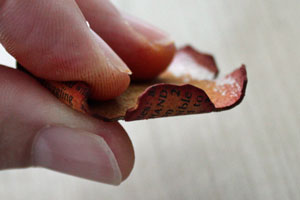
  5. Shape each flower petal.

  6. Step 5

    Take the first six petal flower and apply adhesive on the petal to the right side of the cut.
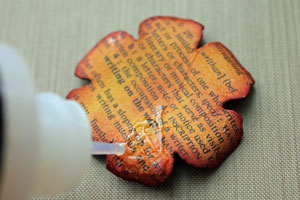
  7. Step 6

    Slide the petal to the left of the cut over the petal with the adhesive and press down.
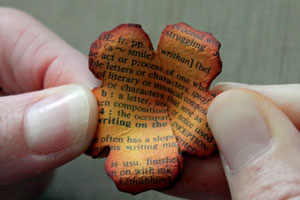
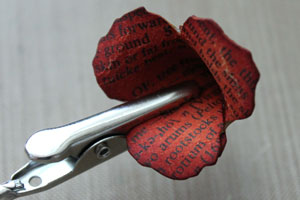
  8. Hold the petals together with an alligator clip or paper clip while the adhesive dries.
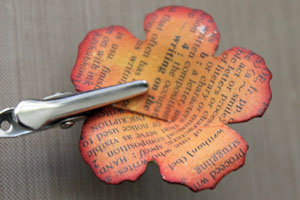
  9. Step 7

    Repeat stes 5 and 6 for the five petaled
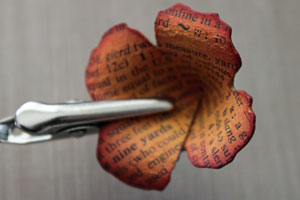
  10. and four petaled flowers.

  11. Step 8

    Roll the right petal of the two petal piece you cut down away from the printed side and apply adhesive on the right edge.
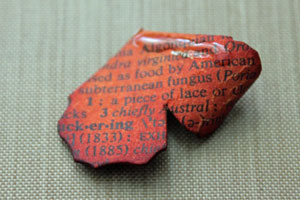
  12. Step 9

    Start from the left side and roll the piece like an ice cream cone.
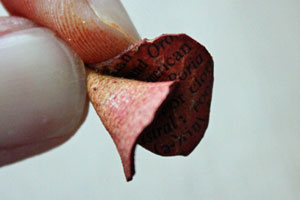
  13. Clamp together with an alligator clip and set aside to dry.
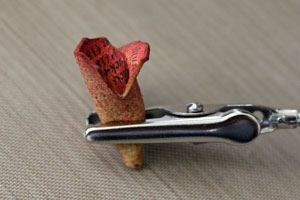
  14. Step 10

    Pierce a hole through the base of the two petal flower cone.
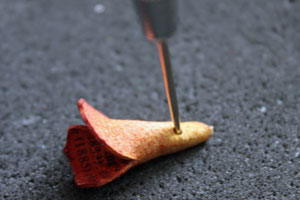
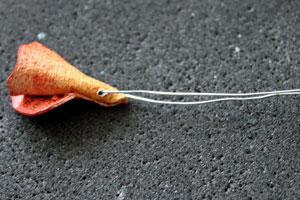
  15. Thread a piece of wire through the hole and center it. Even out the wire ends and fold them together.

    Hint:
    This wire will help you attach the flower to your project.
  16. Step 11

    Cut a hole in the bottom of the three petal cone.
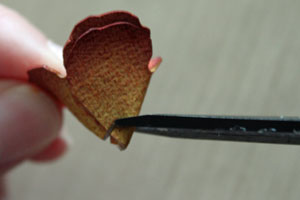
  17. Repeat with the four and five petal flower sections.
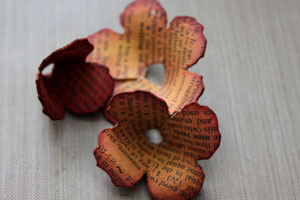
  18. Step 12

    Apply adhesive to the inside of the three petal flower section at the bottom.
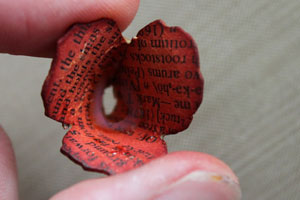
  19. Slide the two petal piece inside it and adhere. The end of the smaller piece will stick out through the hole.
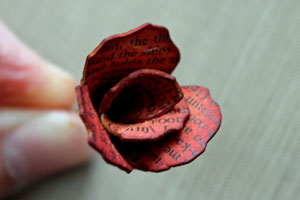
  20. Step 13

    Apply adhesive to the bottom of the four petal cone.
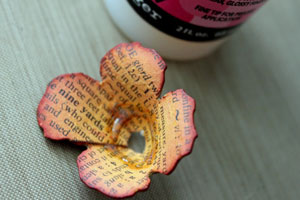
  21. Thread the three petal cone through it.
  22. Step 14

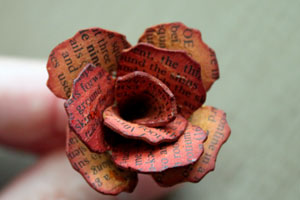
    Apply adhesive in the center of the five petal flower.
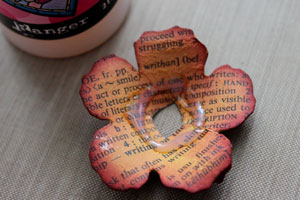
  23. Adhere the smaller flower to it.

  24. Step 15

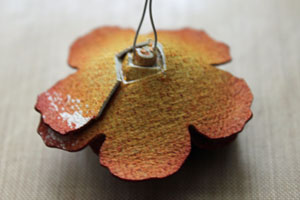
    Turn the flower over and move the wire ends to one side. Cut the end off of the smallest cone.
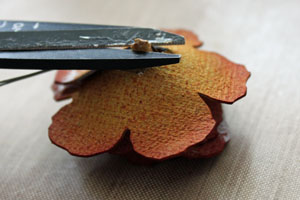
  25. This will help the flower sit flat on your project.
  26. Step 16

    Roll the end of the remaining single petal and cut off the tip.
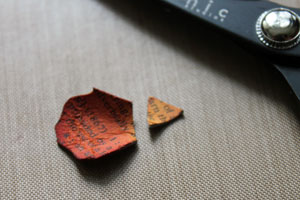
  27. Step 17

    Apply adhesive in the center of the flower.
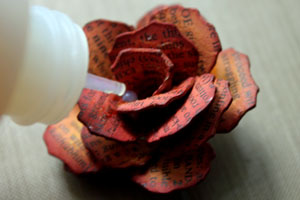
  28. Roll the last petal and slide it into the center of the flower, and your flower is finished
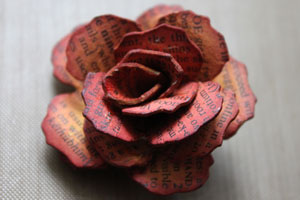
  29. Step 18

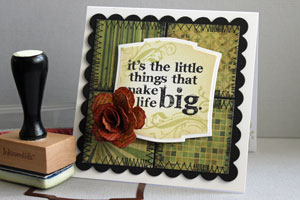
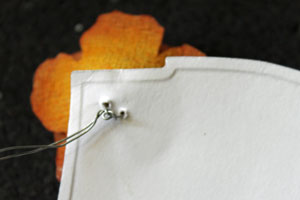
    Pierce two small holes where you want to attach the flower to your project.
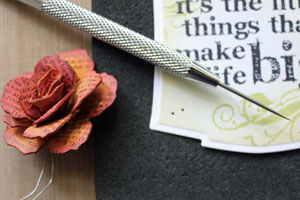
  30. Step 19

    Thread the wire ends through the holes.
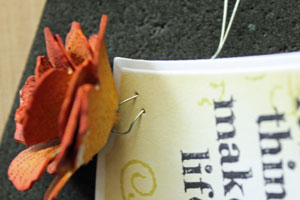
  31. Turn your cardstock over and tie or twist your wire to secure the flower.
  32. Step 20

    Finish your project.

Video!

Variations

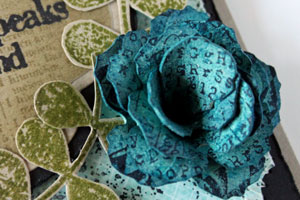
  1. Stamp the Petals
    Stamp directly on the paper flowers instead of adding dictionary pages.

    Add more texture
    Emboss the paper with embossing folders before cutting out the flowers for added texture.
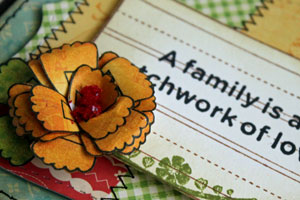
  2. Alternative Base
    Use patterned paper or colored cardstock to make the flowers.
Your Turn

You've seen the tutorial, now you try it! We've got a section of the gallery set aside for Dimensional Flowers. Try this technique, then upload your artwork to the gallery. Show us your creations!

***Please note - Internet Explorer/Edge is not a supported browser, and will not allow you to see the videos. Please use Chrome, Firefox or Safari to view our tutorial videos.

Questions and Comments

We'd love to get your feedback or questions. Leave your comment below.

I've seen the tutorial, called "3-Version Rose" by Lisa Gregory before and your tutorial shows more detail I needed to know to get started!! Thank you so much, Beate!!
Makiko Jones  |  Wed May 5, 2010 at 10:31 AM
Super tutorial. I watched it several times. I can't wait to do one. Thank you!
Vi  |  Wed May 5, 2010 at 10:47 AM
What an exciting tutorial to add to fun things to do with paper. I think this would make a fabulous vase of flowers
Lynne Ingram  |  Wed May 5, 2010 at 12:01 PM
This is such a great technique! Ever since I saw this on Beate's blog, I've been making them left and right!
Julz  |  Wed May 5, 2010 at 1:14 PM
Wow! Great tutorial. Very clear. I can't wait to make them. Thanks
Jacki  |  Wed May 5, 2010 at 3:18 PM
The only punch / flower die I had available at the time to use was my 5 petal extra large fancy punch from stampin up and my rose turned out beautiful! Thank you so much for this tutorial!
Shawnie_B  |  Wed May 5, 2010 at 4:56 PM
I am so impressed! These flowers are really extraordinary!!! smile
Debby Dugger  |  Wed May 5, 2010 at 8:06 PM
Thanks for the tut. I have already made these flowers but couldn't figure out how to get them to stay on my card. Now after watching your tutorial I certainly will put them on properly. Thanks. I used card stock for the flowers and they turned out wonderful.
Leslie Loutit  |  Wed May 5, 2010 at 9:02 PM
Thanx Beate and Gin for the info.. Can't wait to find the product and try it out!
Margie  |  Wed May 5, 2010 at 10:07 PM
This is a cool project, but what is grunge paper and where would I get it?
Diana Upton  |  Wed May 5, 2010 at 11:57 PM
This is gorgeous!! I don't quite know the texture of grunge paper though... could someone tell me what it is like? I could then use some local substitutes...
Smita  |  Thu May 6, 2010 at 4:19 AM
Thank you for showing the beautiful flower and how to do it , I look forward to getting your tutorial each week and have done most of them looking forward to next time
Frances  |  Thu May 6, 2010 at 6:02 AM
What a fabulous tutorial, Beate! You are the best! And I love these flowers -- I can see lots of ways to use them! Gotta get some grunge paper!
CherylQuilts  |  Fri May 7, 2010 at 8:06 AM
Thanks for motorvating(sp?) me!!! I can't wait to try this!!!Happy Mothers Day! Ines
4 Cats Lady (Ines  |  Sat May 8, 2010 at 6:12 AM
What is grunge paper? And how do I view the answer?
Julie E.
Juliann  |  Tue May 11, 2010 at 11:53 AM
When I saw this last week, for some reason, I didn't pay any attention to it. Today, I decided to look at the tutorial and I just think it is really fantastic! I wonder if you have to use Grunge paper. I have some hand-made paper that I might try. Thanks for sharing this (and all) wonderful techniques!
Barbara  |  Wed May 12, 2010 at 7:57 PM
Great project, but I didn't understand not to throw out the one-petal and two-petal flowers which were originally removed! I successfully made the flower, but had to cut out another flower to replace those petals which went out with the garbage...
Valerie  |  Thu May 13, 2010 at 6:29 AM
Very nice directions. I to wondered about grunge paper. Plan on trying this . My question is how do you send a card like this through the mail? I'm all about sharing my cards with friends & family. Thanks for sharing.
Ruth Overway  |  Thu May 13, 2010 at 1:46 PM
Grunge paper is flexible material, sturdier then cardstock and paper. It's from Tim Holtz Idea-ology line. Type grunge paper into your search engine and you will find several online places that sell it.

Ruth,
you can't send the card in a regular envelope. I would send it in a small box with a gift or hand the card to someone. It will be to bulky to mail in a regular envelope.

Hugs and smiles
beate  |  Thu May 13, 2010 at 4:25 PM
This is the BEST tutorial I've seen on how to make these flowers. I have to try it again now!!
Carlene  |  Sun May 16, 2010 at 3:25 PM

Page 2 of 3 pages  <  1 2 3 >

You need to be logged in to comment

GET OUR NEWSLETTER


Splitcoaststampers's privacy policy