Die Cut Masking
by Dina Kowal
Use die cut painter's tape for precise masking techniques.
Supplies

- Dies (My Favorite Things By the Letters die set used here)
- Painters tape, masking film or shelf liner (FrogTape Delicate Surface Painter's Tape and Con-Tact Brand Self-Adhesive Shelf Liner used here)
- Cardstock or watercolor paper
- Release sheet from label paper or other paper backing from adhesive paper
- Coloring medium of choice (PanPastels and QoR watercolors used here)
- Fixative for dry color media (Krylon Workable Fixatif used here)
- Die cutting machine
- Post-It Notes
- Craft knife
- Other supplies as needed to complete the project (used here: MISTI, Stamps (Impression Obsession H9396 French Script, E13268 Grunge Hearts Background, C13305 Expect Miracles; Sweet ‘n Sassy Stamps You clear set (retired), Sizzix Awareness Ribbon steel rule die, Scor-Pal, PanPastel Sofft tool, Versamark ink, Versafine Onyx Black ink)
Step-by-Step
-
Step 1
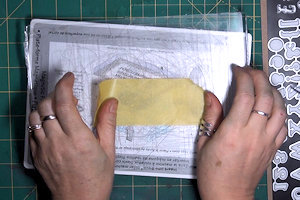
If working with a dry coloring medium, apply painter’s tape or other adhesive masking paper directly to the cutting plate of your die cutting machine. (For water-based media see below.)
-
Arrange dies on the tape, and die cut as usual. (FrogTape was used in this sample.)

-
Step 2
Remove the excess tape around the die cut shapes.

-
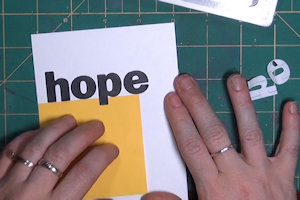
Step 3
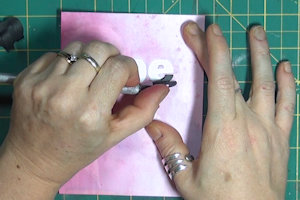
Carefully arrange the masks on your project surface.
TIP:
To align letters, use the edge of a sticky note as a base line.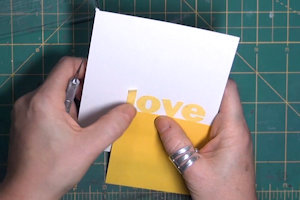
-
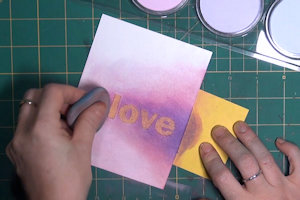
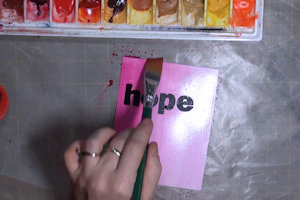
Step 4
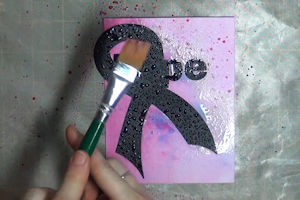
Apply a dry color medium over and around the tape. PanPastels were used for this sample. Sponged inks or chalks could also be used.
-
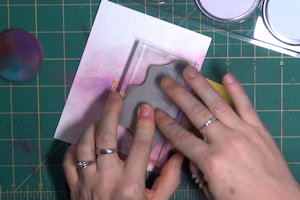
Step 5
If you wish, add some stamping over the masked area.
-
TIP:
If using PanPastels or chalks, stamp with Versamark ink, then reapply the medium lightly to highlight the stamped images.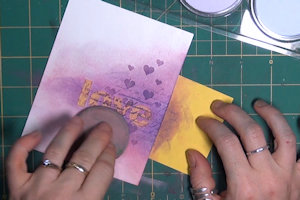
-
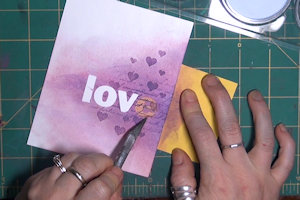
Step 6
Carefully remove the tape using a craft knife. Use an eraser to remove any stray color. Use a spray fixative to prevent smearing.
-
Add any finishing touches as desired.
-
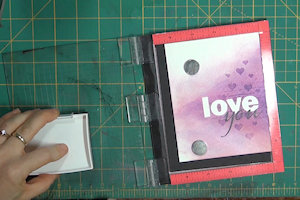
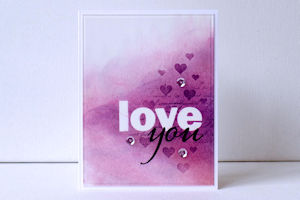
Step 7
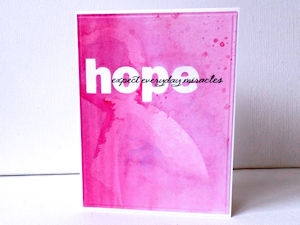
Use the panel to complete a card or other project.
-
Step 8
If using a wet medium, apply painter’s tape to a release sheet or other sticker backing before die cutting. This will prevent any shreds of paper from the cutting plate from sticking to the tape – these will compromise a good seal of the tape to the watercolor paper. Shelf liner was used for the sample here.
Arrange dies on the tape, and die cut as usual.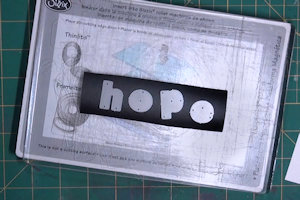
-
Step 9
Align the die cuts on watercolor paper as above. (Smooth hot press paper will work best for this technique.)
-
Run the panel through the die cutting machine again to secure the die cut pieces.
TIP:
Lay a sheet of tissue paper or text weight paper over the panel to prevent etching in the watercolor paper from the cutting plate’s surface.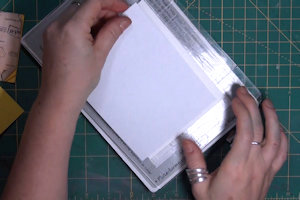
-
Step 10
Paint or spray colored mists over the panel, either with full coverage of the panel or in a loose shape around the masking.
-
If desired, a second layer of masking can be added over the first, after the panel has dried completely. The second layer will appear to be behind the first layer when the masks are removed.
-
Step 11
After the panel has dried completely, remove the tape to reveal the masked area. Leave the masked area white or add color and/or shading as desired.
-
Step 12
Use the panel to complete a card or other project.
Video!
Variations
-
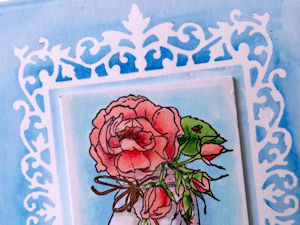
Try these techniques with other shape or frame dies.
-
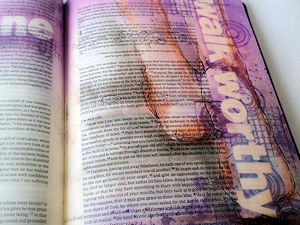
Try masking in an art journal or altered book – it’s a great way to highlight a key word or thought.
Your Turn
You've seen the tutorial, now you try it! We've got a section of the gallery set aside for Die Cut Masking. Try this technique, then upload your artwork to the gallery. Show us your creations!
***Please note - Internet Explorer/Edge is not a supported browser, and will not allow you to see the videos. Please use Chrome, Firefox or Safari to view our tutorial videos.

Questions and Comments
We'd love to get your feedback or questions. Leave your comment below.
This is a gorgeous card! I love that you created this while I watched and even though it looks easy enough (I haven't tried it yet), it is a stunning card that I would love to give someone!
Page 1 of 2 pages 1 2 >