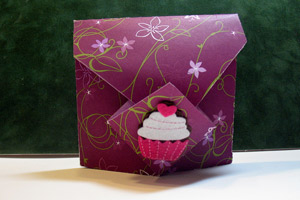
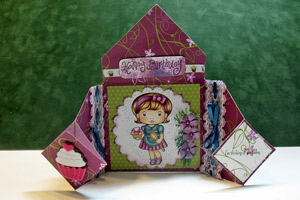
Diamond Origami Fold Card

by Patricia St. Martin

Create a unique card fold.

Supplies
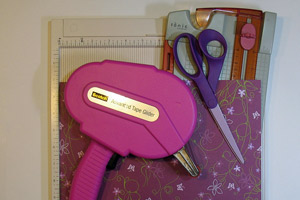
  • One Sheet of 11" x 11" patterned paper

  • Scoring tool

  • Paper cutter

  • Adhesive

Step-by-Step

  1. Step 1

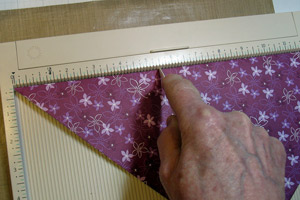
    Place your patterned paper on your scoring board on the left side and fold diagonally and crease the fold.
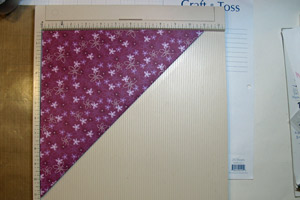
  2. Step 2

    Place the long edge of the paper to the top side of the scoring board. Score at 3 and 5 1/2". Flip the paper over and score again 3" and 5 1/2" .
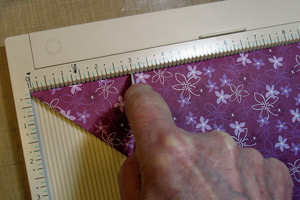
  3. Step 3

    Turn your paper with the long end on the right side and the triangle pointing to the left side of the soaring board. Score at the 3 1/2" mark.
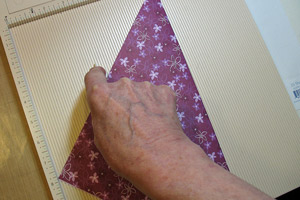
  4. Step 4

    Folding all the scored marks toward the inside of the card. Cut the two ends of the triangle off.
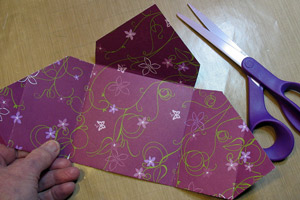
  5. Step 5

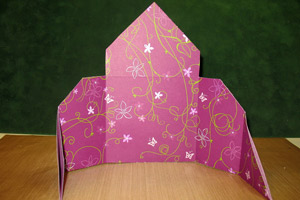
    When you open the card it will look like this.
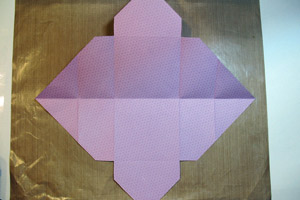
  6. Step 6

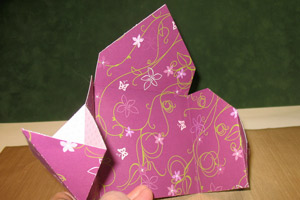
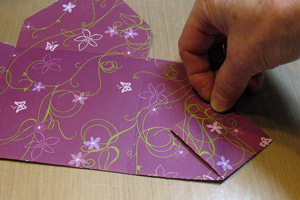
    Laying the card down. You are going to make the Origami fold. Put your fingers into the fold on the right side and place to finger at the center and press down them score. This is a basic origami fold. Do the same thing on the left side.
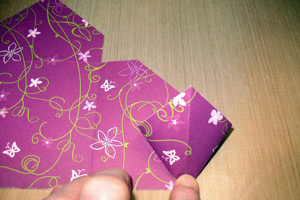
  7. Step 7

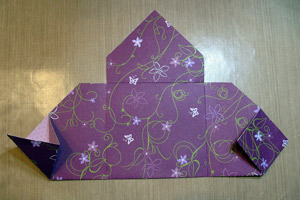
    With both ends folded this is what you will have.
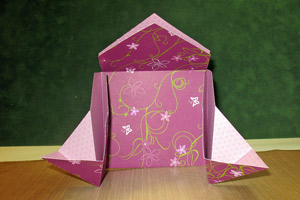
  8. Step 8

    You need to tape or glue the inside of your card.

    Hint:
    REMEMBER DO NOT PUT ANY GLUE ON THE LEFT ORIGAMI FOLD.
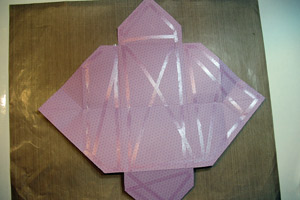
  9. Step 9

    As you are folding the two side together HOLD THE RIGHT ORIGAMI FOLD OPEN WITH YOUR RIGHT HAND SO IT WILL NOT GLUE FLAT AT THIS POINT.
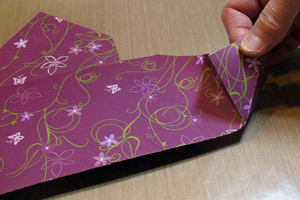
  10. Step 10

    Once you have taped together the card you can now press down the origami fold.
  11. Step 11

    Your card will look like this:
  12. Step 12

    Right side view:

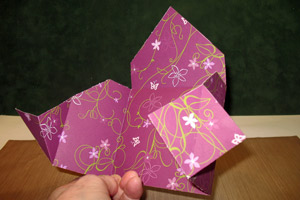
  13. Left side view.

  14. Step 13

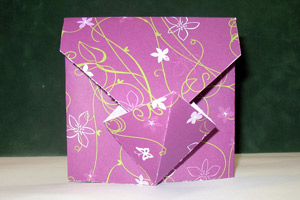
    The front triangle folds into the left origami fold. You have your envelope and card all in one. Finished view.
  15. Step 14

    Decorate the front

  16. and the inside of the card.

Video!

Your Turn

You've seen the tutorial, now you try it! We've got a section of the gallery set aside for Diamond Origami Fold Card. Try this technique, then upload your artwork to the gallery. Show us your creations!

***Please note - Internet Explorer/Edge is not a supported browser, and will not allow you to see the videos. Please use Chrome, Firefox or Safari to view our tutorial videos.

Questions and Comments

We'd love to get your feedback or questions. Leave your comment below.

wow Patricia - you took an amazingly beautiful card with a fold that looks very challenging and with such clear instructions, you make it look completely do-able. I love it. TFS
Meg McAlister  |  Wed Apr 3, 2013 at 3:16 AM
Absolutely fantastic!! MUST try this card! Thank you for being so creative and sharing!
Carol Byrne  |  Wed Apr 3, 2013 at 4:21 AM
Very nice will try for someone special
Diane O'Grady  |  Wed Apr 3, 2013 at 5:04 AM
Beautiful project Patricia. You make it look so easy! I shall give it a try. smile)
Karen Shirey  |  Wed Apr 3, 2013 at 5:30 AM
Wonderful tutorial - very clear instructions. I will definitely try this one! Thank you so very much.
Vi  |  Wed Apr 3, 2013 at 5:46 AM
I noticed in step 3 it says to score at 3 inches, it should be 3.5 inches. smile
lori h  |  Wed Apr 3, 2013 at 6:20 AM
Thanks Patricia for taking the time to make this video, and showing how to add the adhesive.
You made a difficult card look easy, thank you!
Have a great day!
Kris  |  Wed Apr 3, 2013 at 6:38 AM
This is the most wonderful site...I love the tutorials and especially the videos. Thank you for sharing all this knowledge and inspiration!
Lois Latus  |  Wed Apr 3, 2013 at 6:46 AM
Hi, I will volunteer to proof you test before you post it.
Char
Char  |  Wed Apr 3, 2013 at 7:10 AM
Thank you so much for the idea. The video was great. Thanks for all the tips/tricks to make the successfully.
kab  |  Wed Apr 3, 2013 at 7:11 AM
Fantastic card fold! TFS
Ellen Taylor  |  Wed Apr 3, 2013 at 7:26 AM
LOVE this card. Thank you so much for the wonderful video how-to!
Priss  |  Wed Apr 3, 2013 at 7:28 AM
Great job Pat! I was so surprised to see you did a video- so happy for you girl. Thanks for sharing and an early Happy Birthday sweetie
Dawn Lotharius  |  Wed Apr 3, 2013 at 7:52 AM
Love it!!!! Thanks so much for demo-ing it. It's a lot easier than I thought!
May S.  |  Wed Apr 3, 2013 at 7:57 AM
in the written directions, it says to use a 12x12 sheet, but the folds don't align right. It works with the video directions of using an 11x11 square.
Jen Hutchins  |  Wed Apr 3, 2013 at 8:14 AM
I don't remember where I first came across this design, but I absolutely loved it. I made about 100 Christmas cards one year with it. It was such a fun and unique card to send out!
Kristy Tyra  |  Wed Apr 3, 2013 at 8:21 AM
Love it!! Will be trying this soon. Thanks so much for the awesome tutorial!
Jenn  |  Wed Apr 3, 2013 at 8:36 AM
It's cards like this that makes me happy I keep all kinds of 'ugly' paper so I can try new techniques. This is going to be fun to try.
Kelley  |  Wed Apr 3, 2013 at 8:50 AM
Thank you so much for the great tutorial, Patricia. especially for taking the time to make the video. What a cute card!
Mary Beth  |  Wed Apr 3, 2013 at 9:14 AM
Hi Patricia, I love the card and wanted to try making it right away. I thought I'd let you know a couple of tiny scoring corrections for other SCS members. In the written instructions it doesn't tell you to cut the paper down to 11 x 11 (but the video does). The score measurements should be 3 1/4 and 5 1/2 NOT 3 x 5 1/2 (the flaps don't line up). Next in the video it tells you to put the point at the left of the score board and to score at 3 1/2 but the written instructions say to score at 3 ( it should be 3 1/2 like the video says). Just sharing so you can make corrections. Thanks again. Sue
Sue Revill  |  Wed Apr 3, 2013 at 9:16 AM

Page 1 of 3 pages  1 2 3 >

You need to be logged in to comment

GET OUR NEWSLETTER


Splitcoaststampers's privacy policy