Decorative Corner Card
by Laura Lipe
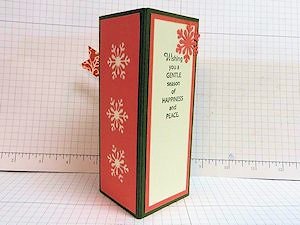
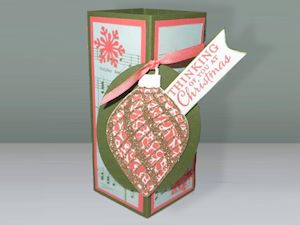
The front panel stands out from this card when displayed.
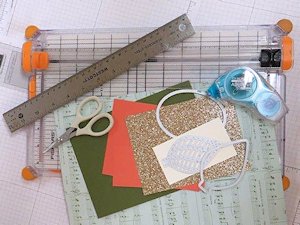
Supplies
- Cardstock for base , cut to 5 1/2" x 8 1/2"
- Cardstock, same as above, cut to 1" x 5 1/2"
- Two 1" circles cut or punched from cardstock above
- Coordinating cardstock for layering – 4 pieces cut to 5 1/4" x 1 7/8"
- Patterned and neutral papers for layering – 4 pieces cut to 5" x 1 5/8"
- Die cut shape or label to use as base for smaller images
- Images to decorate the corner piece – die cut or stamped and fussy cut
- Sentiment stamp (opt.)
- Double sided tape
- Paper trimmer
- Scoring tool
Step-by-Step
-
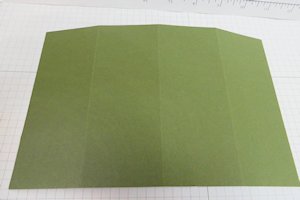
Step 1
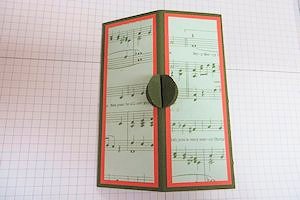
Along the long side of the card base, score at 2 1/8", 4 1/4", and 6 3/8". Fold all as mountain folds.
-
Step 2
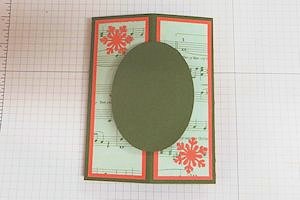
Add layering panels of cardstock and patterned paper to the panels of the base.
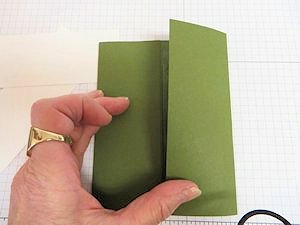
Score the 5 1/2" x 1" strip of cardstock in half lengthwise at 1/2". Glue one side of the 1” piece to one short side of the card from the back side, so that the card will stand up as a tall box shape.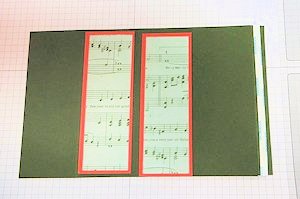
-
Add adhesive to the other side of the strip. Fold the card in a gate fold to the center back of the card, and close the card to adhere the seam.
-
Step 3
Stamp and decorate the back pieces or add a handwritten message if desired. Glue them to the two back panels.
-
Step 4
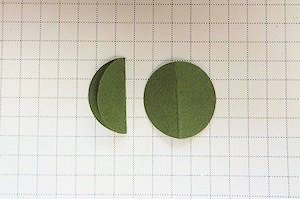
Score and fold both 1" circles in half.
-
Apply glue to only one side of each circle and affix them to the front corner with folds facing each other and aligned with the center fold of the card.
-
Step 5
Put glue on the circle tabs that are facing out, and adhere a large die cut shape or label as a base for smaller die cut or stamped images.
-
Adhere die cut or stamped images to the panel. When you stand the card up like a square, they will stand out from the corner.
Decorate the back as desired.
NOTE:
If desired, more circle hinges can be added to include additional sentiments, images, etc.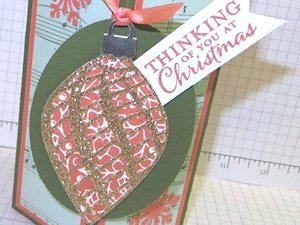
-
Step 6
Decorate and complete the card. The card folds flat for mailing in an A2 envelope.
Video!
Your Turn
You've seen the tutorial, now you try it! We've got a section of the gallery set aside for Decorative Corner Card. Try this technique, then upload your artwork to the gallery. Show us your creations!
***Please note - Internet Explorer/Edge is not a supported browser, and will not allow you to see the videos. Please use Chrome, Firefox or Safari to view our tutorial videos.

Questions and Comments
We'd love to get your feedback or questions. Leave your comment below.
Page 2 of 2 pages < 1 2