Date Night Kit
by Janelle Stollfus
Create a darling date night kit.
Supplies
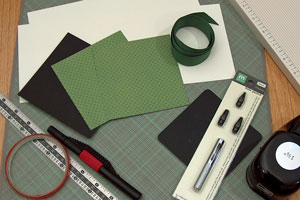
- 5 7/8" x 10" piece of cardstock for CD sleeve
- 5" x 12" piece of cardstock for kit cover
- Two pieces of 4 1/2" x 4 1/2" cardstock or patterned paper
- A 4 3/4" square piece of cardstock or patterned paper
- One yard of Wide ribbon
- Scoring tool, (Martha Stewart Score Board used here)
- Ruler and grid ruler (not shown)
- Tacky Tape, or other strong adhesive
- Eyelet hole punch with smallest punch
- 1/4 “ hole punch (not shown)
- Hobby knife
- Circle punch
Step-by-Step
-
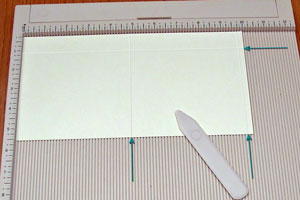
Step 1
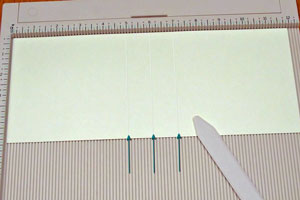
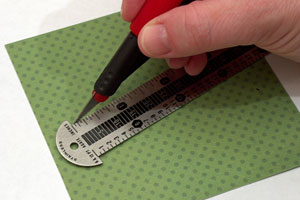
Score the 5 7/8" x 10" piece of cardstock across the short side at 4 7/8" and 9 3/4". There will be a 1/4" tab at the end.
Rotate 90 degrees to the left and score at 1" on the left side.
-
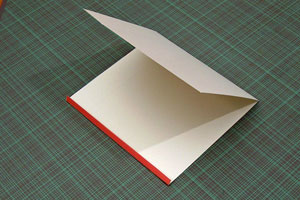
Step 2
Add adhesive to the tab and fold to adhere to the other end.
-
Use a circle punch in the center of the open end to make a notch (about a 1/3 of the punch should be used.)
This will be your CD sleeve.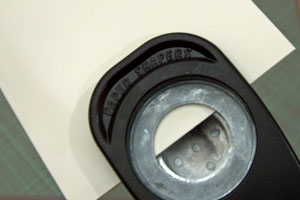
-
Step 3
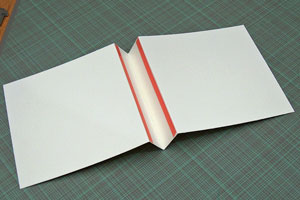
Score the 5 x 12" piece of cardstock along the short side at 5 ", 6" and 7".
-
Fold score lines so the center score is a valley and lay flat again. Add adhesive tape along the inside of the 5" and 7" score lines.
-
Step 4
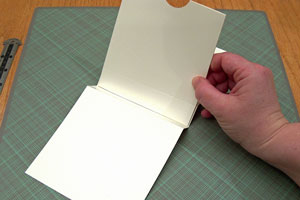
Place the 1"scored edge of the CD sleeve in the valley fold of the cover. Adhere together and set aside.
-
Step 5
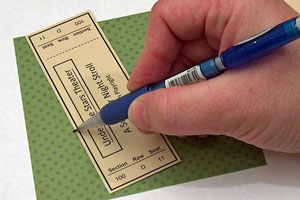
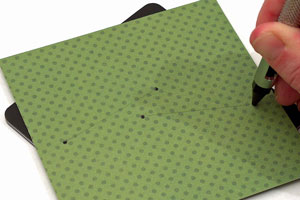
On the first 4 1/2" square piece of patterned paper, mark in pencil on the front where you want to cut slits to hold the tickets.
-
Or use these coordinates.
For a 2" x 3 1/4" movie ticket, you can use these measurements. Measuring from the left (L) then up from the bottom (B) mark dots for;
Left ticket slit
(L) 1/2" (B) 2 1/4” and
(L) 2 1/2", (B) 2 3/4"
Right Ticket slit
(L) 2" (B) 2 1/4" and
(L) 4" (B) 1 3/4"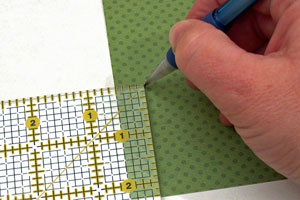
-
Step 6
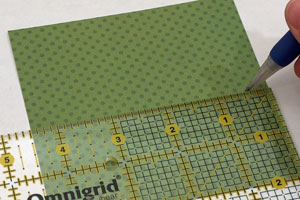
Cut between your marked dots with a hobby knife.
-
Step 7
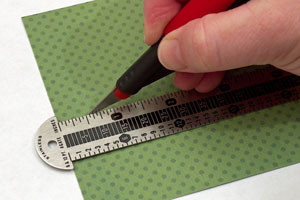
On the other 4 1/2" square piece of patterned paper, measure a 3 1/2" slit about 2" from the bottom starting at 1/2" from the left side and ending 1/2" from the right side of the paper.
-
Cut with a hobby knife.
-
Step 8 (Optional)
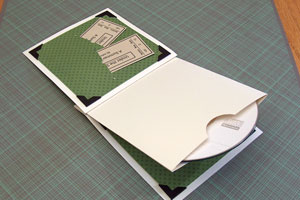
Add stress relief points at each end of the slits with a small eyelet punch for the ticket pockets (shown) and the gift card pocket.
-
For easy access into the pockets, create a half circle dip on the paper below the slit for the ticket pockets and the gift card pocket (shown).
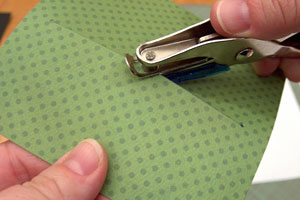
-
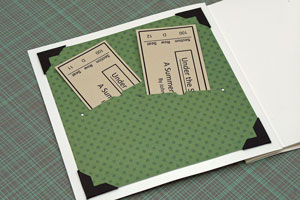
Step 9
Adhere ticket and gift card papers to the inside front and back cover.
-
-
Step 10
Insert a special music CD or DVD into the CD sleeve.
-
Step 11
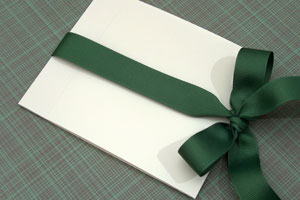
Wrap ribbon around the spine of the cover and tie a bow at the opening of the kit.
-
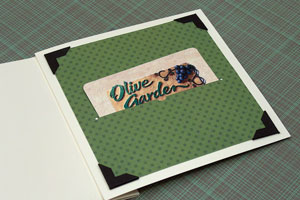
Step 12
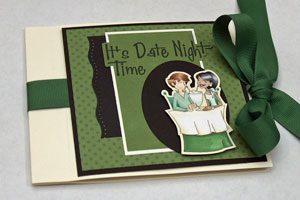
Create a kit front with the 4 3/4"square of patterned paper and adhere to the front of the cover over the ribbon.
Video!
Your Turn
You've seen the tutorial, now you try it! We've got a section of the gallery set aside for Date Night Kit. Try this technique, then upload your artwork to the gallery. Show us your creations!
***Please note - Internet Explorer/Edge is not a supported browser, and will not allow you to see the videos. Please use Chrome, Firefox or Safari to view our tutorial videos.

Questions and Comments
We'd love to get your feedback or questions. Leave your comment below.
I bought my super roll of tacky tape from i{heart}papers. I've seen it at other online stores, but the names don't come to mind. It's called i {stick} papers or ISP at i{heart}papers.
I can't live without it as my craft room in summer is so hot mono or SNAIL tape just peels apart.
Page 2 of 2 pages < 1 2