Cutting Shapes with Nestabilities™ Die templates
by Lori Craig
Use Nestabilities™ die cut templates to cut shapes from cardstock.
Supplies

- Nestabilities™ Die
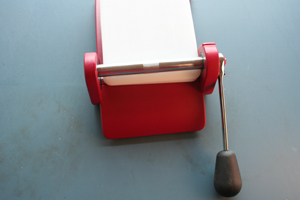
- Die Cut Machine, Wizard™ used here
- Cardstock
- Master Embossing Mat
- Magnetic Spacer Mat
Step-by-Step
-
Step 1
Starting with Master Emboss Mat, stack from bottom to top:
• Master Emboss Mat
• Cardstock to be cut
• Nestabilities die (blade down)
• Magnestic Spacer Mat
• 2nd Master Emboss Mat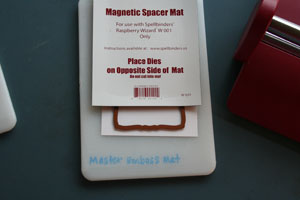
-
Step 2
With the long portion (with the logo) of the Wizard machine to the back and the black balled handle to the front, slip ‘sandwich’ into the back of the machine, pushing firmly.
-
Step 3
Holding the back corner of the sandwich, raise and lower the handle repeatedly to push sandwich through machine. You will hear a ratchet sound.
Tip:
When the sandwich is almost entirely through the Wizard, be prepared to ‘catch it’ as it exits the short side of the machine.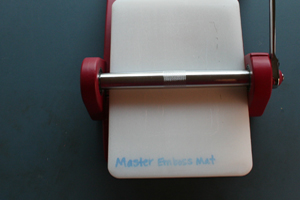
-
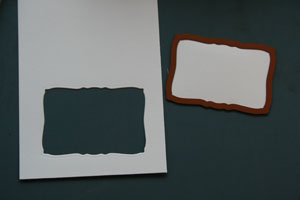
Step 4
Removed die and cut shape from the original piece of cardstock without removing the cardstock from the die.
-
Step 5
Layer bottom to top:
• Master Emboss Mat
• Rubber Embossing Mat
• Cut cardstock with die, blade down into the rubber embossing mat
• 2nd Master Emboss Mat
Repeat steps two and three using this sandwich recipe.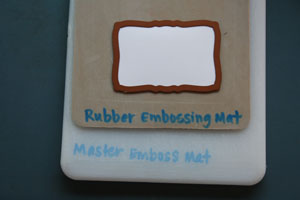
-
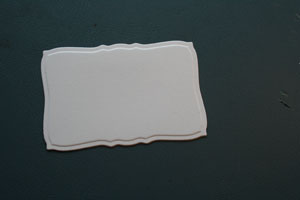
Crisp embossed-edge die cut to use for finished card.
-
Step 6
Use stamps, inks and embellishments as desired to finish card.
Option:
Use air gun or air art tool to add color to the raised center before removing the metal die from embossed edge.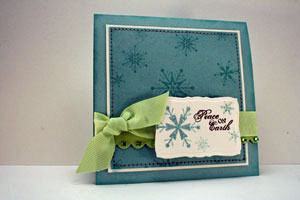
Variations
Using a different die-cutting system?
You can find a comprehensive download that provides sandwich recipes for most major die-cutting machines on the market here.
Check this tutorial to learn how to use your Nestabilities™ Die templates to emboss shapes into your cardstock.

Questions and Comments
We'd love to get your feedback or questions. Leave your comment below.
Yes, there is a trick. Put a piece of wax paper between the die and your cardstock when cutting intricate dies. It will help you pop out your die cuts without any problems.
Hugs and smiles
Page 2 of 2 pages < 1 2