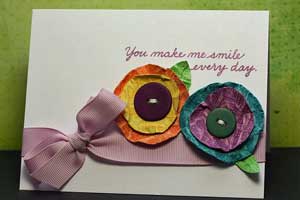
Crinkled Cardstock

by Ashley Cannon Newell

Use simple sanding tools to give your cardstock an antique look.

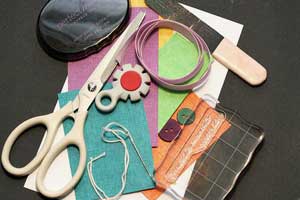
Supplies
Step-by-Step

  1. Step 1

    Cut cardstock into the shape you need.

  2. Step 2

    Crinkle cardstock in your hand. Unfold and repeat until the cardstock looks aged/crinkled enough.

  3. If you have more then one cardstock piece you want antique, crinkle your other pieces.

  4. Step 3

    Unfold cardstock pieces.

  5. Step 4 (Optional)

    If you are using cardstock with a different colored core, distress cardstock crinkles with a sanding tool to show texture.

    Variation:
    Try sponging the crinkles instead.

  6. Repeat with all of your cardstock pieces.

  7. Step 5

    Finish your card.

Questions and Comments

We'd love to get your feedback or questions. Leave your comment below.

Beautifully done, Ashley!
Debbie Olson  |  Wed May 27, 2009 at 11:24 AM
Me encanta, enhorabuena, como algo tan sencillo puede decorar tan bien. �Qu� imaginaci�n!
Marimer  |  Fri May 29, 2009 at 1:16 AM
Fabulously pretty!!
Bonnie Sharp  |  Thu Jun 11, 2009 at 4:33 AM
siple and great idea, tfs
antje  |  Fri Jun 12, 2009 at 2:35 AM
i just love the look of these crinkly imperfect flowers that cost far to much to purchase in the lss . . . thanx for showing us how to make them ourselves!
{pam}  |  Sat Jun 13, 2009 at 10:44 AM
Pretty and easy flowers. Great easy to understand tutorial. Thanks Ashley
Darci  |  Thu Jun 18, 2009 at 2:38 AM
Absolutely darling. I love your instructions and truly love your work. You are an inspiration!
Jeanne Kuhlman  |  Mon Jun 22, 2009 at 6:16 PM
What a neat idea! And a new use for buttons, too. Yay!
Thank you!
Kim  |  Tue Jun 23, 2009 at 6:18 AM
Great work Ashley and great name too - my maiden name was Newell!
Dorothy  |  Tue Jun 23, 2009 at 8:22 PM
I love Core'dinations!! With this technique, I took it one step further and slightly misted the paper after crumpling and sanding. Really aged the paper. Thanks for your idea Ashley.
Sandy At Olde Tyme  |  Sat Jul 11, 2009 at 10:46 AM
Great tutorial. Thanks

Val (Brazil)

www.crieartezzanato.blogspot.com
Val  |  Sun Nov 7, 2010 at 6:46 PM
I have this card stock very excited to try this. Love your idea!!
Donna Sutton  |  Thu Feb 3, 2011 at 12:34 AM
Wow! What a cute idea!
Thank's
Pat  |  Tue Feb 15, 2011 at 5:56 PM
I just made 2 cards. They are Beautiful. The Flowers were so easy to male. I plan to make more. I would like to add the flowers to other projects. Thank you, Jane
Jane Livingston  |  Thu Mar 10, 2011 at 6:07 PM
i like the information... all the pictures looks well..
Send Flowers Pakistan  |  Fri Apr 27, 2012 at 1:25 AM
Beautiful! Love it when I can have the expensive look for just a tiny bit of labor, and also alleviate my guilt of throwing away small scraps. Think I will just punch the shapes and save to have ready when needed from now on. Already have enough butterflies, small flowers and leaves prepunched. Thank you.
BRENDA MITCHELL  |  Wed Sep 16, 2015 at 8:36 AM
Great tutorial! I would think dampening the cardstock with a spritz or 2 of water before crinkling it would help, since it softens the fibers of the paper. I'll have to give this a try! smile
Andrea La Vigne  |  Tue Apr 24, 2018 at 10:59 AM

Page 1 of 1 pages

You need to be logged in to comment

GET OUR NEWSLETTER


Splitcoaststampers's privacy policy