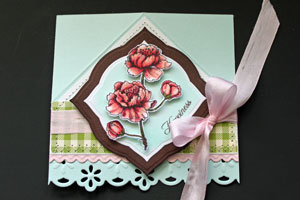
Corner Bookmark
by Beate Johns
Create a bookmark to slip over the corner of your book to mark your spot.
Supplies
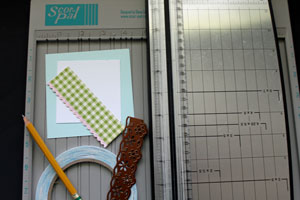
- One 4" x 4" piece of cardstock
- One 2 3/4" x 2 3/4" piece of cardstock
- Scor-Pal™ or other scoring tool
- Paper cutter
- Scor-Tape™ or other strong adhesive
- Borderabilities™,(Eyelet Borderabilities used here) or border punch (optional)
- Stamps, Flourishes Cherry Blossoms used here
- Ink or coloring medium
- Additional cardstock, patterned paper and embellishments to decorate bookmark
Step-by-Step
-
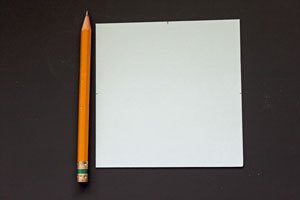
Step 1
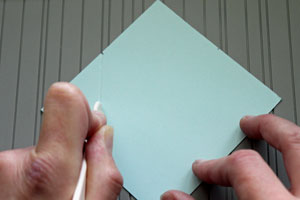
Mark the center of three sides of the 4" cardstock square.
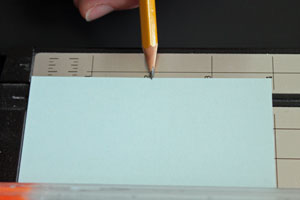
-
Mark the center of two more sides of the square.
-
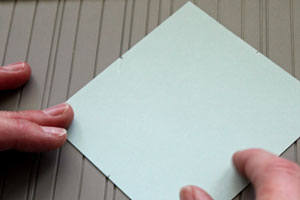
Step 2
Place your cardstock square on your scoring tool so two of the marked spots are aligned in one groove.
-
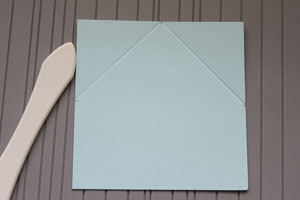
Step 3
Score between the markings.
-
Line up the other two markings and create another diagonal score line.
-
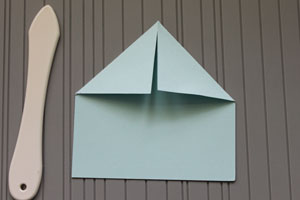
Step 4
Prefold at both score lines.
-
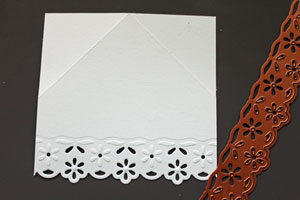
Step 5 (Optional)
Add a decorative border to the unscored side with either Borderabilities™, other dies or punches.
-
Step 6
Line up the 2 3/4" cardstock square diagonally in your paper cutter.
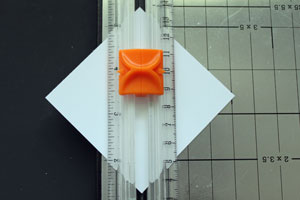
-
Cut the square in half. You will need both triangles.

-
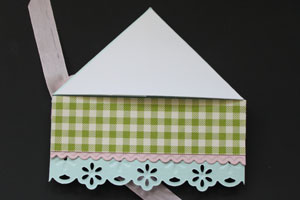
Step 7
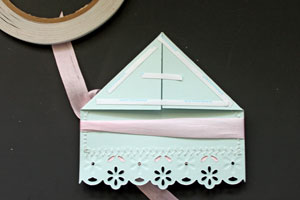
Use one of the triangles on the front of the bookmark and decorate.
-
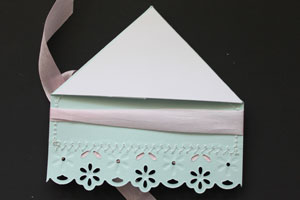
Step 8
Turn the bookmark over, fold your corners back in and apply Scor-Tape™ over them.
-
Adhere your second triangle over the flaps. This will keep your bookmark closed.
-
Step 9 (Optional)
If you used ribbon to tie around your bookmark you might want to cover it up with more cardstock or patterned paper. Otherwise your ribbon might get snagged between the bookmark and the book pages.
-
Step 10
Your corner bookmark is finished.

Video!
Variations
Different size:
You can make your corner bookmark smaller or bigger. Just measure the angled side and cut your second square that size before cutting it in half.
Your Turn
You've seen the tutorial, now you try it! We've got a section of the gallery set aside for Corner Bookmark. Try this technique, then upload your artwork to the gallery. Show us your creations!
***Please note - Internet Explorer/Edge is not a supported browser, and will not allow you to see the videos. Please use Chrome, Firefox or Safari to view our tutorial videos.
 *
*
Questions and Comments
We'd love to get your feedback or questions. Leave your comment below.
Page 3 of 3 pages < 1 2 3