Coloring with Distress Inks
by Yvonne Hagane
Learn how to watercolor with distress inks.
Supplies
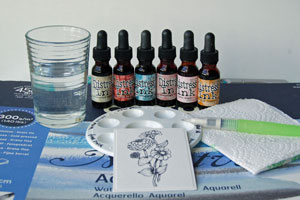
- Water brush, without water
- Watercolor paper
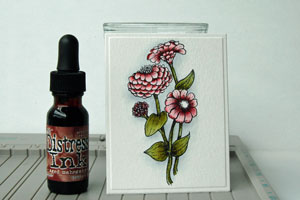
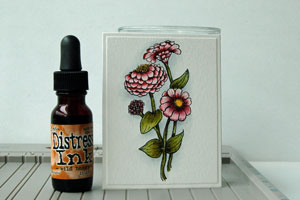
- Distress reinker
- Water
- Waterproof ink (Jet Black Archival ink used here)
- Stamps (Flourishes Zinnias used here)
Step-by-Step
-
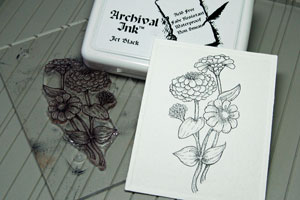
Step 1
Stamp your image on a piece of watercolor paper with waterproof ink.
-
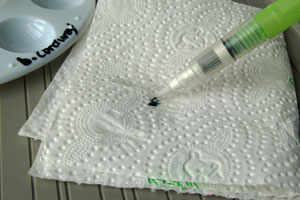
Step 2
Add ink to the moistened waterbrush and wipe off excess ink on a paper towel before you start.
-
Step 3
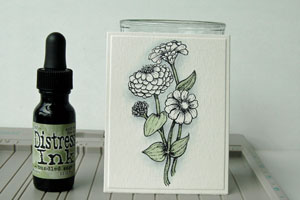
Color the background of your image. Weathered Wood reinker was used here.
-
Step 4
Color the leaves with a light green reinker. Bundled Sage was used here.
-
Step 5
Use a darker color reinker to the areas you want to shade. Peeled Paint reinker was used here. Use a clean, moistened brush to blend the colors together.
Wipe off excess color from the brush with the tissue.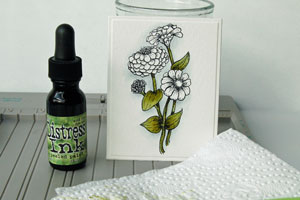
-
Step 6
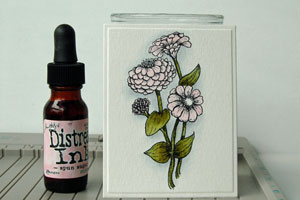
Color the flowers with a light color. Spun Sugar was used here.
-
Step 7
Add a darker color to the parts of the flower that you want to shade. Victorian Velvet was used here.
-
Step 8
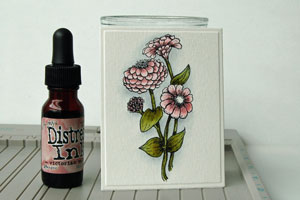
To add even more debth, add an even darker color to the shaded areas of the flowers. Aged Mahogany was used here.
-
Step 9
Add the color to the center of the flowers. Wild Honey was used here.
-
Step 10 (Optional)
For a soft look, sponge a light color around the edges. Antique Linen Distress ink was used here.
-
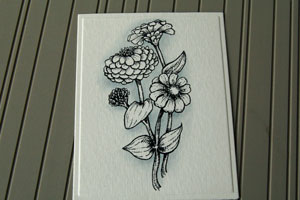
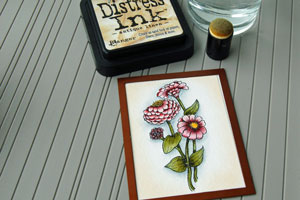
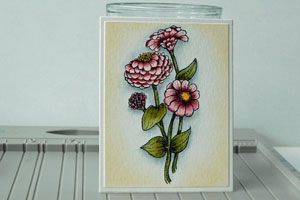
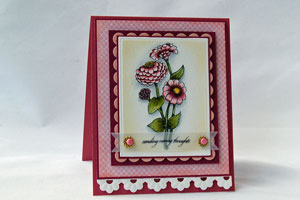
Your colored image is finished.
-
Step 11 (Optional)
Finish your card.
Video!
Your Turn
You've seen the tutorial, now you try it! We've got a section of the gallery set aside for Coloring with Distress Inks. Try this technique, then upload your artwork to the gallery. Show us your creations!
***Please note - Internet Explorer/Edge is not a supported browser, and will not allow you to see the videos. Please use Chrome, Firefox or Safari to view our tutorial videos.

Questions and Comments
We'd love to get your feedback or questions. Leave your comment below.
Thank you for reminding me to get my reinkers out...and to try my waterbrush without water for better control! I love how you show us in detail, the little steps that really make a card shine! For instance, how to shade, how to deepen a color, to start with the background, etc...
Wonderful Tutorial! Thank you so much!
He IS Able!
Traci S.
bise raymonde
bise raymonde
Page 3 of 3 pages < 1 2 3