Coloring with Distress Inks
by Yvonne Hagane
Learn how to watercolor with distress inks.
Supplies
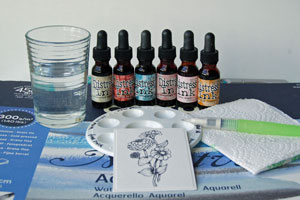
- Water brush, without water
- Watercolor paper
- Distress reinker
- Water
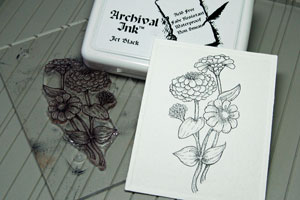
- Waterproof ink (Jet Black Archival ink used here)
- Stamps (Flourishes Zinnias used here)
Step-by-Step
-
Step 1
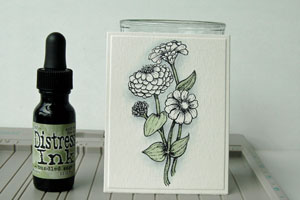
Stamp your image on a piece of watercolor paper with waterproof ink.
-
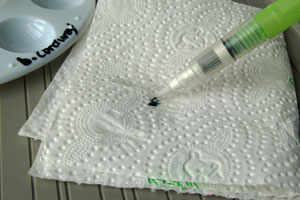
Step 2
Add ink to the moistened waterbrush and wipe off excess ink on a paper towel before you start.
-
Step 3
Color the background of your image. Weathered Wood reinker was used here.
-
Step 4
Color the leaves with a light green reinker. Bundled Sage was used here.
-
Step 5
Use a darker color reinker to the areas you want to shade. Peeled Paint reinker was used here. Use a clean, moistened brush to blend the colors together.
Wipe off excess color from the brush with the tissue.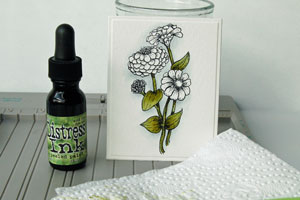
-
Step 6
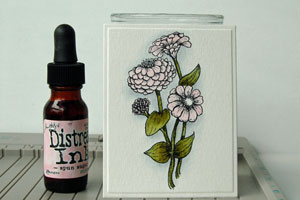
Color the flowers with a light color. Spun Sugar was used here.
-
Step 7
Add a darker color to the parts of the flower that you want to shade. Victorian Velvet was used here.
-
Step 8
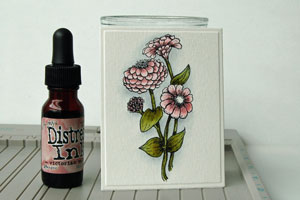
To add even more debth, add an even darker color to the shaded areas of the flowers. Aged Mahogany was used here.
-
Step 9
Add the color to the center of the flowers. Wild Honey was used here.
-
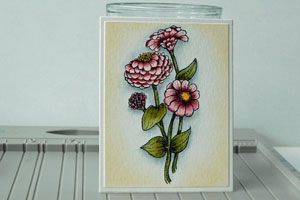
Step 10 (Optional)
For a soft look, sponge a light color around the edges. Antique Linen Distress ink was used here.
-
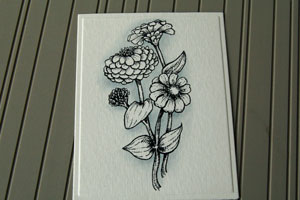
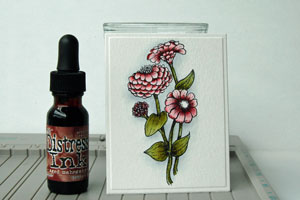
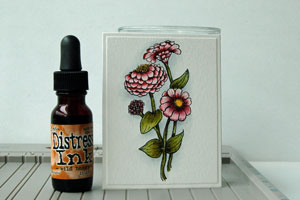
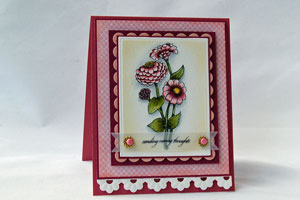
Your colored image is finished.
-
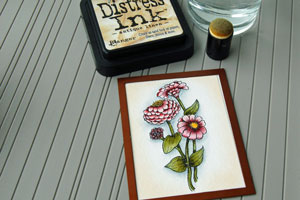
Step 11 (Optional)
Finish your card.
Video!
Your Turn
You've seen the tutorial, now you try it! We've got a section of the gallery set aside for Coloring with Distress Inks. Try this technique, then upload your artwork to the gallery. Show us your creations!
***Please note - Internet Explorer/Edge is not a supported browser, and will not allow you to see the videos. Please use Chrome, Firefox or Safari to view our tutorial videos.

Questions and Comments
We'd love to get your feedback or questions. Leave your comment below.
First, through working with other bloggers who use distess ink coloring, it is better to use the reinkers. You can get great color intensity with them and they are easier to use than the pads. Next, the lady above does not seem to FILL the waterbrush and that is something I recently learned. It is a GREAT idea as much frustration stems from not being able to control the water that flows from these brushes. Wetting them but leaving the barrell empty works best. Last for finer details, use a #0 or#1, #2 watercolor brush for shading as well. WOrks great. Last, you must WAIT for the first coat of watercolor to dry before shading or adding other colors or all colors will mush. For another fabulous tutorial (free) check out Deenas Stamping Corner:
http://denasstampingcorner.blogspot.com/search/label/Video
thanks
If you switch the water in this tutorial with alcohol blending solution you should be able to color with alcohol inks.
Jackie,
Distress inks are waterbased inks. But unlike other water based inks, Distress ink colors won't dilute when you add water. Red will stay red, not turn pink.
Watercolor crayons is a different tutorial. You can find that on our resource section. You can watercolor with each medium you mentioned. The technique is just a bit different.
Could you tell me what stamp company the stamp was from?
Thanks!
You can find a link for the stamp set used in the photo tutorial in the supply list on the beginning of the tutorial.
The stamp set in the video is also from Flourishes. It's called "With Gratitude".
Kathy
Page 2 of 3 pages < 1 2 3 >