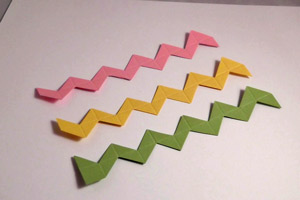
Chevron Strips
by Julie Hoffman
Learn how to create chevron strips without a die.
Supplies
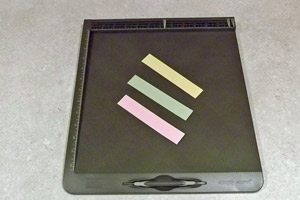
- Scoring tool
- 1" x 5" Cardstock strip
- Scissors
Step-by-Step
-
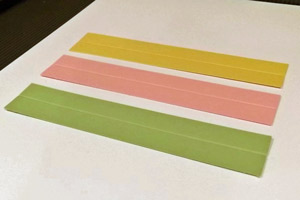
Step 1
Cut cardstock to 1" x 5 1/2".
-
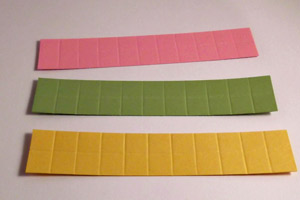
Step 2
Score cardstockr at 1/2" down the length of the paper.
-
Step 3
Score cardstock every 1/2" across the width of the paper.
-
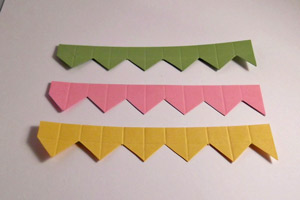
Step 4
Cut the paper from the bottom corner to the middle score line, removing triangle shapes along the length of the paper.
-
Step 5
Rotate paper at 90 degrees and cut opposite triangles.
-
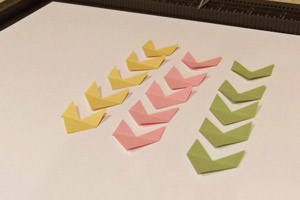
Step 6 (Optional)
Cut the chevrons every 1 inch from the strip to use as individual chevrons.
-
Step 7 (Optional)
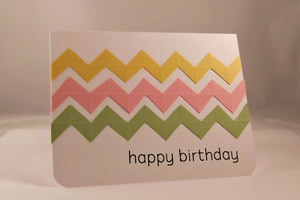
Adhere chevrons to your project.
Video!
Variations
-
Try different cardstock widths:
Use the same scoring distance as the width of your cardstock. This samples shows chevron strips created out of 3/4" wide cardstock.
Your Turn
You've seen the tutorial, now you try it! We've got a section of the gallery set aside for Chevron Strips. Try this technique, then upload your artwork to the gallery. Show us your creations!
***Please note - Internet Explorer/Edge is not a supported browser, and will not allow you to see the videos. Please use Chrome, Firefox or Safari to view our tutorial videos.

Questions and Comments
We'd love to get your feedback or questions. Leave your comment below.
everywhere, and now I don't have to buy one!!
Page 2 of 3 pages < 1 2 3 >