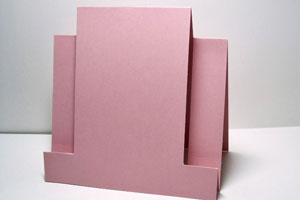
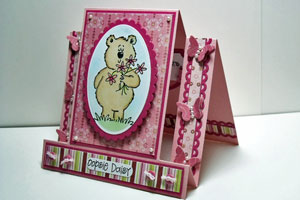
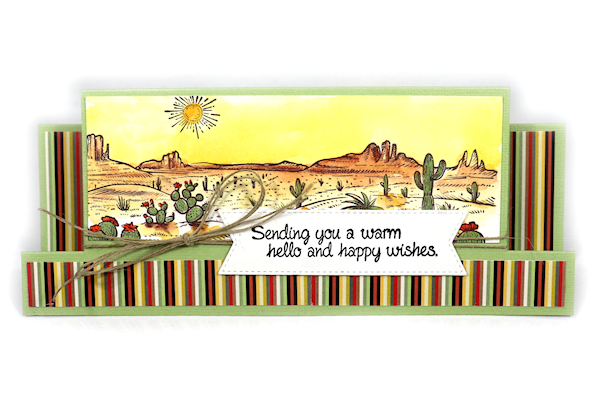
Center Step Card

by Frances Byrne

Create a unique card with a few cut and score lines.

Supplies
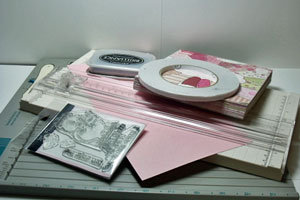
  • One 5 1/2" x 11" piece of cardstock for card base
  • Scor-Pal™, or other scoring tool
  • Paper trimmer
  • Adhesive
  • Stamps
  • Ink
  • Additional cardstock, pattern paper and embellishments for decoration

Step-by-Step

  1. Step 1

    Line cardstock up in paper trimmer so that the edge of the card is at the 1" mark. Position the cutting blade at 1" and cut from 1" to 6.5".
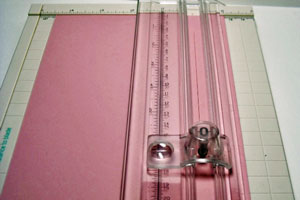
  2. Flip card over and do the same on the other side.
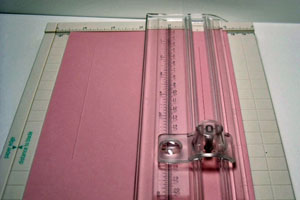
  3. Step 2

    Place cardstock onto scoring tool and score along the long side of the card from the edge to the cut line at 1", 2" and 6.5".
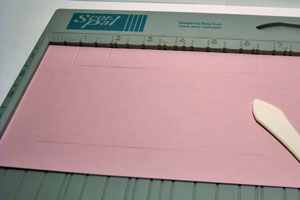
  4. Step 3

    Repeat step 3 on opposite edge of card.
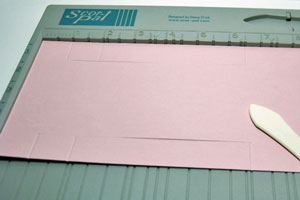
  5. Step 4

    Score between cut lines at 5 1/2".
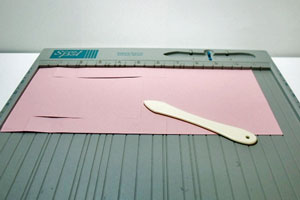
  6. Step 5

    Fold at the score lines. The first, third and center score lines are mountain folds. The second score line is a valley fold. Reinforce score lines to make folds crisp.
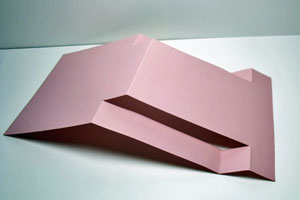
  7. Step 6

    Stamp and decorate your card as desired.
Video!

Variations

  1. For a slimline version of the card, cut the card base to 8 1/2" x 7". From the 8 1/2" side, follow Step 1, and cut from 1" to 4 1/2", 1" from both sides. For Step 2-3, score at 1", 2", and 4 1/2". For Step 4, score at 3 1/2".

Your Turn

You've seen the tutorial, now you try it! We've got a section of the gallery set aside for Center Step Card. Try this technique, then upload your artwork to the gallery. Show us your creations!

***Please note - Internet Explorer/Edge is not a supported browser, and will not allow you to see the videos. Please use Chrome, Firefox or Safari to view our tutorial videos.
Questions and Comments

We'd love to get your feedback or questions. Leave your comment below.

Hi Frances love your card. Do you make envelopes for that card?
Delores  |  Thu Feb 16, 2012 at 2:57 PM
Thanks Delores, no I don't make envelopes, I just put them into either square or a large rectangle envelope the ones that fit a letter size paper folded in half, and then fold the excess envelope down.
StampOwl  |  Fri Feb 17, 2012 at 2:10 AM
I love this card also. However, the measurements are for a 5 1/2 in. square card. The standard envelopes for square cards are also 5 1/2 inches, and this card will not fit in a standard envelope. So, what would the measurements be for a 5 1/4 in. card?
Mary Warner  |  Wed Apr 25, 2012 at 10:25 PM
Greetings, I love this card. I just cut out about 25 of them only to find that they don't fit into my envelopes. I cut it down to 51/4" x 11" and still it won't fit into the envelope. It's just a little too wide. I make my envelopes with the Martha Stuwart score board envelope set. I use the 9"x9" paper cut for the envelope, but it is still too tight. Please share with me the size envelope you mail this in; the inches. I was making a bunch of these to mail to the senior citizens in our church as a thinking of you type card from the pastor, his wife, and the church. Any help and ideas you can offer will be greatly appreciated. Blessings, Betty
Betty  |  Sat May 26, 2012 at 12:32 PM
The size of my envelopes will be different to yours as I live in Australia and our papers are different, although the tutorial is done in US sizes.

I normally just use a large envelope and any excess over.

There was a tutorial a couple of week's ago called any size envelopes which might be helpful to you ... you can find it here http://www.splitcoaststampers.com/resources/tutorials/anysizeenvelope/
StampOwl  |  Sat May 26, 2012 at 4:20 PM
Thank you so much for these precise directions. The video was wonderful. I have seen several videos on how to make this card. This one was perfect. I made the card with 10 minutes or less.

Thanks, Frances. I love this card.
Pat  |  Sun Jun 17, 2012 at 3:39 PM
Hi Frances! Thanks for that. I linked my blog to your tutorial!
Elisabeth  |  Sun Jul 8, 2012 at 12:27 AM
Thank you so much for this - has to be my favourite stepper card. The tutorial is so clear and helpful.
Sara  |  Wed Aug 1, 2012 at 1:48 AM
I love these. Your instructions are very easy. Can you please tell me which trimmer are you using. I need a good trimmer.
Anita Kejriwal  |  Thu Aug 23, 2012 at 8:01 AM
Thank you! Inspiring! I need to learn (am a rookie)
how to print the sentiment from my computer!!
then I think I could try this one!
Heatherlabuddecard  |  Fri Aug 24, 2012 at 9:33 PM
Very beautiful card. Thank you for sharing.
Karin husk  |  Sun Aug 26, 2012 at 3:01 PM
LOve it ...Have to try it...
MaryAnn  |  Sat Sep 15, 2012 at 5:53 AM
love to try it ...
MaryAnn  |  Tue Sep 25, 2012 at 4:09 PM
this is a lovely tutorial, very clear and easy to follow, I have ade one from your instructions and it worked out beautifully, I just have to buy a larger cutter than I have - thanks for sharing
Jasmine Patrick  |  Sun Sep 30, 2012 at 9:05 PM
Love the card. I do crafts with hospital patients and plan to use this with them. Thanks much
Joanne  |  Mon Oct 1, 2012 at 7:00 AM
Thanks for the refresher course on this cutting and folding card. Edna
Edna Burgess  |  Thu Nov 8, 2012 at 6:54 AM
What kind of paper trimmer are you using with the ScorePal?
Love the card
Thanks
SJ Olson  |  Sat Nov 24, 2012 at 3:58 PM
Hi , This a beautiful card. The instructions are great. I meet once a week with 2 friends and make cards. This will be our next projects.
Thanks,
Maggie
Margaret Muise  |  Wed May 22, 2013 at 5:05 AM
I will try this one, thank you.

I have a question about the inside, I see you have added some decoration to the inside, and recently I have seen several side step card decorated inside. I have never seen this before, and I didn't even think about these cards having an "inside", I thought to put a panel on the back to write on. Have I had it wrong for all this time? Should I be decorating inside too?
Cazzy  |  Thu Jun 27, 2013 at 7:11 AM
There is plenty of room on the "inside" to add some sort of decoration if you wish or at least to use for writing your greeting on to whoever you send it to.

Decorating the inside of the card is always a personal choice ... but I normally like to do something even if it is very simple
Frances Byrne  |  Thu Jun 27, 2013 at 3:22 PM

Page 5 of 6 pages « First  <  3 4 5 6 >

You need to be logged in to comment

GET OUR NEWSLETTER


Splitcoaststampers's privacy policy