Carrot Treat Box
by Twila Davis
Fill a carrot-shaped box with sweet Easter treats!

Supplies
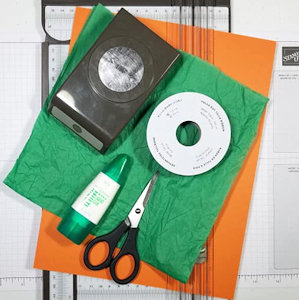
- Orange cardstock (Stampin' Up!® Pumpkin Pie cardstock used here)
- Paper trimmer
- Scoring tool
- 1 3/4" circle punch or die
- Ribbon (about 12", SU Whisper White Polka Dot Tulle Ribbon used here)
- Liquid glue (Tombow Multi Purpose Liquid Glue used here)
- Green tissue paper (8" x 17")
- Other supplies as needed to complete the project (for optional tag: circle dies, SU Fable Friends stamp set, Tuxedo Black Memento Ink, white twine, hole punch)
Step-by-Step
-
Step 1
Cut a piece of orange cardstock to 6" x 6". Turn the panel so that one point is at the top and one is at the bottom laying on the paper trimmer. Score diagonally from point to point.
-
Step 2
Keeping the bottom point on the cutting and scoring "ditch", move the cardstock past the ditch and cut off from 1" at the top tapering to nothing at the bottom.
-
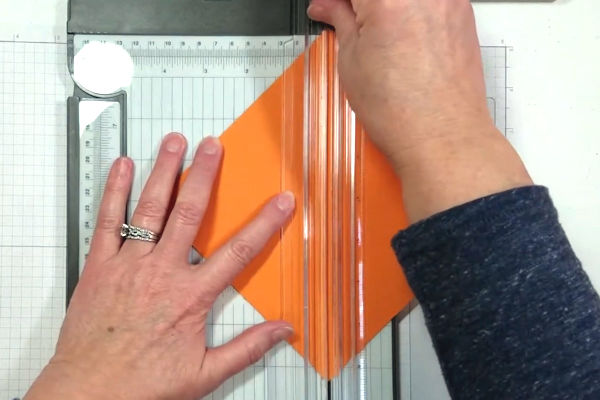
Step 3
Turn the cardstock 180 degrees with the bottom point (which is at the top now) still on the "ditch". Score back up from 1" to nothing.
-
Step 4
Turn the cardstock 180 degrees again on the paper trimmer with bottom point again on the ditch. Move the top of the cardstock to 2 1/2" and score.
-
Step 5
Turn the cardstock 180 degrees with the bottom point (at the top now) on the ditch. Move the top point over to 2 1/2" and score back up to nothing.
-
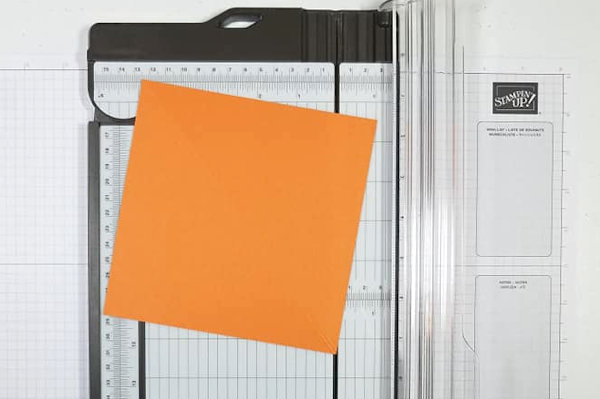
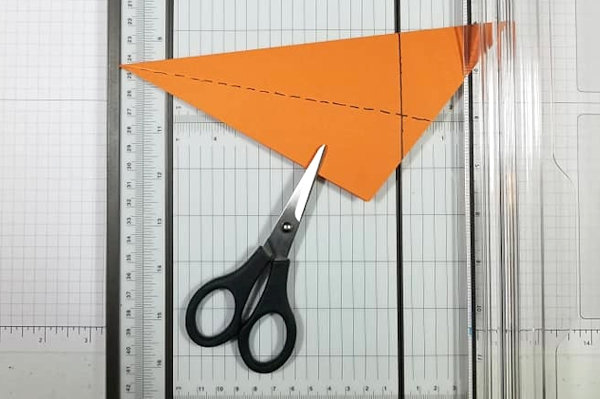
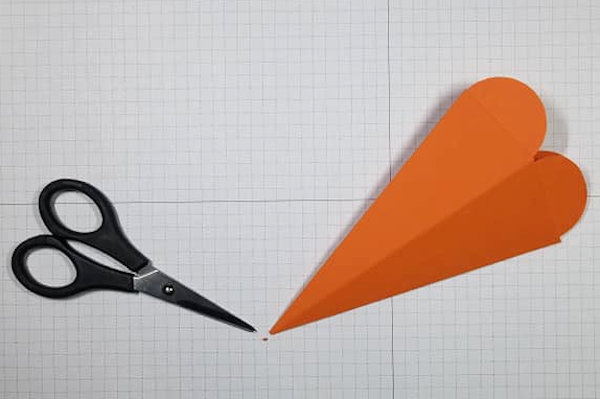
Step 6
With longest fold to the top of the paper trimmer, cut off as shown in the picture.
NOTE:
From point to cut line will measure 6", but cardstock will be cut at an angle. -
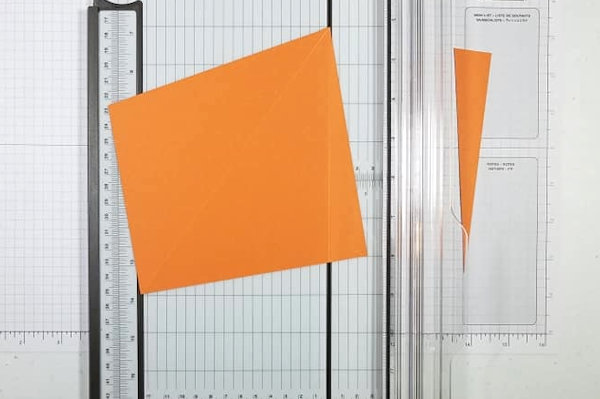
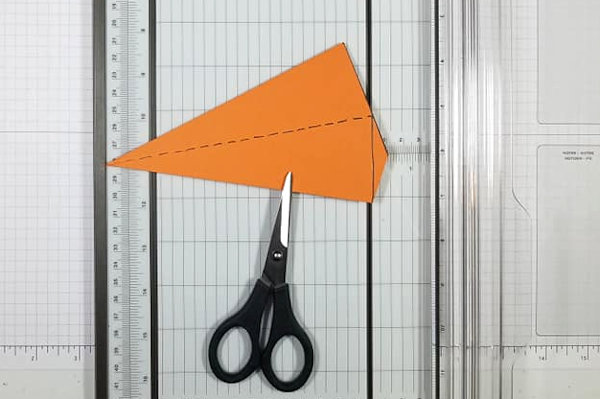
Step 7
Turn cardstock slightly so point with fold line is on the ditch and cut as shown (cutting from the top point of scoreline to end point).
-
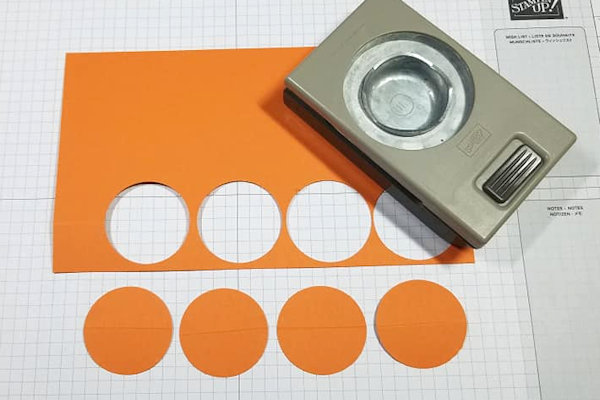
Step 8
Take the bigger scrap of orange cardstock with the short side to the top and score at 1" all the way done. Take the 1 3/4" Circle Punch and punch (4) circles aligning the score line in the middle of each.
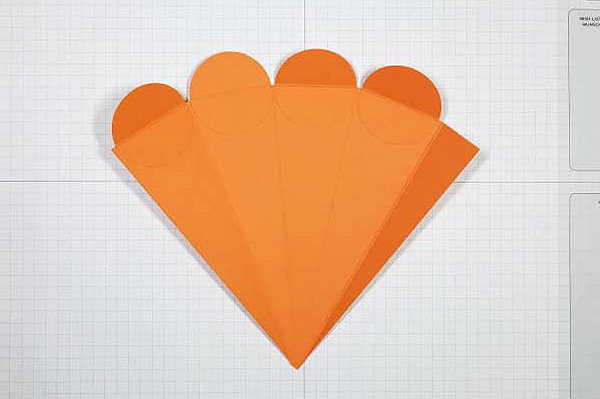
-
Attach the circles to the inside of the box piece, matching scorelines even with top of box.
-
Step 9
Add glue to the 1" flap, tucking it to the inside. Fold box in half to secure the flap. Cut off the very tip of the carrot that is flimsy.
-
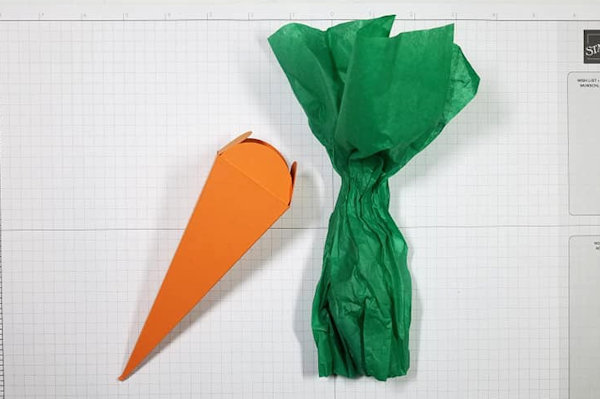
Step 10
Take a 8" x 17" piece of green tissue paper and fold in half. Unfold and add candy and fold back up.
-
Step 11
Insert the tissue paper bundle inside the carrot box. Scrunch up the tissue paper where the top of the Carrot box will be folding up. Fold up the box top overlapping the circles. Tie a piece of 12" ribbon around the tissue at top of box and into a bow.
The box is now complete.
Optional: Add a tag.


Video!
Your Turn
You've seen the tutorial, now you try it! We've got a section of the gallery set aside for Carrot Treat Box. Try this technique, then upload your artwork to the gallery. Show us your creations!
***Please note - Internet Explorer/Edge is not a supported browser, and will not allow you to see the videos. Please use Chrome, Firefox or Safari to view our tutorial videos.

Questions and Comments
We'd love to get your feedback or questions. Leave your comment below.
Page 1 of 1 pages