Cardboard Roll Album
by Areli Johnson
Upcycle cardboard rolls into this cute mini album.
Supplies
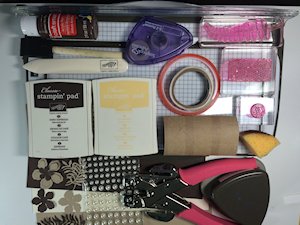
- Empty toilet paper rolls
- Bone folder
- Adhesive (double sided tape, tape runner and glue dots used here)
- Acrylic paint (Craft Smart Espresso used here)
- Foam brush
- Cardstock (Stampin’ Up!® Very Vanilla, Crumb Cake, and Early Espresso used here)
- Paper trimmer
- Crop-A-Dile
- Eyelets
- Binder ring - 1 1/2”
- Other supplies as needed to complete the project (Stamps for background stamping (Stampin’ Up! Butterfly Basics Stamp Set used here); ink pads (Stampin’ Up! Early Espresso and So Saffron used here); embellishments (flowers and leaves cut from Stampin Up’s Botanical Builder Framelits Dies and adhesive pearls used here); sponge; corner punch (Stampin’ Up! Curvy Corner Trio punch used here)
Step-by-Step
-
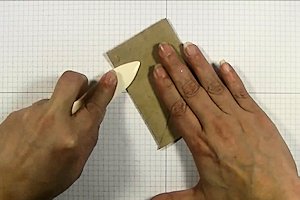
Step 1
Use a bone folder to flatten the cardboard roll.
-
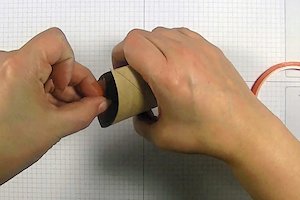
Step 2
Use 2” of double sided tape to close one end of the roll.
-
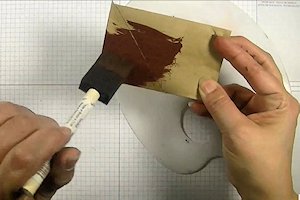
Step 3
Use a foam brush to apply acrylic paint to the outside of the roll. Set aside to dry.
-
Step 4
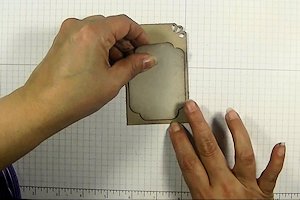
Use a paper trimmer to cut two pieces of cardstock measuring 4” x 2 1/2 ‘’.

-
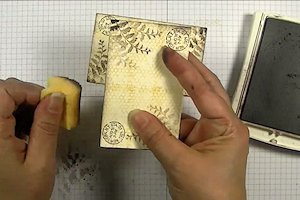
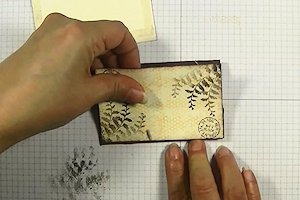
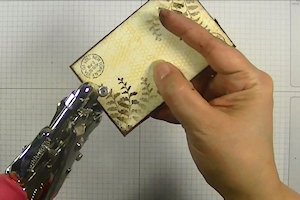
Stamp and embellish the pieces as desired.
-
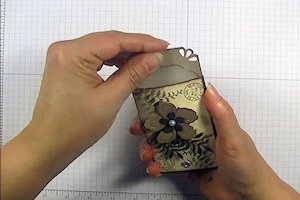
Step 5
Adhere the cardstock pieces to the toilet paper roll, one on each side.
-
Step 6
Use a Crop-A-Dile or other heavy duty punch to punch a hole and set an eyelet on the closed end of the toilet paper roll.
-
Add die cuts or other embellishments as desired.

-
Step 7
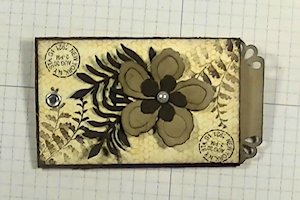
To make an insert, cut a piece of cardstock measuring 4” x 2 1/2”.

-
Layer and embellish the tag as desired.
-
Step 8
Insert tag into the open end of the cardboard roll.
-
Step 9
Repeat these directions for each cardboard roll that you wish to include in your mini album.
-
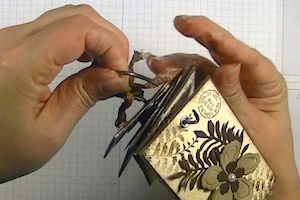
Step 10
Bind the rolls together with a binder ring.
-
Step 11
Complete the project.

Video!
Your Turn
You've seen the tutorial, now you try it! We've got a section of the gallery set aside for Cardboard Roll Album. Try this technique, then upload your artwork to the gallery. Show us your creations!
***Please note - Internet Explorer/Edge is not a supported browser, and will not allow you to see the videos. Please use Chrome, Firefox or Safari to view our tutorial videos.

Questions and Comments
We'd love to get your feedback or questions. Leave your comment below.
Page 2 of 2 pages < 1 2