Building Block Card
by Laura Lipe
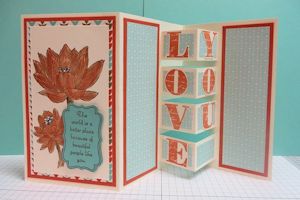
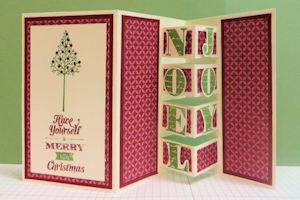
Make your card's message pop up on dimensional blocks.
Supplies
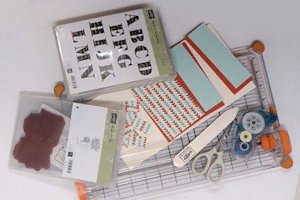
- 5.5” x 10.5” card base
- Coordinating cardstock or designer paper as desired to decorate card panels
- Paper trimmer
- Scoring tool
- Adhesive
- Alphabet stamps or dies, and other embellishments to decorate card
Step-by-Step
-
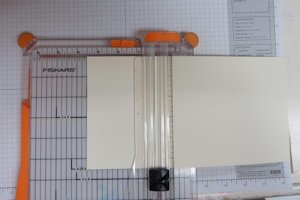
Step 1
Score the 5.5” x 10.5” cardstock at 3.5” and 7” on the long edge.
-
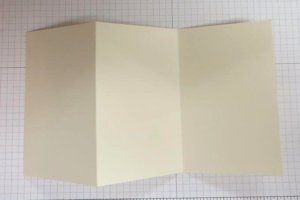
Fold these as a mountain fold and a valley fold.
-
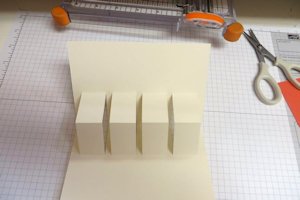
Step 2
Close the valley fold, and cut in 1.5” along the fold at these intervals: 3/8”, 1 3/8”, 1 5/8”, 2 5/8”, 2 7/8”, 3 7/8”, 4 1/8”, and 5 1/8”.

-
Step 3
Score at the end of the cuts on the 1” slits so these can fold up with mountain folds. Leave the ¼” slits as valley folds.
-
Step 4
Secure the score lines by pressing down along the folds with a bone folder to make sure they are nice and sharp.
Decorate the front and inside panels. (The front panel measures 3.5" x 5.5". The panels on either side of the blocks are 2" x 5.5". Each block panel measures 1"x 1.5".)
Note:
You may choose to back the card with a slightly larger piece of coordinating cardstock.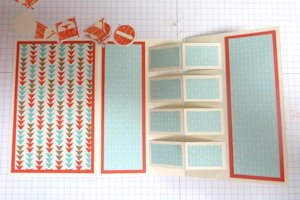
-
Step 5
Complete the project.
Video!
Variations
-
This card may be used for many occasions, as many words will fit on the inside blocks.
Some ideas:
--Baby Boy or Baby Girl
--Love You
--Get Well
--Noel/Joy
--Good Job or Well Done
Small photos could also be adhered to the blocks.
-

Your Turn
You've seen the tutorial, now you try it! We've got a section of the gallery set aside for Building Block Card. Try this technique, then upload your artwork to the gallery. Show us your creations!
***Please note - Internet Explorer/Edge is not a supported browser, and will not allow you to see the videos. Please use Chrome, Firefox or Safari to view our tutorial videos.

Questions and Comments
We'd love to get your feedback or questions. Leave your comment below.
What a great tutorial, and so versatile! Thanks so much!
this looks great!!!
Page 3 of 3 pages < 1 2 3