Bokeh Background
by Lydia Fiedler
Create a very simple, dreamy background inspired by a photography technique.
Supplies
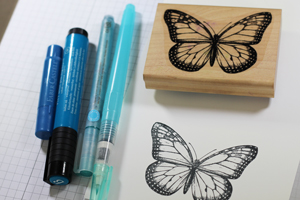
- Large stamp or die cut
- Dye ink pad (Stampin' Up! Tempting Turquoise used here)
- Metallic Gelato™ to match ink or other shimmery water-based medium (Metallic Blueberry Gelato used here)
- Coloring medium to match ink(PITT artist pen big brush used here)
- Pencil with new, flat white eraser
Step-by-Step
-
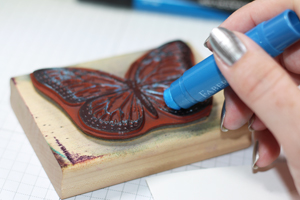
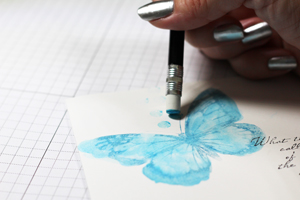
Step 1
Apply metallic Gelato directly to your stamp image.
-
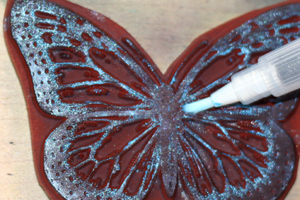
Step 2
Using a water brush, wet the Gelato directly on the stamp.
-
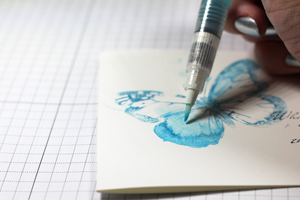
Step 3
Stamp image, and then using water brush, fill in the edges with more Gelato to create a shadow image for the card base.
-
Step 4
Using the eraser like a stamp, add ink, and then gelato and stamp around your focal image - beginning close to the image and stamping farther away as the ink fades on the eraser.
-
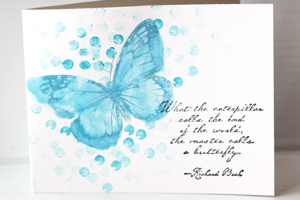
Step 5
Continue stamping circles, some intense and some pale until you have the background you want.
-
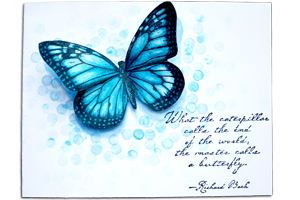
Step 6 (Optional)
Add a finished image, popped up over the shadow you created, to finish your card.
Video!
Variations
-
Highlight a die cut:
Use a die cut or punched shape instead of a stamped image for the focal point.
Your Turn
You've seen the tutorial, now you try it! We've got a section of the gallery set aside for Bokeh Background. Try this technique, then upload your artwork to the gallery. Show us your creations!
***Please note - Internet Explorer/Edge is not a supported browser, and will not allow you to see the videos. Please use Chrome, Firefox or Safari to view our tutorial videos.

 *
*
Questions and Comments
We'd love to get your feedback or questions. Leave your comment below.
I would like to purchase the stamp. You said it is Wonderful Wings and do you know the manufacturer?
Thanks in advance for your help!
The manufacturer is Stampin' Up! That particular stamp is retired, but you have a few options. You can post and (I)n (S)earch (O)f in this forum: http://www.splitcoaststampers.com/forums/iso-f115/ and see if anyone wants to sell theirs, or you can purchase a smaller version of this same image in a set called "Best of Butterflies" from Stampin' Up! There's a link under the video to see the size of that image.
Sylvia xx
great tutorial!
Page 3 of 3 pages < 1 2 3