Blended Pencils

by Lydia Fiedler

Blend colored pencils over lightly stamped images for a striking look.

Supplies

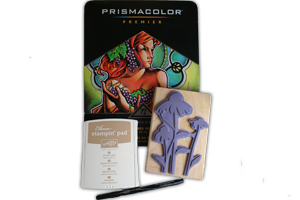
  • White or kraft cardstock

  • Light neutral dye ink

  • Large silhouette floral image (Stampin' Up! Inspired by Nature used here)

  • Colored pencils (Prismacolor® Premier used here)

  • Fine line black pen (Prismacolor Premier .005 used here)

Step-by-Step

  1. Step 1

    Using a light colored neutral ink, ink up a large silhouette flower image, stamp off once on a scrap, and then stamp your image on the front of a white or kraft card base.

    Don't worry if the image isn't inked fully or is uneven - you will be covering the ink with pencil.
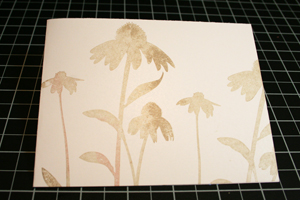
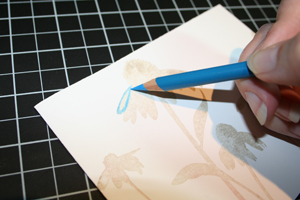
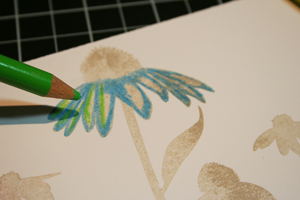
  2. Step 2

    Using the dominant color in your image, color around the edges of the petals, leaving the centers blank.

  3. This coloring can be very rough and sketchy - the texture will become smooth as you add more layers of color.
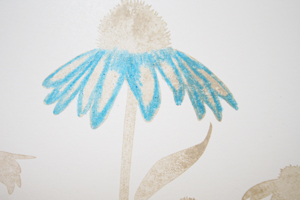
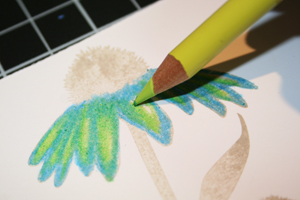
  4. Step 3

    Color towards the center of the petals with your next lightest color.

  5. Step 4

    Come back with the your first color and blend the colors together. You will start to see the color become smooth and blended, but there will still be porous portions. Leave a little bit of exposed cardstock at the center of the flowers.
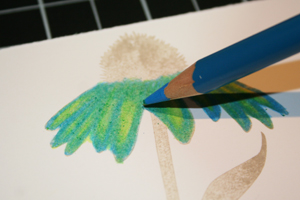
  6. Step 5

    Using the lightest color pencil, color over the entire petal to blend all the colors together. The texture of the color will now be smooth and waxy.

  7. Step 6

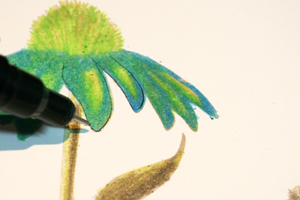
    Come back one last time with the darkest color pencil and intensify the darkest portions of the petal. Color the top of the flower with two of the lighter pencils.
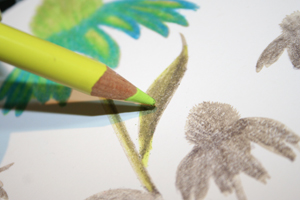
  8. Step 7

    Color the other flowers in the image with a charcoal grey pencil - this coloring can be very light and sketchy - you do not need to blend this - just use basic coloring and shading. On the main flower image, come back and blend the grey on the stem and leaves with the lighter colored pencil.

  9. Step 8

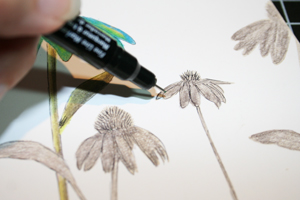
    Using a very fine black pen, add detail to the flowers.

  10. Step 9

    You may also add this detail to the grey background flowers.

  11. Step 10

    Finish your card.

Video!

Your Turn

You've seen the tutorial, now you try it! We've got a section of the gallery set aside for Blended Pencils. Try this technique, then upload your artwork to the gallery. Show us your creations!

***Please note - Internet Explorer/Edge is not a supported browser, and will not allow you to see the videos. Please use Chrome, Firefox or Safari to view our tutorial videos.

Questions and Comments

We'd love to get your feedback or questions. Leave your comment below.

Gorgeous sample & what a fabulous tutorial! I'll have to give this technique a try!
Mona Pendleton  |  Fri Sep 10, 2010 at 10:47 AM
WOW!! I just tried this technique with an old leaf silhouette stamp that never got much use. Can't beleive how well the image came out... really pleased with it and looking forward to turning it into a card tomorrow!! And drawing in all the leaf veins was pretty fun, too. smile
Linda  |  Sun Sep 12, 2010 at 8:47 PM
I have never even heard of this technique before. Just love it! Thanks for the tutorial ... I can't wait to try it.
Beth  |  Mon Sep 13, 2010 at 1:38 PM
Love it! Thanks for the tutorial
Sandy Knecht  |  Tue Sep 14, 2010 at 11:17 AM
I want to try that...have to get that beautiful stamp!
Thank you for the great video
KayakSue  |  Wed Sep 15, 2010 at 5:38 AM
Oh!! I love this!!! I think even I can do this. I started stamping because I can NOT draw or paint. You have made this so simple to follow. Thank you!
Triplemom  |  Thu Sep 16, 2010 at 9:03 AM
Lydia,

I love the card. What light neutral ink did you use?Is it the Sahara Sand?

Tamara
Justme247  |  Sat Sep 18, 2010 at 12:13 AM
Hi Tamara - Yes, I've used both Sahara Sand and Crumb Cake. Sometimes I stamp off first to get a very light image (depending on the colors I'm using) and sometimes I stamp it full strength.
lydia  |  Sat Sep 18, 2010 at 6:13 AM
thats a great technique, I really enjoyed the tutorial. thanks
grace  |  Sat Sep 18, 2010 at 1:07 PM
Love this technique, will give it a try as soon as I have a minute. Thanks
Elizabeth Robertson  |  Mon Sep 20, 2010 at 8:24 PM
What a beautiful card! And, you do a wonderful job on the tutorial video. I have watched it several times and now giving it a try. I love the stamp and the card! Would love to watch and learn more from you. Do you have other tutorials/videos to help people like me who are rather new to stamping. Your voice is so relaxed, great job!!! I love blue also!
Judy  |  Sat Feb 26, 2011 at 6:02 PM
The flower is Euchinacia, or purple cone flower.
Markey  |  Tue Mar 22, 2011 at 9:27 AM
Thanks, Markey -
My daughter in law knew the name of the flower also! I love making this card - so easy & pretty too.
Judy  |  Tue Mar 22, 2011 at 1:49 PM
Thanks for taking the time to share your technique with us. I am new to stamping and will definitely be trying this technique now that you have made it look so easy!
Deborah  |  Fri Apr 8, 2011 at 4:21 PM
Lydia, this is such a clear, easy to follow tutorial, many thanks.
I don't have professional coloured pencils but I do have normal reasonable quality colouring pencils and aqua pencils. Don't want to fail at my first attempt at this 'new' method so would either of these be suitable? Or which would be the better of the two to try?
Your video and turorial makes even the non artistic ones like myself feel this could be achieveable, thank you again.
craftyvron  |  Mon Aug 15, 2011 at 3:53 PM
Hi there! Any colored pencil that has a more waxy than chalky finish is fine! Aqua pencils won't work as well - they're not designed for pencil on pencil blending. But your regular colored pencils will be fine - the ticket is to keep working on the colors together until they smoothly blend. I did it originally by accident, so you'll be fine smile Thank you for your kind words!
lydia  |  Mon Aug 15, 2011 at 3:59 PM
Great technique~Thanks for sharing! Can't wait to try it.
rubberstampmadness  |  Wed Oct 26, 2011 at 9:06 AM
The video that goes along with your tutorial is very good. You demonstrate how relaxing it can be to create a piece of art in a very short time.
Deanna  |  Wed Mar 21, 2012 at 8:20 AM
I love playing with pencils so was immediately drawn to this tutorial. To make it even more fun, you used the first stamp I ever bought from Stampin Up! I love the set and will pull it out again to experiment with the technique. Thank you
Jamie  |  Fri Mar 23, 2012 at 3:17 PM
Really enjoyed this tutorial! Thx so much.
Kathy Burgess  |  Sun Oct 18, 2015 at 2:30 PM

Page 4 of 5 pages « First  <  2 3 4 5 >

You need to be logged in to comment

GET OUR NEWSLETTER


Splitcoaststampers's privacy policy