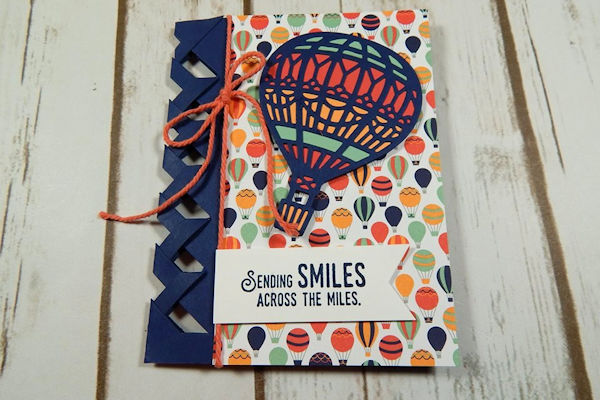
Basket Weave Card
by Kelly Acheson
Create a latticed card with a few simple cuts and folds.
Supplies
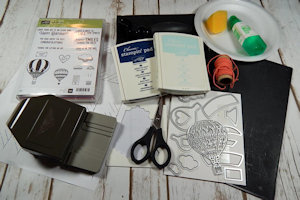
- Cardstock (Stampin’ Up! Night of Navy, Whisper White, and Carried Away Designer Series Paper used here)
- Basket Weave Card printable template
- Scissors
- Paper trimmer
- Bone folder
- Paper clips
- Adhesive (Tombow Mono Liquid Glue used here)
- Other supplies as needed to complete the project (Stampin’ Up! supplies used here: Die Cutting Machine, Watermelon Wonder, Mint Macaron, and Peekaboo Peach cardstock, Banner Triple Punch, Lift Me Up Stamp Set, Up & Away Thinlits Dies, Big Shot Die Brush, Precision Base Plate, Magnetic Platform, Soft Sky and Night Navy ink pads, Dimensionals or 3D Pop Dots)
Step-by-Step
-
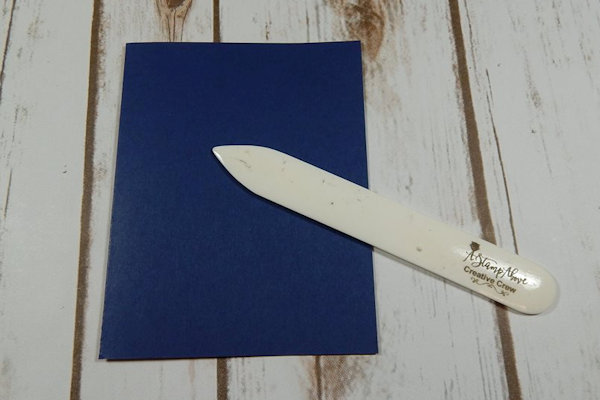
Step 1
Cut a cardstock base at 5 1/2" x 8 1/2". Fold it in half and burnish the edge with a bone folder.
-
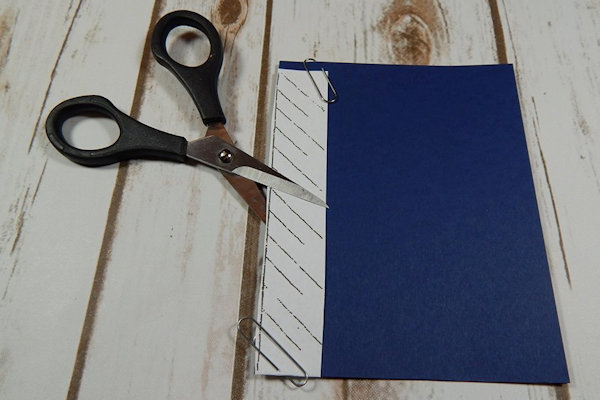
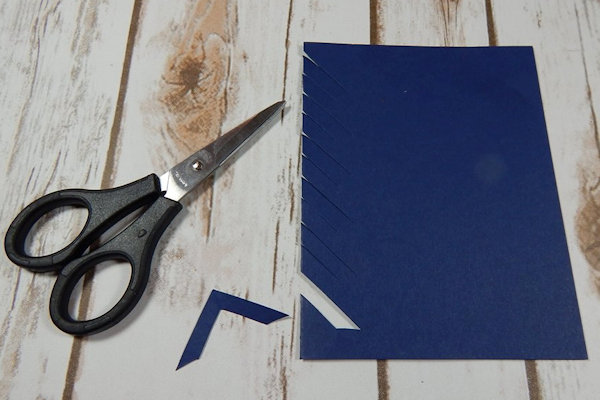
Step 2
Place the template over the folded edge of the card base with slash marks facing down, and secure it in place with paper clips. Use scissors to cut on all lines.
-
Step 3
Cut the bottom triangle off and set it aside.
-
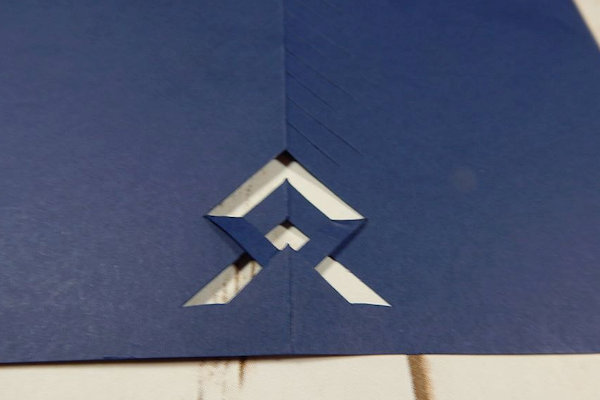
Step 4
Open the card. Working on the outside of the card, fold every other triangle down, and tuck it under the one below.
-
Repeat this step for each of the triangular cuts.
-
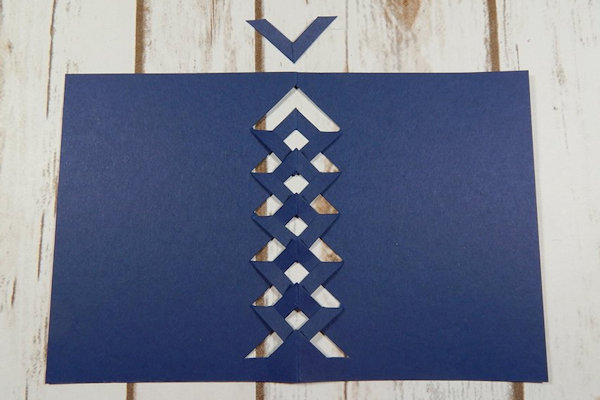
Step 5
Add the top triangle to the card using a little glue, and tuck the end under like the rest.
-
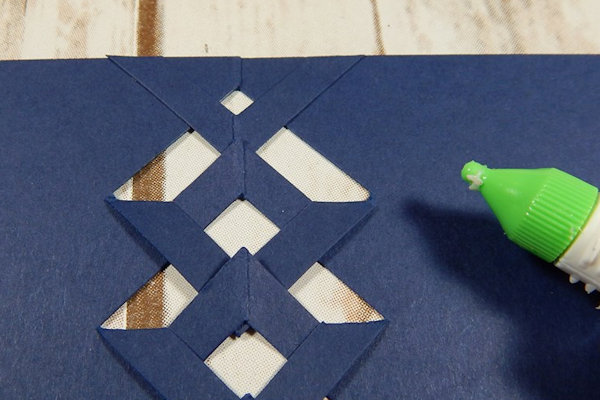
Step 6
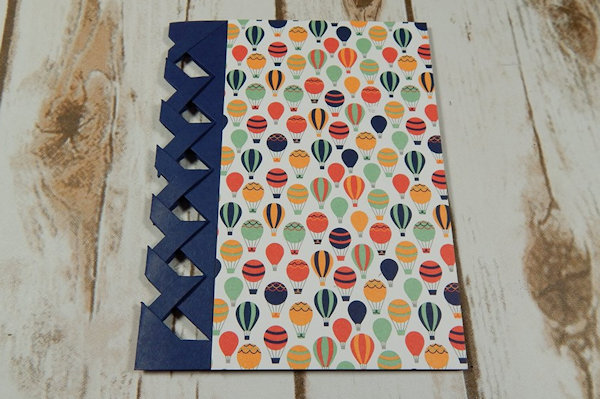
Adhere a 5 1/2" x 3 1/4" piece of patterned paper to the card front with liquid glue.
-
Step 7
Embellish the card.
-
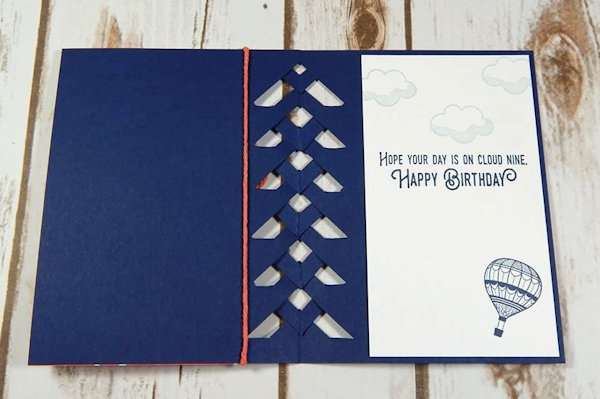
Add a panel to the inside as well.
-
Step 8
Complete the project.

Video!
Your Turn
You've seen the tutorial, now you try it! We've got a section of the gallery set aside for Basket Weave Card. Try this technique, then upload your artwork to the gallery. Show us your creations!
***Please note - Internet Explorer/Edge is not a supported browser, and will not allow you to see the videos. Please use Chrome, Firefox or Safari to view our tutorial videos.

Questions and Comments
We'd love to get your feedback or questions. Leave your comment below.
Beth
Page 2 of 2 pages < 1 2