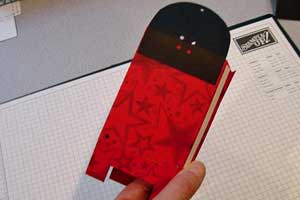
Backpack Box
by Mary Arima
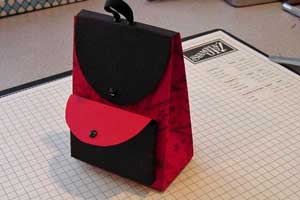
Create this adorable box shaped like a backpack.
Supplies
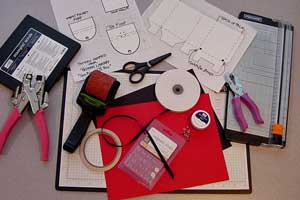
- Backpack Box Template
- Two each of 8.5 x 11” sheets colored card stock (2 contrasting colors)
- Paper Trimmer with scoring blade
- 1/8” Handheld Circle Punch
- Crop-a-dile™
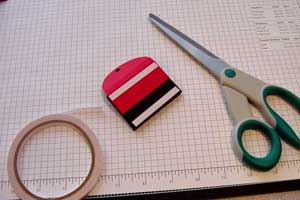
- Scissors
- Ruler
- Stamps & Ink
- Bone Folder
- Sticky Strip™
- Magnetic Snaps or Velcro Dots (2 pairs)
- Mini-eyelets in coordinating color (8)
- Eyelet setting tools
- ¼” Grosgrain Ribbon in coordinating color – 36” total
Step-by-Step
-
Step 1
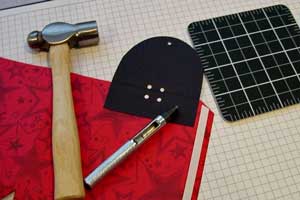
Print template, then cut on solid lines.
Punch holes where indicated.
Backpack Base Template (PDF, 24K)
Backpack Flap and Pocket (PDF, 24K)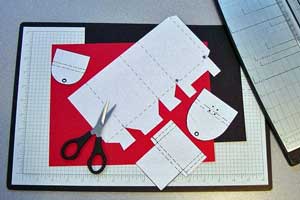
-
Step 2
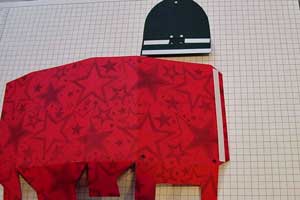
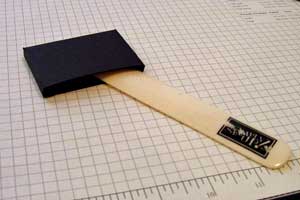
Arrange template pieces on card stock, with base and small flap on one color (red used here), front pocket and large flap on other color (black used here).
-
Step 3
Trace around template pieces, using a ruler to keep the lines straight, if you wish.
Do not forget to mark eyelet holes.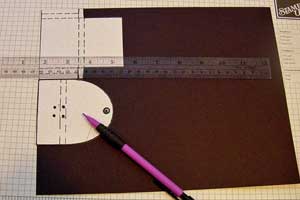
-
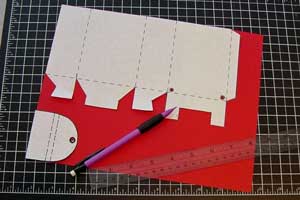
Step 4
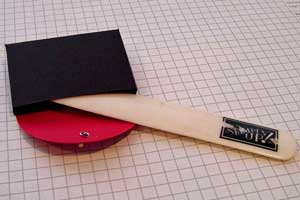
Cut pieces from card stock, using trimmer for straight cuts and scissors for details.
Punch eyelet holes, using 1/8” handheld circle punch or an anywhere punch, as appropriate.
-
Step 5
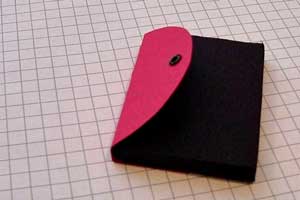
Decorate box base.
Classic Stars jumbo wheel with Ancient Page black ink cartridge was used here.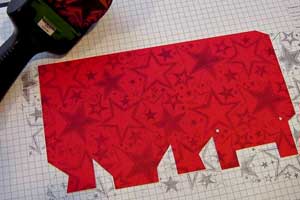
-
Step 6
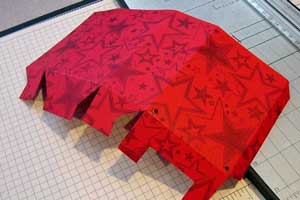
Score all four cut pieces where indicated by dotted lines on template.
-
For both flaps, measure 1” from straight edge for first score and 1 ¼” for the second score.
-
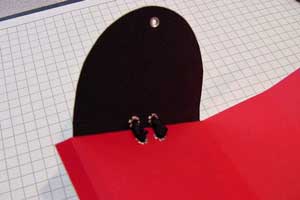
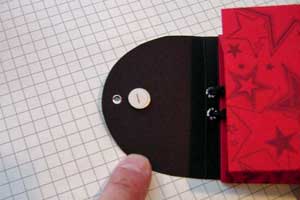
Step 7
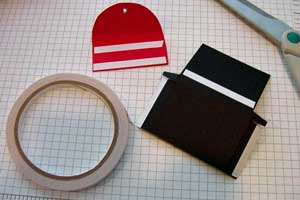
Position Sticky Strip™ on box base and large flap, as indicated in photo.
-
Step 8
Position large flap on top edge of base back (largest section, adjacent to the ½” flap), as indicated in photo. Be sure the 1” score is just above the edge of the base, so it will fold at the score.
-
Step 9
Punch holes in base layer, using pre-punched holes in flap as a guide.
-
Step 10
Attach eyelets to all punched holes.

-
Step 11
Position Sticky Strip™ on front pocket piece and small flap, as indicated in photo.
-
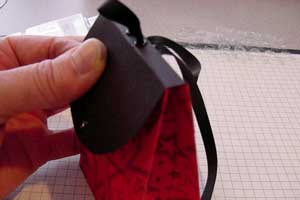
Step 12
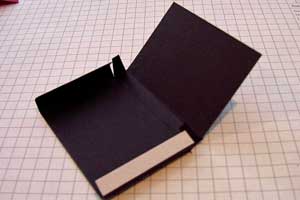
Fold pocket on all score lines, starting with small flaps. Make crisp folds with bone folder.
-
Step 13
Tuck side flaps with Sticky Strip™ behind back side of pocket, aligning sides of back piece with the first fold, as indicated in photo.

-
Step 14
Use bone folder to press joints together.
-
Step 15
Align small flap with pocket, so 1” extension is at back of pocket and flap folds neatly over top of pocket. Remove Sticky Strip™ lining and adhere.
-
Step 16
Use bone folder to press joints together.
-
Step 17
Position Sticky Strip™ at top back of pocket, as indicated in photo.
-
Step 18
Cut 24” piece grosgrain ribbon for backpack handle and straps.
Cut ends at an angle to make it easier to thread ribbon through eyelets.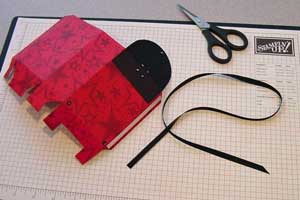
-
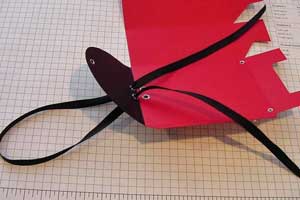
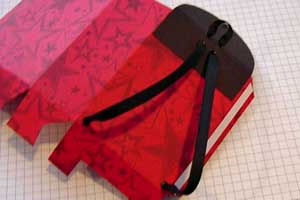
Step 19
Fold ribbon in half, then thread each end down through top two eyelets in large flap.
-
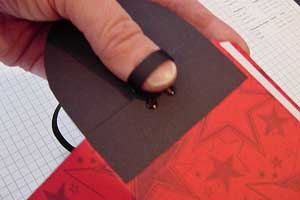
Pull ribbon equally on both sides until it touches your thumb to create the handle.
-
Step 20
Flip box base over.
Knot ribbon where it emerges from the first set of eyelets. This will prevent it from slipping after box is complete.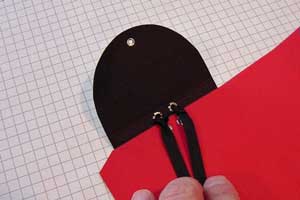
-
Step 21
Thread ribbon ends through adjacent eyelets.
-
Ribbon will emerge at the top back of base.

-
Step 21
Thread ribbon ends through adjacent eyelets.
-
Ribbon will emerge at the top back of base.
-
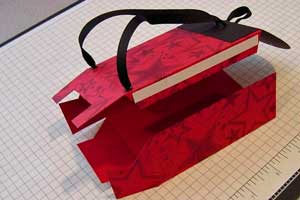
Step 22
Thread ribbon ends through eyelets at bottom of base, leaving enough slack to make it look like backpack straps.
-
Step 23
Flip base over and secure ribbon with a knot at each end where it touches the eyelets.
Trim away any extra ribbon.
-
Step 24
Flip base again and align the tab (with sticky strip) along the side edge of base.
-
Remove lining and press to adhere. Use bone folder to ensure a good bond.
-
Step 25
Flip base upside-down. To make bottom of box, fold side flaps flat first, followed by back flap, then front flap.
NOTE:
You may wish to add sticky strip to the back flap extensions, to make bottom more stable.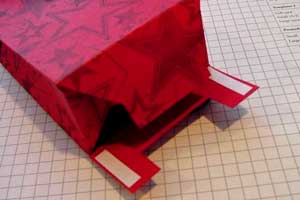
-
The front flap may be slightly curved in order to slip it into the slot created by the others.
-
Step 26
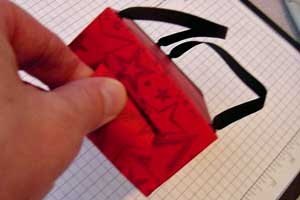
Using both hands, push gently on sides of base, to create the crease at the top of the box.
-
Crease sides enough that the top “pinches” together to fit the second flap score.
-
Step 27
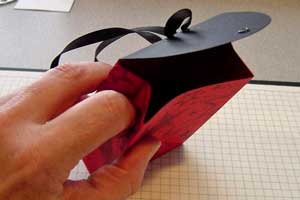
If using magnetic snaps, place one negative and one positive piece together, so the adhesive is facing out. Remove lining on one side of snap and position on inside of large flap, above the eyelet. Press to adhere securely.
-
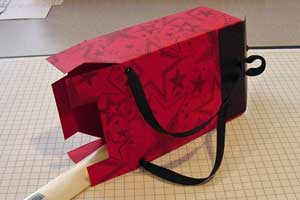
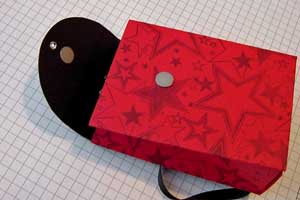
Step 28
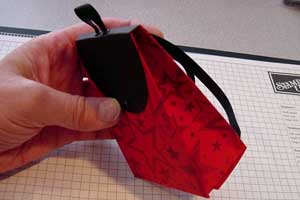
Remove lining on other side of snap and carefully close flap over base, so that it fits over top of box and flat on the box front. Press through all layers to adhere securely.
-
-
Step 29
Remove liner from sticky strip on back of pocket.

-
Adhere to front of backpack, positioning pocket for equal spacing between it and the sides and bottom of box. Press to adhere.
-
Step 30
Add magnetic snap to pocket flap using the same procedure as on the large flap.

-
Step 31
Cut to 6" pieces of grosgrain.
Thread one end through large flap eyelet, making ends even. Knot ribbon.
Repeat with small flap and the backpack box is done.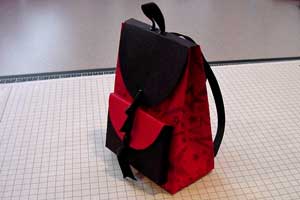
Your Turn
You've seen the tutorial, now you try it! We've got a section of the gallery set aside for Backpack Box. Try this technique, then upload your artwork to the gallery. Show us your creations!
***Please note - Internet Explorer/Edge is not a supported browser, and will not allow you to see the videos. Please use Chrome, Firefox or Safari to view our tutorial videos.

Questions and Comments
We'd love to get your feedback or questions. Leave your comment below.
It is very cute!
Answers to 2 questions:
Merle, I'm really not sure why the top flap is so much wider. It may have something to do with how it was saved/printed. Try re-saving the templates (the same way for both) and printing them again. Otherwise, this question may need to be addressed by SCS support???
Yolanda, the finished dimensions of my backpack box are:
4" high
3" wide
1 3/4" deep (at bottom), 1/4" deep (at top)
It's not quite small enough to fit an 18" doll, but I suppose you could reduce the pattern to make it fit!
Hope this helps!
Thanks for all your sweet comments, everyone!!!
The magnetic snaps should be available at your local scrapbooking store. If not, I order mine from eclecticPaperie.com.
The specific URL for the snaps is:
http://www.eclecticpaperie.com/i-need-that.html
Hope that helps!
Thankyou and best wishes Carolyn
Thank you in advance for your help
Leslie
I�ll do my backpack soon
lORRAINE
I'm sorry for the confusion about the posts on this thread! I believe you are seeing ALL the posts on this thread because you have "subscribed" to it... Anyone who subscribes will receive these posts in their e-mail.
So, they aren't necessarily addressed to you, but to this tutorial thread. You can probably ignore them if they don't specifically have your name in them. Does that help?
M.
Thank you for your sweet words! I'm so glad you like the project!
YES! You absolutely may use the template! That's why it was posted. Of course, I would certainly appreciate it if proper credit for the design is given (if people ask), and I would also hope my design is not submitted for contests. But, other than that, feel free to use it as you wish!
Thanks again!!!
Page 3 of 6 pages < 1 2 3 4 5 > Last »