Altered Game Pieces
by Cindy Lyles
Take dominoes to a whole new place using reinkers and stamps.
Supplies
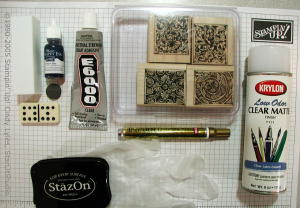
- Game piece
- Sanding block
- Dye ink refill
- StazOn™ ink
- Detailed stamps
- Gold leafing pen
- Spray sealant
- Plastic glove (optional)
- Magnet
- Industrial cement such as E-6000
Step-by-Step
-
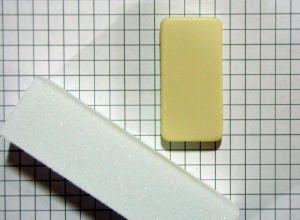
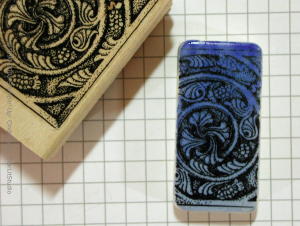
Step 1
Using the sanding block, sand the smooth side of the game piece to remove the shine.
-
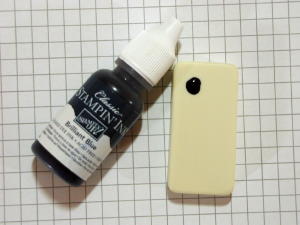
Step 2
Place a very, very small amount of reinker onto the sanded game piece.
-
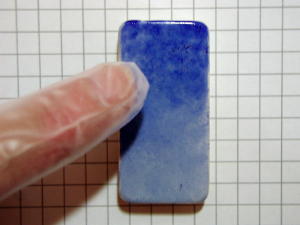
Step 3
You will now alter the base color of the game piece. Don the glove if desired. This will prevent your fingers from becoming stained, and the chance of any fingerprints on the piece.
Blend the reinker on the sanded game piece surface. I chose to have the color fade away versus an even application. If you have applied too much reinker dab your finger onto a baby wipe or paper towel. The reinker will dry almost immediately.
-
Step 4
Ink stamp with StazOn™ or other solvent ink. Stamp game piece. Allow to dry.
-
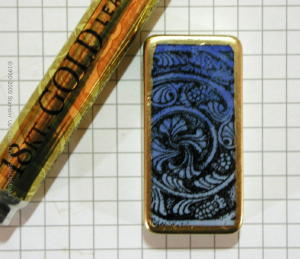
Step 5
Apply leafing pen to edges of game piece. The chisel tip really does a great job creating a nice edge.
-
Step 6
Seal the game piece with a spray sealant.
-
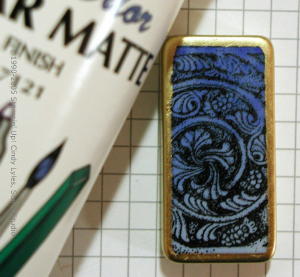
Step 7
Using E-6000 or other industrial cement, adhere magnet to back of game piece. Allow to dry.
Tip: If doing multiples of these at the same time, use caution not to place the pieces too close to each other. The magnets will naturally attract each other, and will dry askew and not centered on the back of the game piece.

-
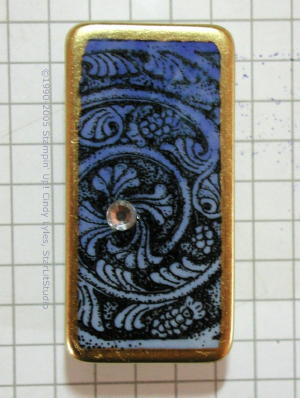
Step 8 (Optional)
Add a bauble if desired.
I found these at Michaels in the bead aisle and adhered with a small amount of Crystal Effects™.
-
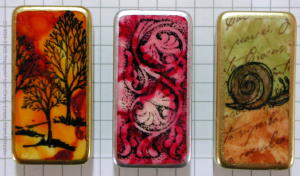
Other samples using the same technique. The snail image from Winged Things uses two classic reinkers. The other two use Pinata Inks and Claro Extender (used to achieve the mottled look). Source: http://www.usartquest.com.
Variations
Try Embossing
If you don't mind getting your VersaMark pad dirty, you can also press the game piece into a VersaMark pad, then dip into a vat of clear embossing powder, coating the stamped surface and leafing pen on the edges, and heat set. This latter method tends to leave a visible texture on the surface of the game piece.
Your Turn
You've seen the tutorial, now you try it! We've got a section of the gallery set aside for Altered Game Pieces. Try this technique, then upload your artwork to the gallery. Show us your creations!
***Please note - Internet Explorer/Edge is not a supported browser, and will not allow you to see the videos. Please use Chrome, Firefox or Safari to view our tutorial videos.

Questions and Comments
We'd love to get your feedback or questions. Leave your comment below.
Some people use alcohol inks to color their backgrounds with. I didn't have any on hand so I colored my background using a cotton ball wet with alochol. Then I took my SU! reinker and put a few drops of two different colors on them. I randomly sponge by domino and set the ink with my heat gun.
Hope this helps!
Hope this helps :o)
cheers from Australia susan
Page 2 of 2 pages < 1 2