Acrylic Smash
by Beate Johns
Use acrylic paint on acetate to create a unique background.
Supplies
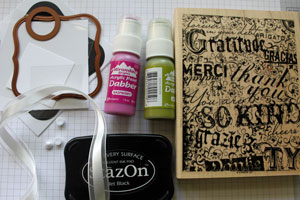
- Acetate
- White Cardstock
- Stamps, Stampin' Up!'s Gratuitous Graffiti used here
- StazOn™ Ink
- Acrylic Paint, Paint Dabber from Ranger used here
- Die Cuts, Spellbinders Nestabilities Label One used here (optional)
- Embellishments
- Card Base, Core'dinations Super Assortment Roy G. Biv used here.
Step-by-Step
-
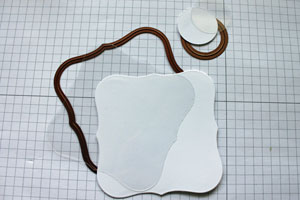
Step 1
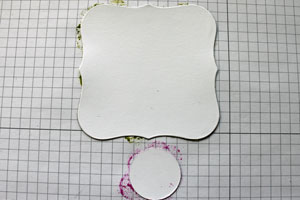
Use die templates to cut white cardstock and acetate to the shape and size needed.
Alternative:
Cut white cardstock and acetate with a paper cutter or circular cutting system.
-
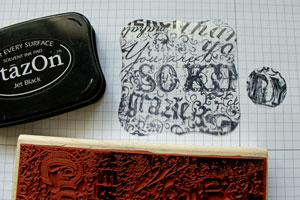
Step 2
Stamp image in StazOn on acetate piece.
-
Step 3
Apply acrylic paint to the "wrong" side of the stamped acetate.
Hint:
Try a light coat first. You can always repeat this and the next step to add more color.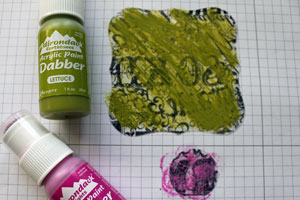
-
Step 4
Press your white cardstock piece over acetate.
-
Step 5
Flip the acetate/cardstock piece over. You can move the acetate piece around to spread the paint, or lift the acetate piece up and add more paint.
Make sure the pieces are lined up straight.
Hint:
When the ink is dry, the pieces will stick together. No need for adhesive.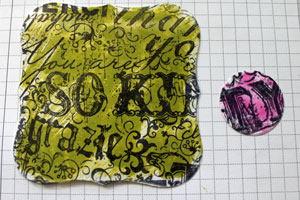
-
Step 6
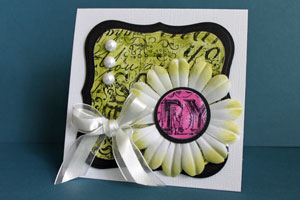
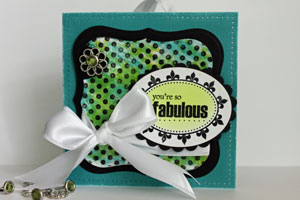
Finish your card.
Video!
Variations
-
Multicolored
Add more then one color to your Acetate.
-
Add more texture
Run your Acetate piece through your die cut machine with an embossing folder before creating the background.
You will need to cover the acetate completely with paint to make the now textured acetate stick to your cardstock.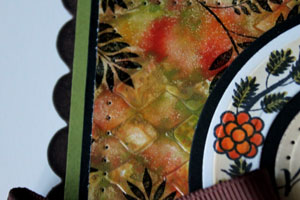
Your Turn
You've seen the tutorial, now you try it! We've got a section of the gallery set aside for Acrylic Smash. Try this technique, then upload your artwork to the gallery. Show us your creations!
***Please note - Internet Explorer/Edge is not a supported browser, and will not allow you to see the videos. Please use Chrome, Firefox or Safari to view our tutorial videos.
 *
*
Questions and Comments
We'd love to get your feedback or questions. Leave your comment below.
Thanks
Mon. Oct 5, 2009
I think what you are talking about is the next cardstock layer. It was cut with the same Nestabilities Label dies, just the next size up. I adhered the Acrylic smashed piece on top of the black layer before adhering it to the card base.
Hugs and smiles
Bonnie
Thank you so much for sharing your project. It holds so many different possibilities and is a great source of inspiration. I love what you do.
Page 2 of 3 pages < 1 2 3 >