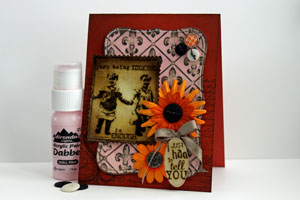
Acrylic Distress

by Beate Johns

Create a rustic background with an embossing folder and acrylic paints.

Supplies
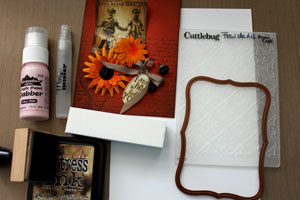
  • Embossing Folder (Cuttlebug™'s Fleur De Lis used here)

  • Cardstock

  • Light Acrylic paint (Adirondack® Shell Pink Acrylic Paint Dabber used here)

  • Sanding tool

  • Brown dye ink, (Walnut Stain Distress ink used here)

  • Blending tool

  • Water mister

  • Cotton cloth

  • Additional cardstock and embellishments to finish the project

Step-by-Step

  1. Step 1

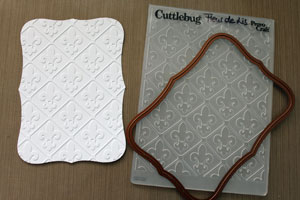
    Cut your cardstock to the size you need. Emboss the cut cardstock with an embossing folder and die cutting machine of your choosing.

    Alternative:
    A Label 8 Nestabilities™ die was used to cut the piece in the sample, but you can use any shape die.
  2. Step 2

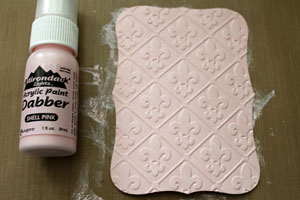
    Apply Acrylic Paint over the entire piece of cardstock. Let paint dry.
  3. Step 3

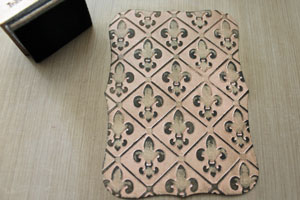
    Start sanding the raised images.
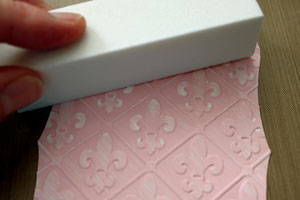
  4. Continue to sand until most of the paint on the raised part of the cardstock has been removed.
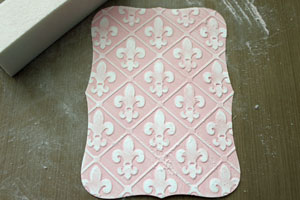
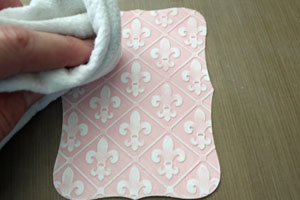
  5. Step 4

    Wipe away dust with cotton cloth.
  6. Step 5

    Apply brown dye ink to the cardstock.
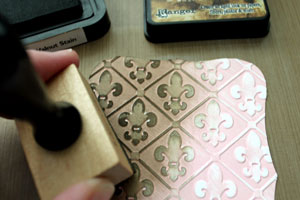
  7. Continue to blend ink into the cardstock until the entire piece is covered.
  8. Step 6

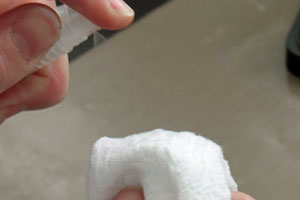
    Dampen the cotton cloth with a water mister.
  9. Step 7

    Clean the excess ink off the painted cardstock with a moist cloth.
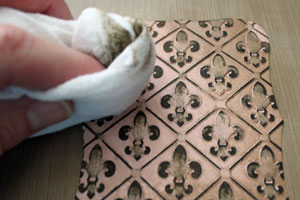
  10. The brown ink will only remain where the acrylic paint has been sanded off.
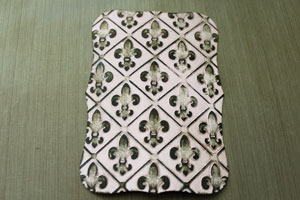
  11. Step 8

    Finish your project.

Video!

Your Turn

You've seen the tutorial, now you try it! We've got a section of the gallery set aside for Acrylic Distress. Try this technique, then upload your artwork to the gallery. Show us your creations!

***Please note - Internet Explorer/Edge is not a supported browser, and will not allow you to see the videos. Please use Chrome, Firefox or Safari to view our tutorial videos.

Questions and Comments

We'd love to get your feedback or questions. Leave your comment below.

I can not wait to give this a try! This is marvelous and your card is stunning Beate! Love this quick and simple tutorial with two of my faves...distress and embossing!!
Karen M  |  Thu Apr 8, 2010 at 1:34 AM
This is a beautiful card, and I love the technique used for the background. Will certainly give it a try. Thanks so much.
Karen
Karen Varney  |  Thu Apr 8, 2010 at 9:54 AM
This is a neat project thanks for teaching a new cardmaker a new technique im inspired to try it out
pbond08  |  Thu Apr 8, 2010 at 12:17 PM
Got to have a go at this. I have a load of acrylic paint that hasn't seen the lightof day for some time. Thank you Beatefor another great tutorial.
Nanny Barbara  |  Thu Apr 8, 2010 at 2:02 PM
Well I did it! This is such an easy but creative technique! I made several amples yesterday adn then used them to create a variety of different cards. Once again, thanks Beate!
Fiona Harvey  |  Thu Apr 8, 2010 at 7:21 PM
Hi Bette - I thoroughly enjoy your tutorials. On this one can you substitute another ink for the distress ink? Most of my inks are Stampn' Up and I don't have any distress ink pads.
Kay Wilkinson  |  Fri Apr 9, 2010 at 12:51 PM
What is dye ink? Is that different than the inks we buy from places like stampin'up?
Lois
Lois  |  Fri Apr 9, 2010 at 11:17 PM
Hi Lois,
You can use any dye ink (water based) ink pad for this technique. Stampin' Up!'s Classic ink pads will work great.

Hugs and smiles
Beate  |  Sat Apr 10, 2010 at 8:33 AM
Beate, you are the best. Always outdoing yourself. Love this. Must try. Love Vintage
Vickie  |  Sat Apr 10, 2010 at 8:54 AM
Thanks Beate, I tried it once from memory and did it wrong but love what I got. Now I am going to go do it according to your directions.
Lois
Lois  |  Sat Apr 10, 2010 at 9:52 AM
Every time I click on the link to the gallery, it tells me it is restricted. Is that a demo only link?
Leah  |  Sat Apr 10, 2010 at 1:39 PM
Hi Leah,
You have to be logged into the site as a member to view any technique spotlight gallery.
Beate  |  Sat Apr 10, 2010 at 4:00 PM
Oh, I tried this today and thoroughly enjoyed the outcomes. I am going to make the card and load it. Thanks for sharing this!~
heidi  |  Sat Apr 10, 2010 at 4:45 PM
I have just crafters acrylic fast drying paint. Will that still work? I just love the card you created.
beth  |  Sun Apr 11, 2010 at 8:10 AM
Great Job!! Love it! TFS
Solange Damasio  |  Tue Apr 13, 2010 at 7:01 PM
When I tried this the distress ink did not wipe off the painted portion of the card very well. It stayed and when I wiped more I just wiped off the acrylic paint. What type of cardstock did you use? Should I have used glossy paper?
Cathy  |  Mon Apr 26, 2010 at 8:44 AM
Hi Cathy,

Make sure you wet the rag you are using with a bit of water. Your dye ink should come off the acrylic paint. Acrylic paint, when dry, should NOT come off your cardstock. Maybe try a different brand of paint?
beate  |  Mon Apr 26, 2010 at 9:55 AM
Loved your tutorial!!! Will use this technique often.
However, I, also enjoyed your editorials!! Spot on. I love it when we can find humor in all things. Keep the smiles going!!!
Linda Stanley  |  Thu Aug 26, 2010 at 10:29 AM
Thanks so much! This is really beautiful. I just saw the paint dabber at the store yesterday and was thinking about how to use it. Love the distressing. Thanks again!
Julie Sistrunk  |  Fri Oct 1, 2010 at 1:40 PM
I can't get the paint to come off when sanding. Any tips?
munhaven  |  Sat Sep 3, 2011 at 6:50 PM

Page 2 of 3 pages  <  1 2 3 >

You need to be logged in to comment

GET OUR NEWSLETTER


Splitcoaststampers's privacy policy