Acrylic Post-It™ Note Holder
by Beth Silaika
Turn an acrylic photo frame on its end to make a cute desk accessory!
Supplies
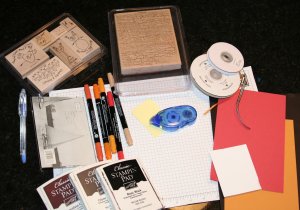
- 4" x 6" Horizontal Bent Acrylic Photo Frame
- RSVP™ Pen (can be purchased from most office supply companies)
- Ink or Markers
- Stamps
- 4" x 6" cardstock for the background
- Cardstock Scraps
- Adhesive
- Post-It™ Note Pad
Step-by-Step
-
Step 1
If needed, trim 4" x 6" cardstock to fit inside the frame. This will be your background.

-
Step 2
Stamp main image on a cardstock scrap.

-
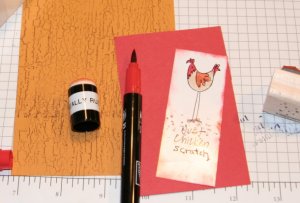
Step 3
Stamp background cardstock (here, Weathered Background on More Mustard). Color main image with markers.
Layer main stamped image on a coordinating scrap of cardstock, and attach to background.
Hint: Make sure to offset the main image so it is not covered by the Post-It Note Pad you will be placing on top of the acrylic frame.
-
Step 4
Add ribbon to background.
Slide assembled background into the photo frame.
Note: The photo frame is upside down. It will rest on a flat surface like a small desk.
-
Step 5
Remove paper backing from Post-It™ Note Pad. Use adhesive to secure note pad to the acrylic frame.
Check here for a tutorial on altering an RSVP pen to match.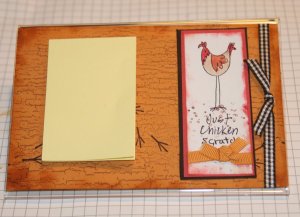
Your Turn
You've seen the tutorial, now you try it! We've got a section of the gallery set aside for Acrylic Post-It™ Note Holder. Try this technique, then upload your artwork to the gallery. Show us your creations!
***Please note - Internet Explorer/Edge is not a supported browser, and will not allow you to see the videos. Please use Chrome, Firefox or Safari to view our tutorial videos.

Questions and Comments
We'd love to get your feedback or questions. Leave your comment below.
Page 2 of 2 pages < 1 2