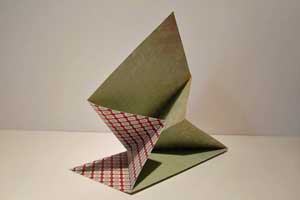
Spring Card

by Sandy Hulsart

Proudly display a beautiful scene or meaningful sentiment on this fancy-fold card.

Supplies
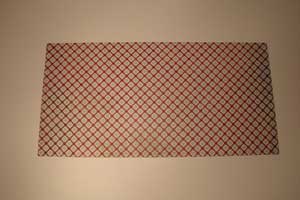
  • One piece of cardstock 5 ¼" x 10 ½"

  • Scoring tool

  • Pencil

  • Ruler

  • Scissors

Step-by-Step

  1. Step 1

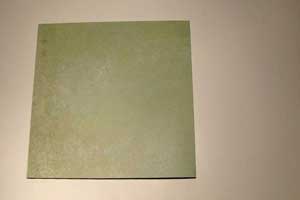
    Fold paper in half, patterned sides together to make a 5 ¼" square.
  2. Step 2

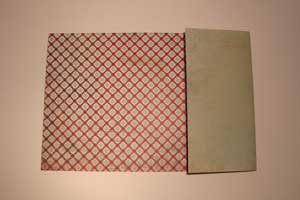
    Open the paper and with the patterned side up, fold the right side back to the center, creating a quarter fold on the right end.
  3. Step 3

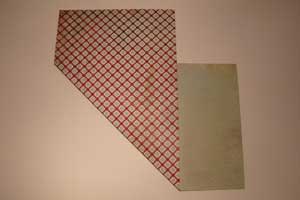
    Open the paper again, but with the patterned side down.

    Grab the lower left hand corner, pull it up and over until the lower edge is even with the score created in Step 2. Crease.
  4. Step 4

    Open the paper again, still patterned side down.

    Grab the top left hand corner, pull it down and over until the upper edge is even with the score created in Step 2. Crease.

  5. Step 5

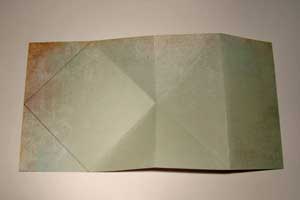
    Open the paper, patterned side down to see the score lines.

    Mark the center of the left hand edge and draw a line from that point to the score marks a quareter of the way to the right, top and bottom.

    These are the cutting lines.
  6. Step 6

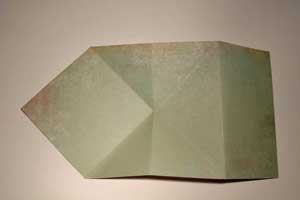
    Cut along the pencil lines to create a point at the top of the card.

    If everything was creased in the correct direction, it should fold up perfectly. This is what it looks like from the back. A little bit of adhesive was added under the front point on the bottom to get it to stay upright.
  7. And a side view.

  8. Step 7

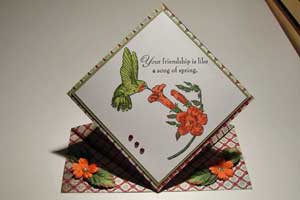
    Finished card folds flat and is 5 1/4 " square. When taken out of the envelope, it will "spring" up, thus the name. For mailing, use a 5 1/2 square envelope.
Video!

Your Turn

You've seen the tutorial, now you try it! We've got a section of the gallery set aside for Spring Card. Try this technique, then upload your artwork to the gallery. Show us your creations!

***Please note - Internet Explorer/Edge is not a supported browser, and will not allow you to see the videos. Please use Chrome, Firefox or Safari to view our tutorial videos.

Questions and Comments

We'd love to get your feedback or questions. Leave your comment below.

THis is Awesome! Thanks for sharing.
chicagogirl  |  Wed Jul 2, 2008 at 8:24 AM
love this card, I was looking for a unique card for my secret stamper for our reveal party in July.
Thank you
cym6,bBethAnna  |  Wed Jul 2, 2008 at 8:28 AM
Loved this tutorial. I've been trying to do some origami. The people who write those tutorials should take a lesson from you - use paper with different colors/prints on each side. Makes the photos so much clearer! Thanks for this and for making it so understandable!
MissCookie  |  Wed Jul 2, 2008 at 8:36 AM
This is such a fun card! I'll definitely have to try it...we have a great-aunt turning 100 this month, and she spent many years in Japan as a missionary, so this origami-inspired card would be great!! Thanks for the inspiration and the tutorial!

~Michelle
Michelle  |  Wed Jul 2, 2008 at 8:41 AM
AWESOME! Love this! Been wanting to try this! Great Card! TFS!
Yvonne  |  Wed Jul 2, 2008 at 8:43 AM
This card is so beautiful. I've been stamping for 8 years and am always looking for new, simple ideas. Thanks for the inspiration!
Deanna  |  Wed Jul 2, 2008 at 8:46 AM
This is so neat. I'm getting ready to leave on vacation but I'll have to try this when I return; it looks easy and makes a very nice appearance.
Pam Schwartz  |  Wed Jul 2, 2008 at 9:03 AM
Stunning card....
Diane
Diane Cooper  |  Wed Jul 2, 2008 at 9:05 AM
oh, do I love this!!! can't wait to give it a try.
Thanks!
Dawn  |  Wed Jul 2, 2008 at 9:16 AM
That is so clever!!! Thanks for sharing this fabulous card and idea. smile
Heike  |  Wed Jul 2, 2008 at 9:22 AM
Very cute idea! This would be a great idea for table place settings!!!
Emily  |  Wed Jul 2, 2008 at 9:55 AM
This is so neat! I will definitely give this a try.
Charlene H.  |  Wed Jul 2, 2008 at 10:06 AM
I really like this idea, I have actually done one sort of like this for my graduation invitations out of black to mimick the hat. It was inside if a gate fold card and when it opened, it popped out. I got the template that goes to a stencil I have. I will try this again.
Chai Dackermann  |  Wed Jul 2, 2008 at 10:18 AM
What size envelop will work with this card?
What are the finished dimensions?
Does it fold flat again?
Annie  |  Wed Jul 2, 2008 at 10:31 AM
and to think I knew you "when" Way to go Sandy! smile
Sandy  |  Wed Jul 2, 2008 at 11:32 AM
thanks a lot. just made this card and cut off the tip on top and could fit it in a note card env. and wrote on the backside a little note to my grandaughter at summer camp, i know she will love it. great job and thank you
GRANDMANITA  |  Wed Jul 2, 2008 at 11:40 AM
Great card and I really like the idea of using it for a placecard. My son is getting married next spring. I'm going to show it to him and his future wife also I'm going to try and use it as a way to display some pictures of my grandchildren. Thanks
fern  |  Wed Jul 2, 2008 at 12:10 PM
What a lovely card, I just love it, Off to try one right now. Thank you so much for a wonderful tutorial.
Sharon  |  Wed Jul 2, 2008 at 12:31 PM
So cool! Gonna have to try this one for sure! smile
BevMom  |  Wed Jul 2, 2008 at 12:52 PM
Yes, it does fold flat and is 5 1/4 " square. When you take it out of the envelope, it will "spring" up, thus the name. I would use a 5 1/2 square envelope. Thank you for all the kind comments
Sandy Hulsart  |  Wed Jul 2, 2008 at 1:04 PM

Page 1 of 5 pages  1 2 3 >  Last »

You need to be logged in to comment

GET OUR NEWSLETTER


Splitcoaststampers's privacy policy