3” x 3” Notecard Box

by Laurie Schmidlin

Create this beautiful box to hold your 3" x 3" notecards.

Supplies
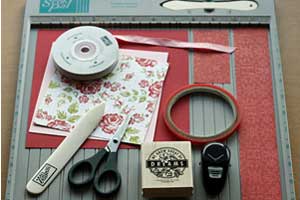
  • Scor-Pal™ (or paper cutter with scoring blade)

  • One 7 1/2" square piece of cardstock (for base of box)

  • One 5 5/8" square piece of cardstock (for box top)

  • One 5 1/8" square piece of patterned paper A

  • One 1 3/4" x 12" strip of patterned paper B

  • One 1 3/4" x 3 1/2" strip of patterned paper B

  • Corner Rounder punch

  • Bone Folder

  • Sticky Strip™

  • Scissors

  • Stamps, Ink, Ribbon (or other embellishments) to decorate box

Step-by-Step

  1. Step 1

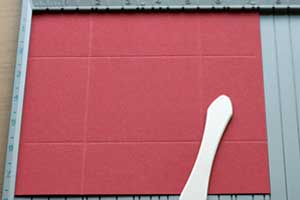
    Score 7 1/2" square cardstock at 2" on all four sides.
  2. Step 2

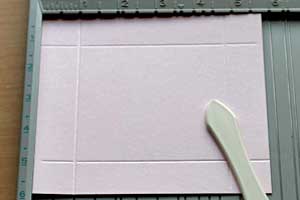
    Score 5 5/8" square cardstock at 1" on all four sides
  3. Step 3

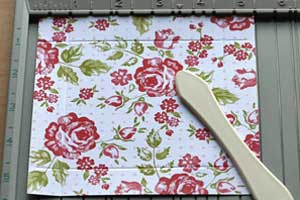
    Score 5 1/8" piece of patterned paper at 3/4" on all four sides
  4. Step 4

    Prefold all scores with Bone Folder.
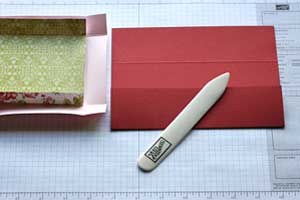
  5. Step 5

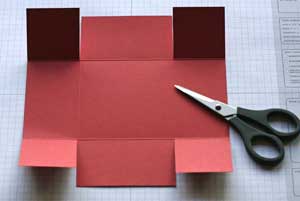
    Using scissors, make vertical cuts (following the scored line) on all four sides to create a flap in each corner of the 7 1/2" square cardstock piece.

    Repeat this step on the 5 5/8" square piece of cardstock and the 5 1/8" piece of patterned paper
  6. Step 6

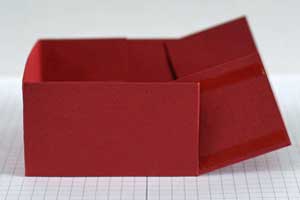
    Add Sticky Strip™ to each corner flap on the 7 1/2" square cardstock and fold into a box.
  7. Step 7

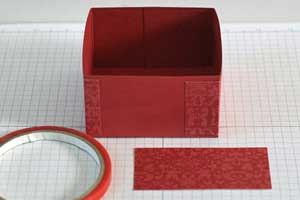
    Adhere 1 3/4" x 12" strip of patterned paper around box so that both ends start and end on same side.

    Adhere 1 3/4" x 3 1/2" strip of patterned paper to the side with the gap.
  8. Step 8

    Using scissors, cut each flap of the 5 5/8" cardstock in half at an angle.

    Create a scalloped edge around the 5 5/8" piece of cardstock using the Corner Rounder punch. Click here to find a tutorial on scalloping edges with the corner rounder punch.
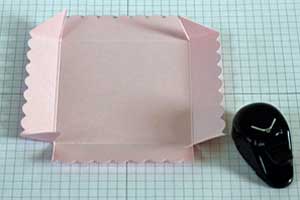
  9. Step 9

    Add Sticky Strip™ to each corner flap of the 5 1/2" cardstock and fold to create box lid.

    Adhere the 5 1/8" square piece of patterned paper to the box lid.
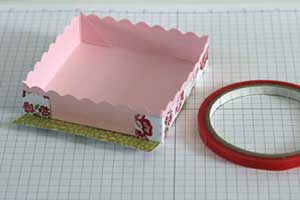
  10. Step 10

    Stamp and embellish your box as desired.
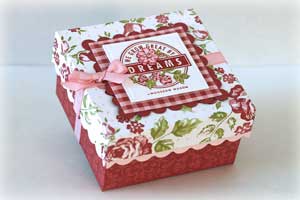
  11. Your finished box is perfect to hold a set of coordinating 3 x 3 Mini Note Cards and envelopes!
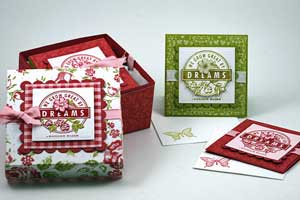
Video!

Your Turn

You've seen the tutorial, now you try it! We've got a section of the gallery set aside for 3” x 3” Notecard Box. Try this technique, then upload your artwork to the gallery. Show us your creations!

***Please note - Internet Explorer/Edge is not a supported browser, and will not allow you to see the videos. Please use Chrome, Firefox or Safari to view our tutorial videos.

Questions and Comments

We'd love to get your feedback or questions. Leave your comment below.

Thank you so much for sharing. I had seen other more complicated tutorials for boxes, but this is thorough and the pictures are great and inspiring!!I will definitely try at it.
Raquel Bessette  |  Thu Feb 26, 2009 at 11:26 AM
I just tried making this project. I love it. The box is very versatile. Now, I want to make the cards to go in the box. Thanks for sharing.
Shaline  |  Thu Feb 26, 2009 at 12:26 PM
Thanks love it! Tried making one of my own the other day, jsut couldn't ge the mesurements right. Now I have your measurements, will have to try it again!!
Thanks
CRAFTY-LIZ  |  Tue Mar 31, 2009 at 8:20 AM
Laurie - Great tutorial!
Patti J.  |  Wed May 6, 2009 at 5:54 PM
I think in step 5 it should say make cuts on two facing side to create a flap in each corner (not on all four sides)... right?
kathymcdaniels  |  Tue Jun 16, 2009 at 11:39 AM
Thank you for the tut on the beautiful box. I have cut and recut, measured and remeasured my paper, but when I get it all together the top is too big for the bottom. Did anyone else have this problem or is it supposed to fit that loose? It's probably just me, but I have four of the same boxes with loose tops sitting before me!!
Dian  |  Thu Jul 23, 2009 at 3:58 PM
You're right! I had the exact same problem---a loose top on my box. It is so pretty, but I was very disappointed in the loose top.
Valerie D. Anderson  |  Thu Jul 23, 2009 at 6:21 PM
I reduced the size of the box top to 5 1/2 inches and it fits perfectly. I carefully took my other lids and untaped them and cut them down and they look just fine. Good thing I was out of the red-tape and used regular two-sided tape.
I just love this site and have learned so much ! thank you, Dian
Dian  |  Mon Jul 27, 2009 at 4:59 PM
Made this box last night & just love it! The top was a bit loose, so will follow your suggestion Dian. Am going to make this box, along with matching cards, with the ladies at work for one of our Christmas crafts grin
Carol H.  |  Tue Sep 22, 2009 at 5:21 PM
I saw an ad on your site for a company called Paper Trey. I cannot find it on the internet. Can someone give me more info.?
Pam Banks  |  Wed Sep 23, 2009 at 11:46 AM
I love this box, but unfortunately I did not have time to read every comment to discover the measurement issues. I spent 3 hours trying to make this work, and wasted a lot of cardstock. It would have been appreciated if once it was known that there was an error, the OP or someone else could have corrected the instructions accordingly.
Susan  |  Sun Nov 15, 2009 at 2:37 PM
Beate, I have been watching your tutorials for about a year. So I thought I should tell you how much I've learned from you. As well as how much I appreciate your talent. Thanks for sharing.
Jessica
Jessica  |  Wed Dec 16, 2009 at 9:43 AM
I love the little box, you did a great tutorial. Could you tell me is it 5 5/8" for 5 1/2" the size for the box lid ? in your video you say 5/8 and on instructions 1/2.
Joanne  |  Wed Dec 16, 2009 at 10:22 AM
What a great idea! Would look cute with sticky notes in it too!
Nomianca  |  Sun Dec 20, 2009 at 6:45 PM
great box.....!!!!! tks
carole  |  Sun Jan 17, 2010 at 9:34 AM
Love it! If you filled it with pretty cards and envelopes, what a lovely gift that would be.
Shoshi  |  Wed Jun 30, 2010 at 4:16 AM
Wow!! This is amazing!! Thank you for sharing!!
TinyBubbles  |  Sun Sep 5, 2010 at 10:38 AM
This is so neat! I'm new to the forum, so can I download these instructions? Thanks, Anne
Anne Garrard  |  Fri Sep 24, 2010 at 10:05 PM
I'm working on this right now. Your example is cute.
cindy  |  Sat Sep 25, 2010 at 8:17 PM
Love the little box. Can't wait to make it!
Mary Lou  |  Tue Apr 19, 2011 at 10:35 AM

Page 4 of 5 pages « First  <  2 3 4 5 >

You need to be logged in to comment

GET OUR NEWSLETTER


Splitcoaststampers's privacy policy