3D Word Dies
by Dina Kowal
Add a pop of dimension to your word-shaped dies.
Supplies
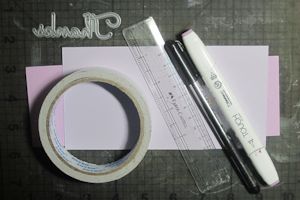
- Word shaped die (Impression Obsession dies used here)
- Cardstock
- Die cutting machine
- Ruler or drafting triangle
- Marker or other coloring medium
- Fine ink pen (test to make sure the ink is compatible with coloring medium)
- Double sided tape
- Embellishments as needed to complete the project
Step-by-Step
-
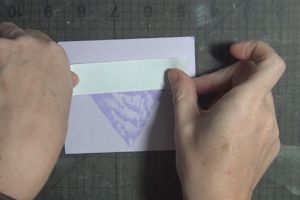
Step 1
Position the word shaped die and tape it in place for cutting. Cut according to machine instructions. Cut a second piece from contrasting cardstock.
Note:
Be sure to save all the cut pieces from inside loops, etc. They will be needed later.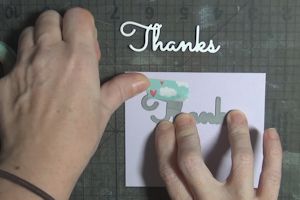
-
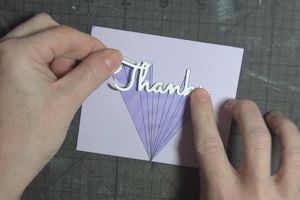
Step 2
Mark a focal point from which to center the spotlight effect. It can be anywhere on the panel, above or below the word, centered or offset.

-
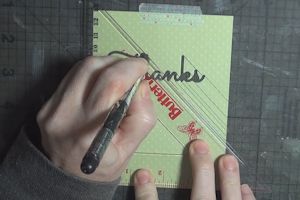
Use a ruler or drafting triangle to draw straight lines between the focal point and each point and curved edge along the bottom of the die cut opening.
For curves and points above the die cut opening: align the ruler with the focal point, but do not continue the line past the open area of the die cut.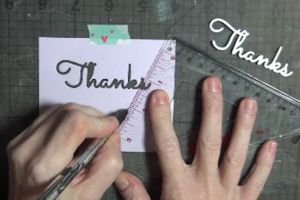
-
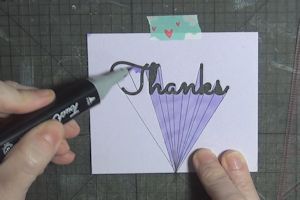
Step 3
Color in the lined wedges with a marker or other coloring medium.
-
Step 4
On the back of the panel, cover the opening with double-sided tape.
-
Adhere the second die cut into the opening.
-
Step 5
Color the cut pieces from inside the letter loops, and replace them into the openings.
Hint:
If the pieces are still in the die, they can be easily attached by laying the die onto the panel and pressing them into the adhesive.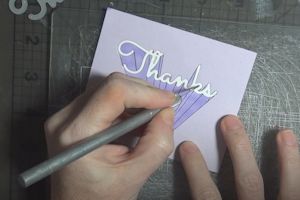
-
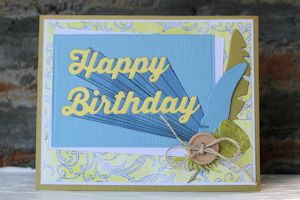
Use the finished panel to complete a project.

-
Step 6
To use two or more word dies, try these variations.
For lines from a single direction, follow the instructions above, connecting the focal point with each curve edge and point. For curves and points above the die cut opening align the ruler with the focal point, but do not continue the line past the open area of the die cut.
Hint:
Work from bottom to top.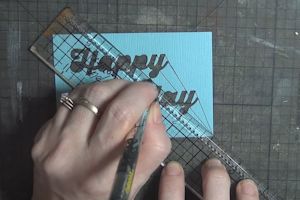
-
Use the finished panel to complete a project.
-
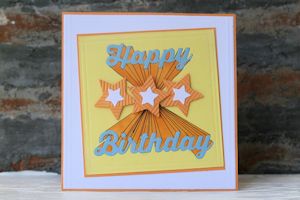
Step 7
For lines radiating from a center point, the concept is the same. The lines to the upper die will be done as above. When drawing the lines to a die cut below the focal point, reverse the directions. Draw straight lines between the focal point and each point and curved edge along the top of the die cut opening. For curves and points below the die cut opening, align the ruler with the focal point, but do not continue the line past the open area of the die cut.
If this is awkward or confusing, it may be helpful to turn the panel 180 degrees when the top is completed.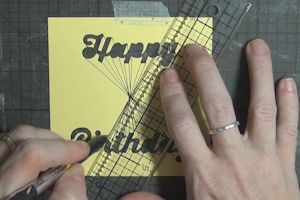
-
Use the finished panel to complete a project.
-
Step 8
For parallel lines, use a drafter’s triangle to keep a consistent angle. Be sure to align the triangle with the bottom edge of the panel for each line.
-
Use the finished panel to complete a project.

Video!
Your Turn
You've seen the tutorial, now you try it! We've got a section of the gallery set aside for 3D Word Dies. Try this technique, then upload your artwork to the gallery. Show us your creations!
***Please note - Internet Explorer/Edge is not a supported browser, and will not allow you to see the videos. Please use Chrome, Firefox or Safari to view our tutorial videos.

Questions and Comments
We'd love to get your feedback or questions. Leave your comment below.
http://www.splitcoaststampers.com/forums/#member-companies
Thanks for sharing your great ideas.
Page 2 of 2 pages < 1 2