It's time for issue #24 of the Weekly Inkling and we welcomed our 25,000th subscriber this week, so it's a good time to recognize all of you who join us each week and also those who produce this publication and the tutorials that accompany it. Thank you for giving us part of your day each week. And a big thanks to Beate Johns, Jenn Balcer, Adam Gomez & all our guest authors.
Now that we've been doing this for a while, we'd love to have you check in and give us your thoughts. Something new you'd like to see? Something we should do different? Leave your comments in
this discussion thread.
- The SCS Crew
|

|
|
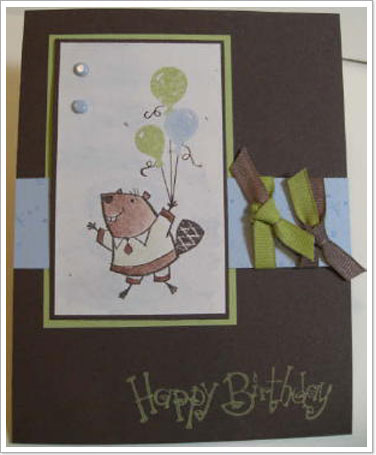
Dual Colored Pastel Ribbon
|
|
|
Sometimes, even with spools of colored and patterned ribbons, you can't find one that is just right for your project. We can help. Our tutorial this week features instructions by Amy Rysavy that will elevate simple white ribbon to a perfect embellishment for your project.
Supplies you'll need for this project
Pastels
Sponge dauber(s)
White grosgrain ribbon
|
|
 Our Artist in Residence answers your questions
 Q: Madonna Woelk asked: "Beate, my customers and I love the kissing technique and we use it quite frequently in our projects, so when SU! came out with the Letter Patterns stamp set, I was excited to try it out! Unfortunately, like many others, we are having difficulty with this set producing a clear kissed image. I've looked through the forums for help, but I still don't feel successful. With the kissing technique being a recent tutorial, do you have any added words of wisdom for us folks who are Letter Patterns challenged?"
A: With this question I went straight to the source and asked Demonstrator Training. I had the same problem that's why I didn't use these very detailed and fine background stamp images in the kissing tutorial. Jared offers these suggestions. Pick vibrant colors, don't press too hard. Only ink the background stamp, not the stamp you are using. Ink the background and kiss off once before inking your letter. Make sure you press down straight without shaking.
|
|
|
Feedback From Past Tutorials
lodichick has a tip for shaker cards: "Creating the window is always the tricky part of the shaker card. Using a square punch seemed like an easy way to go, but how do you line up the punch to get an even window? I used a 1 3/8" square punch on a piece of cardstock that was 2 5/8" square. We used a pencil to draw lines from corner to corner to it created an X. Using the punch upside down, you line up the pencil marks in the corners of the punch and that way you get a perfectly centered and even window."
|
|
|
Tutorials You May Have Missed
|
|
|
All you'll need is a piece of acetate, some markers, and a spray bottle filled with water.
|
|
 |
|
|
|
|
|
|
This Week's Hot Topics
Add some sass to clear buttons
Faux etched glass
You don't need holiday stamps to make holiday cards
Words over words
Video tutorial with Pam Morgan
|
|
|
|
|
September 20 to September 26
Use supplies you likely already own and try new techniques.
Waterfall cards
Try this color combo: Mellow Moss, Bravo Burgundy, So Saffron
A tried a true layout and a bonus "donut" challenge.
Reuse old cards, newspapers or other printed products in your projects.
Be inspired by a Chinese trivet.
|
|
|
|
|
Splitcoast Sponsors
|
|


